Download
1 / 10
110 likes | 265 Vues
WINTER CAMPING. Miranda and Ally. -shell jacket - shell pants - down jacket - fleece jacket - long underware (top and bottom) -wool socks - 2 pairs of gloves - waterproof mitts - warm hat. -Mitts vs Gloves: both are good options, they each have disadvantages and advantages.

E N D
WINTER CAMPING Miranda and Ally
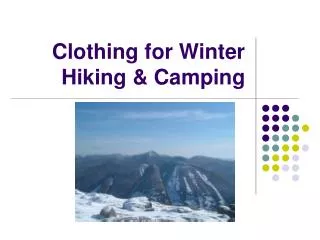
-shell jacket -shell pants -down jacket -fleece jacket -long underware (top and bottom) -wool socks -2 pairs of gloves -waterproof mitts -warm hat -Mitts vs Gloves: both are good options, they each have disadvantages and advantages. -Mitts share heat from finger to finger but limit your movement. -Gloves at least allow more movement but restrict heat flow. Clothing
1st layer (base). This layer is against your skin, and should fit snuggly yet not restrict movement. The material should be able to absorb water but not retain it. Good fabric are polyester and propylene. • 2nd layer (insulating). Same idea as the base. Must contain your body heat and allow moisture to escape. Synthetic materials and wool works very well. • 3rd layer (shell). Layers to help keep you dry. A shell jacket and pant. It can be a simple nylon wind breaker to a 3 ply waterproof breathable garment. Layers..
will depend on what activity.. • Snowshoeing/hiking – insulated boots. Can range up to -70 degrees. Plastic mountaineering boots, Mukluks. Boots
A vapor barrier is a clothing item which is impervious to water thereby serving as a barrier to the transportation of water vapor. When worn near the skin it keeps water vapor near the skin. Eventually the humidity level rises to the point where the body senses a high humidity level and shuts off insensible perspiration. This prevents evaporative heat loss and slows dehydration. • should be used directly against the skin because any evaporation of moisture directly at the skin surface leads to heat lose. • if you’re a person that sweats a lot.. Maybe not good idea Vapor barriers
Shelters Shelters
Ideal kitchen areas are three to four feet deep rectangular holes shoveled in the snow. The length should be five to eight feet and the width three to four feet. A shelf should be made in the snow approximately one foot below the top the hole where a stove can be set and all cooking is done. If you are tired, a kitchen may consist of a small hole deep enough to stand in and to keep the stove out of the wind. • start melting water right after the kitchen area has been constructed. • try to bring water bottles that can withstand freezing, keep them upside down. • Bury your water bottles upside down at night to keep them insulated from freezing and just mark it with a ski pole • at night if you want water bottles with you keep it in your sleeping bag • scrap the food out of dirty dishes with snow.. Cooking
Sleeping bags for winter camping should be rated to temperatures below what you will likely experience if you want to be comfortable. • bag itself should be a mummy style bag with a hood. • Iinsulation should be a least 1/2 " thick (two 3/8 " summer pads work well, or use a Thermosets on top of a 3/8 " foam pad). It best to use full length pads so that all of your body is insulated. • go to the bathroom before bed. If u wake up in the middle of the night and have to go.. Go. Than your body can work on keeping your body temperature up. Sleeping
stomp a path that leads to the “bathroom” and be 150 ft away from a trail • Choose your poop site: Your poop site should be 200 feet from trails, camp, and a water source - again, in a place that will not drain into water during the next storm. Select an inconspicuous site where other people will be unlikely to walk or camp. If camping in the area for more than one night, or if camping with a large group, poop sites should be widely dispersed. • dig a hole.. Than do your business in it, take a stick and mix the bio waste with the soil. • than fill the hole. • Pack out your toilet paper! Lou
Largevs. small More heat from one Source Less heat from one source Small fires mean you need to start and built more fires One to start and keep burnin Campfire