Download
1 / 37
460 likes | 3.12k Vues
Chest Tubes. Kindred Hospital Louisville Education Module. Learning Objectives. Identify indicators for placement of a chest tube. Identify nursing assessment findings of a patient with an alteration in status requiring a chest tube placement. Identify proper procedure for chest tube setup.

E N D
Chest Tubes Kindred Hospital Louisville Education Module
Learning Objectives • Identify indicators for placement of a chest tube. • Identify nursing assessment findings of a patient with an alteration in status requiring a chest tube placement. • Identify proper procedure for chest tube setup. • Identify proper procedure for maintaining chest tubes. • Identify key aspects of nursing assessment of patients with a chest tube in place. • Identify ways to troubleshoot the chest drainage system. • Identify safety concerns for patients with chest tube collection systems. • Identify required documentation regarding chest tubes.
Meet Mr. Williams • Mr. Williams is a 44 year old gentleman admitted with a diagnosis of respiratory failure. He has a history of tobacco abuse, NIDDM, Peripheral Neuropathy, and Atrial Fibrillation which is now controlled medically. He is admitted for ventilatory support, and attempts to wean. He was initially seen at an E.D. two months ago following a MVA where he was a pedestrian struck by a car. He sustained a right ulnar fracture, right radial fracture, right hip fracture, as well as a right sided hemothorax. • He has been stable for 2 weeks since admission, and is tolerating his vent settings of IMV 8-750-.40-+5.
What do you know? • What do you know about Mr. Williams that puts him at a higher risk for pneumothorax? • What components of your nursing assessment are critical for Mr. Williams? • What abnormal findings in your respiratory assessment of Mr. Williams would cause you to suspect a pneumothorax?
The Mechanics of Breathing • In normal situations, the pressure between the pleura of the lungs is below atmospheric pressure. • When air or fluid enters the intrapleural space, the pressure is altered, and this can cause collapse of a portion of the lung. • Even with adequate oxygenation and an open airway, a patient with a collapsed portion of the lung will not have adequate oxygen - carbon dioxide exchange. • The only treatment for this altered condition is to restore the negative pressure to the intrapleural space. This is accomplished through the use of a chest tube and collection chamber.
Mr. Williams • It’s time for Mr. Williams’ dressing change to his right leg surgical site. When you enter the room you notice that he is breathing more rapidly than he was earlier. Mr. Williams seems more anxious, but denies any pain. While performing the dressing change, the ventilator alarm begins to sound with the “High Pressure” alarm.
Mr. Williams • He appears to be getting restless, and when suctioned, the catheter passes easily and does obtains only a small amount of sputum. The ventilator continues to alarm “High Pressure”. • What should be your next series of nursing actions for Mr. Williams?
Diminished or absent breath sounds on affected side. Decreased chest wall movement on affected side. Difficulty breathing. Tachycardia Anxiety Restlessness Decreased oxygen saturation Increased Peak Airway Pressures Cyanosis Complaints of pleuritic-type chest pain Increased respiratory rate Pain may worsen when attempting to breathe deeply Nursing Assessment Findings
Mr. Williams • After performing a thorough cardiovascular assessment and documenting Mr. Williams vital signs, you have discovered that he has diminished breath sounds in the right upper lobe, and absent breath sounds in the the right lower lobe. His vital signs show an increased heart rate, increased blood pressure, and am increased respiratory rate. You suspect that Mr. Williams has a pneumothorax. You notify his physician right away.
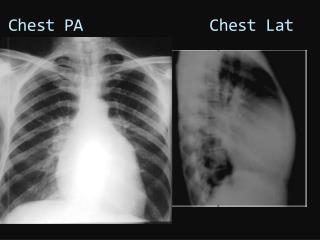
Mr. Williams • The M.D. orders a STAT portable chest X-ray, a STAT ABG, and to increase the patient’s FiO2. He is on his way in to see the patient right now, and wants you to have the supplies for a chest tube insertion ready when he arrives.
Chest tube insertion tray Tube (size per M.D.) Local Anesthetic (Xylocaine) Betadine (or other antiseptic) Suturing supplies Sterile gloves 2 1000cc bottles of sterile water 4 x 4’s Suction setup Suction tubing Chest tube collection system Vaseline Gauze Silk Tape Equipment needed for Chest Tube Setup
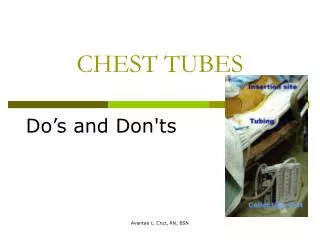
Mr. Williams • The Physician diagnoses Mr. Williams with a pneumothorax. He is going to insert a chest tube. Which of the sites that you see on the left do you think he will use? Why?
Components of the Chest Tube Drainage System • Suction control chamber • Water Seal Chamber • Collection chamber • The next slide will look at each chamber more closely.
Suction Control Chamber • The use of suction helps overcome an air leak by improving the rate of air and fluid flow out of the patient. The simplest and most cost effective means of controlling suction is by a calibrated water chamber. This is axxomplished with a suction control chamber. By addiing or removing water from the suction control chamber, the chest drain controls the amount of suction imposed on the patient. Lower the water content, lower the suction. Raise the water level, raise the amount of suction.
Water Seal Chamber • The water seal chamber which is connected to the collection chamber, allows air to pass down through a narrow channel and bubble out through the bottom of the water seal. Since air must not return to the patient, a water seal is considered one of the safest and most cost effective ways for protecting the patient. Also a patient air leak can be rapidly assessed when bubbles go from right to levt in this chamber. • Continuous bubbling confirms a persistent air leak.
Collection Chamber • Fluids drain diirectly from patient into the collection chamber via a 6’ patient tube. As drainage fluids collect, the nurse must record the amount of fluid that collects on each shift. This amount must be marked on the unit itself, and documented in ProTouch, along with the characteristics of the fluid being collected.
Gather supplies. Prepare patient. Open chest drainage system. As seen at right. Swing out floor stand to stabilize the unit. Close suction control stopcock. Preparing for Insertion
Adding Sterile Water to the Unit • First, position the funnel as shown on the right, and fill to the top of the funnel. Raise funnel to empty water into water seal to 2cm line marking. • NOTE: IF THE TUBING IS NOT ‘CRIMPED’ AS IT SHOWS IN THE PICTURE, YOU WILL OVERFILL THE CHAMBER. • Remove the the vent-plug, pour sterile water in to ordered level, and replace vent-plug. As seen at the bottom right.
Insertion • The patient will need to be positioned according to where the chest tube will be placed. Typically having the patient’s arms over their head assists the physician. • Pre-medicate the patient with sedation & pain medicine as per Physician’s order. This is a scary & painful procedure for the patient. • The Physician will prep and numb the area, then make a small incision with a scalpel, then using atrocar (a sharp, pointed rod that fits inside a tube) will insert the chest tube. The patient will feel pressure. Once the chest tube is inserted it may be either clamped or connected to the prepared drainage system, while the M.D. is suturing the chest tube in place. • Connect tube to drainage system if not done previously, and apply an occlusive vaseline gauze dressing topped with sterile 4x4’s to the insertion site. Securely tape all connections.
Reason for chest tube placement. Patient vital signs. Any medications given. Location & size of chest tube. Patient’s tolerance of procedure. Drainage received (if any): color, characteristics, volume, etc. Dressing type applied. Connections securely taped. Vital signs during/post procedure. Water level ordered & set for suction control chamber. Post-insertion chest x-ray taken. Post-Insertion Documentation
Maintenance of Chest Tubes • Cardiovascular assessments must be performed every 4 hours at least for all patients with chest tubes. • Encourage patient to cough & deep breathe. • Check insertion site every morning at 0800 and replace dressing at that time. • Assess water levels in drainage unit each shift and correct fluid levels if not as ordered. • Report to Physician immediately any change or complication with the chest tube.
Maintenance of Chest Tubes • Check all tubing connections and re-tape as needed EVERY FOUR HOURS. • I & O to be completed (and marked on collection chamber at 0600; 1400; and 2200. • Monitor for air leaks, chest x-ray results, oxygen saturations, and peak airway pressures. Report any alterations immediately to M.D.
Maintenance of Chest Tubes • Keep tubing coiled on bed, NEVER allow tubing to dangle. • Ensure that bedside collection unit NEVER goes above chest level.
Mr. Williams • Mr. Williams has had his chest tube placed in his right anterior lung. The post-insertion x-ray showed the tube in good position. The M.D. orders a chest x-ray to be done again in the morning. The patient’s peak pressures are down, and his oxygenation has improved, his restlessness and anxiety are also decreased.
Mr. Williams • It is essential for what chest-tube specific things to become a part of Mr. Williams routine care now that he has a chest tube in place? • How will you know if Mr. Williams develops an air leak? • Is an air leak a serious development?
Potential Complications with Chest Tubes • Subcutaneous emphysema - a collection of free air or gas in the tissue under the skin. Can be mild or severe. Needs to be measured, reported to M.D., and documented. • Air leak - noted by constant bubbling in the bottom of the water-seal chamber. Potential causes listed on next page.
Potential Sources of Air Leaks • Poor tubing connections. • Tube dislodgement from pleural space. • Cracked bedside collection unit. • To locate air leak, clamp the tubing momentarily at various points along tubing length. When bubbling stops, the clamp is between the air leak and the water seal. If you’ve clamped the whole length of tubing, it may be a cracked collection chamber.
Safety Concerns • Sealed, taped tubing connections • Chest tube maintained in pleural space • Infection at site • Tubing not disconnected or pulled • Constant water levels in unit & constant suction (if ordered) • Sterile 1000cc bottle of saline and tubing clamps at bedside continuously.
What to do if... • Chest tube becomes dislodged: cover open insertion site with vaseline gauze at peak of patient inspiration. Cover with 4x4’s, tape on three sides only, notify M.D. STAT, chart event. • Drainage system breaks: insert the uncontaminated end of tubing into a bottle of sterile water 2cm deep until new unit can be setup. Notify M.D. & document.
Make sure to review the Chest Tube Policies that are attached, and return your completed answer sheet to your nursing manager.