Download
1 / 10
100 likes | 290 Vues
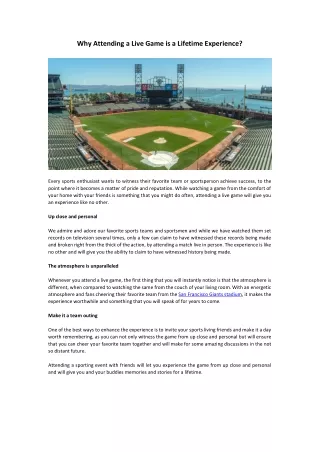
Attending a Meeting. Via The Web App. Even if a person doesn’t have Lync installed on their Computer, they can still attending a meeting via the Web App which opens within your internet browser. To invite someone to a meeting follow the steps outlined in the

E N D
AttendingaMeeting Via The Web App
Even if a person doesn’t have Lync installed on their Computer, they can still attending a meeting via the Web App which opens within your internet browser To invite someone to a meeting follow the steps outlined in the “Lync 2013 using meet now to make a meeting link” tutorial. Once you receive the link which will look similar to this: https://meet.ames.net.au/matthewsk/9TV4GD2B Click on the link to enter a meeting. Click on “Join meeting using Web App”
FIRST TIME ONLY – install web plugin Enter your name Tick “Install Lync Web App plug-in” Click on “Join the meeting” FIRST TIME ONLY – install web plugin Save and then run the web plugin, eg “LWAPlugin…installer.msi”
After the first time… Enter your name Then click on Join the Meeting Wait to be signed in When you enter the meeting you may see just a blank screen like this one. or if the presenter has a ppt or whiteboard up then you will see that
An explanation of the tools In the Web App In the bottom left hand corner there are five icons. The first displays chat messages – Point to it to see the chat or click on It to embed it on the left hand side of the whiteboard area
The Last displays the participants in the meeting – To see other participants point to the little people icon, or click on It to embed it on the left hand side of the whiteboard area
This is your mic options. You can click on this icon to mute and unmute your mic as you talk. The mic is muted when it has a red line through it This is your video options. To save bandwidth it is advised not to have your video on all the time. Most people keep there video off. This is where you see other presenters content and also manage your content should you be presenting. You can share your desktop, files, a ppt, a whiteboard etc in here.
On the bottom right hand side of the window you have 3 different ways you can view the layout of the meeting environment. The icon to the right of the Layout View Options is a full screen viewing option. The black areas appear when you run your mouse over then and disappear when your mouse is removed from the area On the top right hand side of the window you have the Options button– Clicking on this will give you settings for Audio video etc
On the top right hand side of the window you have the Exit Meeting options – Clicking on either of these will exit you from the meeting On the top right hand side of the window you have the Exit Meeting options – Clicking on either of these will exit you from the meeting On the top right hand side of the window you have the Exit Meeting options – Clicking on either of these will exit you from the meeting
Whiteboard Tools Laser Pointer Whiteboard area Text/Typing Options Pen / Line Options Insert Picture Whiteboard area Highlighter Options Delete Selected Layout Options Draw Shapes Options Other Options