Download
1 / 19
200 likes | 337 Vues
Tehachapi Mountain Search and Rescue Basic 4x4 Training. 19 May 2007 Instructor: Brian Garone, TS-48. TMSAR. Course Outline. 4WD Basics Safety Terrain Hills Water Crossing Extraction GPS Navigation Demos Hands-On Vehicle and Equipment Check Lists. 4WD Basics.

E N D
Tehachapi MountainSearch and RescueBasic 4x4 Training 19 May 2007 Instructor: Brian Garone, TS-48 TMSAR
Course Outline • 4WD Basics • Safety • Terrain • Hills • Water Crossing • Extraction • GPS Navigation • Demos • Hands-On • Vehicle and Equipment Check Lists
4WD Basics • 4WD vs All Wheel Drive (AWD) • AWD does not have a transfer case to allow a low range gear selection. • AWD is good for driving on low traction roads… not for off-road use. • “Part-time” or “Full-time” 4WD. • Part time is used for low traction conditions and off-road driving. Front and rear axles rotate at same speeds. Not for use on paved roads with good traction conditions. • Full time is used for same, but the transfer case can allow front axle to rotate at different speed than rear axle. Thus, safe for use on paved roads. • 4WD High Range • Used in similar fashion as all wheel drive… primarily for low traction road conditions. • 4WD Low Range • Used for low traction off-road travel where speed control is required. • Climbing or descending steep hills. • Traversing rocky terrain, deep sand, deep snow, or mud • Low Tire Pressure • Allows more tire to ground contact… known as “flotation”. • Allows tire to “conform” to the ground… providing more traction. • Locking Differentials • Provides “equal power” to both tires on a given axle. Disables “differential” action. • Allows greater traction than traditional “open” or “limited slip” differentials. Low Tire Pressure means less than 20 pounds !! Typically 12-15 lbs.
Safety A complete list of recommended equipment is located at end of brief. • Equipment/Supplies • Minimum: • Fuel • Water, Food, and Clothing/blankets • CB and/or Family Radio Service radio • Cell Phone • First Aid Kit • Fire Extinguisher • Shovel • Tow Strap • Tow hooks front and rear • Buddy System • Never go off-roading alone… Power and safety in numbers! • Tell someone at home where you are going… include enough detail to find you. • Buddies have: • Extra parts • Water, Food, and Clothing/blankets • Energy/strength • Moral support • Transportation • Don’t loose your buddies. • Keep them in your rear view mirror. • Wait for them to catch up. • Wait at turning points and intersections in the trail. • You never know who might be a buddy. • Treat people you meet on the trial with respect. • Help people in need… what goes around, comes around. • Pick up your trash (including shot guns shells and brass)… nobody likes litter!!
Terrain • Rocks • Rocks puncture tires… Make sure you have tires with tough sidewalls and a large lug tread design. • Be aware of the size of obstacles your vehicle can clear… Know the low points on your vehicle such as differentials, transmission, transfer case, etc. • Plan ahead and steer the “line” you wish to take. • Use a “spotter” to let you know what is going on underneath your vehicle and help you to avoid obstacles. • Only assign one person as a spotter. • Spotters should guide from the uphill side of a vehicle or stay well downhill. • If a rock is too big to straddle, carefully put a tire on the rock. This will raise the vehicle, adding clearance to the undercarriage. Travel very slowly to assure that the vehicle clears the rock. Use first gear in low range and use brakes to let the vehicle down gently off of the rock. Avoid compressing the suspension, which will decrease ground clearance. • Mud • Make sure you have open, large lug tread… such as Mud Tires or chains. • Use as high a gear as the vehicle will pull comfortably, generally in low range, and use just enough throttle to maintain forward movement. Avoid wheel spin if possible. • Engage traction aiding devices such as locking differentials for added traction and minimum wheel spin. If necessary, winch yourself through the mud to avoid digging ruts and destroying the trail. • Turn the steering wheel rapidly from side-to-side if you sense a loss of traction. This can help generate additional traction by allowing the side wall tread of the tires to grip the sides of the ruts. This also helps to transfer power from a spinning wheel to a wheel with more traction. • Smooth, easy power is better than too much power. If you feel the vehicle sinking rather than moving forward, stop and try reversing before the vehicle becomes dug in and possibly stuck.
Terrain (continued) • Snow • Snow is similar to Mud as far a traction goes… just cleaner. • Make sure you have open, large lug tread… such as Mud Tires or chains. • Smooth, easy power is better than too much power… idle through snow if you can. • If snow depth is less than nine inches, and there is solid ground beneath it, crossing the snow should not be a problem. • If snow is deeper than nine inches, be prepared to use a winch or tow strap to pull yourself out. • Use low range, and use just enough throttle to maintain forward movement. Avoid wheel spin if possible. • Engage traction aiding devices such as locking differentials for added traction and minimum wheel spin. • Turn the steering wheel rapidly from side-to-side if you sense a loss of traction. This can help generate additional traction by allowing the side wall tread of the tires to grip the snow. This also helps to transfer power from a spinning wheel to a wheel with more traction. • If you feel the vehicle sinking rather than moving forward, stop and try reversing before the vehicle becomes dug in and possibly stuck. • Sand • As with Mud and Snow, flotation is key to driving in sand… lower tire pressure. • Maintain momentum so that your vehicle rides on top of the sand. • Use just enough throttle to propel you through without digging or stalling… this may require plenty of engine power. • Avoid using the brakes… use the engine to slow you down, if possible. Heavy braking digs the tires into the sand.
Hills • Climb • Consider walking the trail to determine if the steep hill before you is passable. • Try to pick a “line” of travel that will keep all four wheels on the ground. • Select 4WD low range and the appropriate gear… steep hills require 1st gear. • Travel straight up or down a hill or grade. • Do not attempt to go side hill or turn around on the hill. This may cause a rollover. • If you loose momentum, and the vehicle is not in danger of sliding, try stopping and backing up a few feet. • Reversing a few feet and starting forward again may enable you to get better traction and momentum. • If you can’t make it to the top of the hill, back straight down. • Decent • Consider walking the trail to determine if the steep hill before you is passable. • Try to pick a “line” of travel that will keep all four wheels on the ground. • Select 4WD low range and the appropriate gear… steep hills require 1st gear. • Use only enough braking as required to control your speed. • If you loose traction while braking, feather (lightly pump) the brake pedal. • Locking up the wheels makes it difficult to control steering and direction of travel. • If the vehicle starts to slide sideways, try not to lock up the brakes… rather, try to keep the vehicle pointed downhill. • Side Hill • Don’t do it… find another path that travels straight up and/or down the hill.
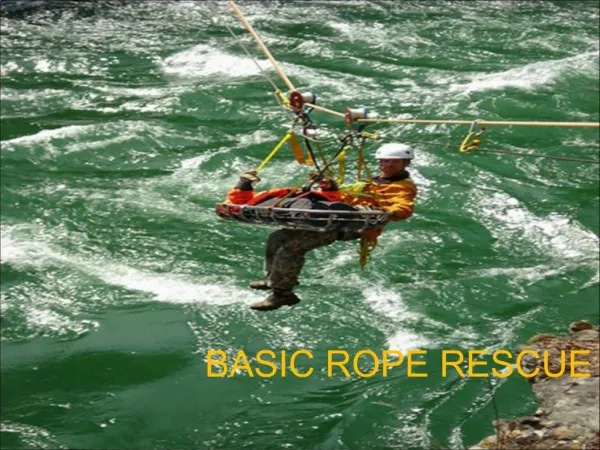
Water Crossing • Water is bad! • Water and oil don’t mix. • Water causes rust and mildew. • Water does not compress… it does not burn either. • Water is not a lubricant. • Shallow water (less than 2 ft) • Make sure your engine air intake is above water line. • Select 4WD low range and the appropriate gear… 1st gear recommended. • Use slow constant forward movement. • Avoid high speed “romping” or “splashing”. • Can cause ignition systems to fail and the vehicle to stall. • Can make visibility out the windshield difficult. • Can loose steering control. • Deep Water (more than 2 feet) • Make sure your engine air intake is above water line!! No really… water does not compress! • Make sure your ignition system is sealed or above the water line… water does not burn! • Consider disconnecting you fan belt to keep your fan from bending into radiator or splashing. • Select 4WD low range and the appropriate gear… 1st gear recommended. • Use slow constant forward movement. • Avoid high speed “romping” or “splashing”. • If you stall the engine, and the air intake or exhaust is under water, do not try to restart the engine! • Get someone to pull you out of the water. • Once on dry land, and prior to starting the engine, make sure there is no water in the engine oil or cylinders.
Extraction • Tow Strap (Tug ‘m Strap) • Tug ‘em Straps are your friend… they’re safe and reliable. • They are made of nylon and they stretch… causing a “sling shot” effect. • Usually 20 to 30 feet long, 2-3 inches wide, with loops sewn on the ends. • Don’t get ones with hooks on the ends… these hurt when they come apart and hit you! • Usually rated to at least 20,000 pounds tensile strength. • Connect to vehicle using tow hooks on frame or heavy duty shackles made for recovery. • Winch Size • As a general rule, choose a winch that is rated for 11/2 times the vehicles loaded weight. • For small vehicles, a 6,000 lb-rated winch is generally adequate. • For larger vehicles, an 8,000 or 9,000 lb-rated winch is recommended. • For heavy-duty four-wheeling with heavily loaded vehicles or full-size pickups, a 10,000 - 12,000 lb-rated winch is recommended. • Obtain or assemble a winch accessory kit with heavy-duty leather gloves, wide tree protector strap, clevis, and pulley. These are available from most winch manufacturers.
Extraction (continued) • Winch Recovery • Self recovery or Removing Obstacles: • Attach the tree protector strap to a large tree or solid anchor point. If using a rock as an anchor, use a chain to wrap around the rock as the nylon tree strap may chaff and cut. • Attach the strap or chain as low as possible. • Use a pulley block if necessary to multiply the pulling power. Each pulley doubles pulling force. • After properly attaching the cable, engage the winch. • Put the vehicle in low range/1st gear and slowly apply power. • Follow the directions of your spotter. • Never overdrive the winch. Let the winch pull you out. • Recovering a Stuck Vehicle: • Attach the winch hook to a suitable tow hook (NEVER to the stock bumper). • Never attach the winch hook back on to the cable because it may damage the cable. • Drive just enough to get the stuck vehicles wheels to spin slightly. This will assist the winch in the recovery. Always drape a blanket, jacket or floor mat over the middle of the winch cable to keep it from flying back at you if it comes loose or breaks!!!
GPS Navigation • Mark Points • A “mark point” is made when you save a GPS position. • Could be your current position • Could be a destination position… or somewhere you desire to travel to. • Mark points are recalled and used as waypoints… why else would you want to store them? • Way Points • A “waypoint” is a position you desire to travel to. • You can travel from waypoint to waypoint to follow a desired “route”. • You can use waypoints to establish search areas or boundries. If you can’t enter Mark Points and recall Waypoints, a GPS is pretty much useless... Get a compass! GPS can only provide you information about your direction of travel if you are moving.
Vehicle Checklist • Cooling System • Check for leaks, cracked or bulging upper and lower radiator hoses and heater hoses. • Check radiator for leaks. • Check radiator antifreeze level and condition. Replace or top-off to proper level. • Check the thermostat and radiator cap for proper operation. • Suspension • Check suspension, steering bushings. Replace cracked, worn or damaged bushings. • Check steering linkage and box for looseness. Tighten or replace weak components. • Lubricate steering linkage and suspension components. • Check for soft or leaking shocks. • Springs should be properly seated. Check for weak, sagging, or cracked springs. • Check spring shackles for wear, proper location, and tightness. • Check alignment. Realign all four wheels if necessary. • Check wheel bearing. Replace bearing if worn. Repack with grease and tighten properly.
Vehicle Checklist (continued) • Engine • Clean engine and check for oil leaks. Repair or replace gaskets or seals. • Change oil and filter if needed. • Change dirty air filter. • Clean carburetor or fuel injectors. Check idle, adjust. On carburetor engines, check float for proper operation, height, and adjust to correct setting. • Check throttle return springs. Replace weak springs. • Check fuel pump for proper fuel pressure. • Check fuel pump, lines, tank, and carburetor/injection system for leaks. • Check spark plugs. Replace or reset to correct gap. • Check plug wires, coil, distributor cap, rotor, points, and ignition timing. Replace worn or damaged parts. Adjust timing. • Check PCV valve. • Check for vacuum leaks. Repair or replace faulty hoses. • Check accessory belts, alternator, water pump, power steering pump, and air conditioner. Tighten or replace if worn or frayed. • Brakes • Check drums and/or rotors; have turned or replaced if outside of tolerances. • Check pads and/or shoes. • Check brake fluid levels; bring to proper levels. • Check for cracked or checked brake line hoses, line conditions, and fluid leaks. Replace worn, leaking or excessively rusty components. • Bleed brakes.
Vehicle Checklist (continued) • Driveline • Check for leaks in transmission, transfer case, and differentials. • Check fluid levels in transmission, transfer case, and differentials. • Check universal joints and CV joints. Lubricate if necessary. • Check all skid plates. Tighten loose bolts. If critical areas aren’t protected, install plates. • Check wheel bearing. Tighten properly. Repack if necessary. • Exhaust System • Examine condition of muffler and tailpipes. Replace if excessively rusty, leaking, or noisy. • Check hangers; the muffler and exhaust pipes should be well above the lower level of the frame. If broken or appears weak, replace. Tighten loose hangers. • Check protective shield beneath catalytic converter. Replace if loose, broken, or missing. The catalytic converter gets very hot, and without protection can set dry grass on fire. Also ensure that no grass or other vegetation has collected on the plate. Consider skid plate protection for both converter and muffler. • Wheels/Tires • Check wheels for damage, especially along the rim. Straighten if possible or replace. • Check tire pressure. Repair leaks. Inflate tires to proper level. Check balance of wheel/tire. • Replace excessively worn tires. • Use valve caps. • Check condition of spare wheels and tires. It’s a good idea to have more than one, just in case.
Vehicle Checklist (continued) • Electrical System • Check battery condition. Clean terminals, seal with dielectric grease. Have voltage and amperage capacity of battery checked. If low, replace the battery. • Check output of alternator. • Examine wiring. Check for worn or melted insulation, shorts, and blown fuses. Check condition of plugs and terminals. Make sure ground straps and terminals are clean, and the proper ground is being maintained. Repair or replace. Spray entire electrical system with a waterproofing material. • Check headlights and auxiliary lights. Aim the lights properly, and be certain each is functioning properly. • Check taillights and turn signals. Replace failed bulbs. • Other • Check wiper blades. Fill windshield washer reservoir. • Check power steering pump and lines for leaks. Check fluid level. • Remove anything on the winch or its support accessories which may cut or gouge into trees, the ground, or limit ground clearance.
Equipment Checklist • The Basics • seat belts • tow hooks mounted to frame • detailed map of the area • first aid kit • high-powered flashlight with spare batteries and bulbs • shovel (folding type are easier to store) • tow straps—2" x 30’ with loops, not hooks • tire chains • ax • bow saw • extra food • water, water filter, and purification tablets • warm clothing • jumper cables • portable air compressor, air tank • extra fan belts • siphon hose • fuses • fire extinguisher • candle, matches, and lighter • signal mirror
Equipment Checklist(continued) • Tool Kit • Allen wrench set • screwdrivers (straight and Phillips) • spark plug socket • wiring crimpers • thread locker • silicone gasket material • radiator stop-leak • plastic steel/plastic aluminum • Hammers (small sledge, claw, ball-peen) • Socket Set with Extensions (1/4", 3/8", and/or 1/2“) • Wrenches • Pliers • Vehicle Tools • star-type lug wrench • hi-lift jack • hydraulic jack • tools specific to your brand of vehicle • Other • plastic tarp for ground cloth • bailing wire • duct tape • electrical wire • heavy-duty folding knife • compass • tire repair kit • air filter • oil filter • oil • brake fluid • distributor cap • cellular phone or C.B. radio for emergencies