Download

1 / 87
3.83k likes | 27.25k Vues
Blood smear preparation and staining. Prepared by: Ibtisam H. Al Aswad Amany S. Al Hindi. Aim of blood smear. Value of blood films:

E N D
Blood smear preparation and staining Prepared by: Ibtisam H. Al Aswad Amany S. Al Hindi
Aim of blood smear Value of blood films: Examination of thin blood films is important in the investigation and management of anaemia, infections, and other conditions which produce changes in the appearance of blood cells and differential white cell count. A blood film report can provide rapidly and at low cost, useful information about a patient’s condition.
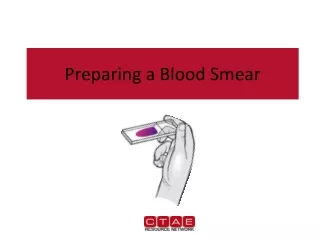
Making blood films Three basic steps to make blood film: Preparation of blood smear. Fixation of blood smear. Staining of blood smear.
І. PREPARATION OF BLOOD SMEAR • Specimen: EDTA anticoagulated blood is preferred. Blood smears can also be made from finger stick blood directly onto slide. • Reagents, equipment. and supplies: • Spreaders • Clean slides
Making blood smear • Three methods may be used to make blood smears: 1. The cover glass smear. 2. The wedge smear . 3. The spun smear. • The spun smear requires an automatic slide spinner. For the purpose of this lab exercise, we will use the wedge smear.
WEDGE BLOOD SMEAR • Procedure: 1. Fill a capillary tube three-quarter full with the anticoagulated specimen or a wooden stick. 2. Place a drop of blood, about 2 mm in diameter approximately an inch from the frosted area of the slide. 3. Place the slide on a flat surface, and hold the narrow side of the non frosted edge between your left thumb and forefinger. 4. With your right hand, place the smooth clean edge of a second (spreader) slide on the specimen slide, just in front of the blood drop. 5. Hold the spreader slide at a 30° angle, and draw it back against the drop of blood.
6. Allow the blood to spread almost to the edges of the slide. 7. Push the spread forward with one light, smooth, and fluid motion. A thin film of blood in the shape of a bullet with a feathered edge will remain on the slide. 8. Label the frosted edge with patient name, ID# and date. 9. Allow the blood film to air-dry completely before staining. (Do not blow to dry. The moisture from your breath will cause RBC artifact.)
Procedure notes І. CHARACTERISTICS OF A GOOD SMEAR: • A good blood film preparation will be thick at the drop end and thin at the opposite end. Note: As soon as the drop of blood is placed on the glass slide, the smear should be made without delay. Any delay results in anabnormal distribution of the white blood cells, with many of the large white cells accumulating at the thin edge of the smear.
CHARACTERISTICS OF A GOOD SMEAR: 2. The blood smear should occupy the central portion of the slide. 3. The blood smear should not touch the edges. except for point of application. 4. Should be margin free.
П. The thickness of the spread The thickness of the spread when pulling the smear is determined by: 1. The angle of the spreader slide. (the greater the angle, thethicker and shorter the smear). 2. Size of the blood drop. 3. Speed of spreading.
The thickness of the spread Notes: • If the hematocrit is increased, the angle of the spreader slide should be decreased. 2. If the hematocrit is decreased, the angle of the spreader slide should be increased.
high HCT small angle low HCT large angle
Common causes of a poor blood smear a. Drop of blood too large or too small. b. Spreader slide pushed across the slide in a jerky manner. c. Failure to keep the entire edge of the spreader slide against the slide while making the smear. d. Failure to keep the spreader slide at a 30° angle with the slide.
Common causes of a poor blood smear e. Failure to push the spreader slide completely across the slide. f. Irregular spread with ridges and long tail: Edge of spreader dirty or chipped; dusty slide.
Common causes of a poor blood smear g. Holes in film: Slide contaminated with fat or grease and air bubbles. h. Cellular degenerative changes: Delay in fixing, inadequate fixing time or methanol contaminated with water.
A: Blood film with jagged tail made from a spreader with achipped end. B: Film which is too thick C: Film which is too long, too wide, uneven thickness and made on a greasy slide. D: A well-made blood film.
Notes: 1. Although this is the easiest and most popular methods for producing a blood smear, it does not produce a quality smear. The WBCs are unevenly distributed and RBC distortion is seen at the edges Smaller WBCs such as lymphocytes tend to reside in the middle of the feathered edge. 2. Large cells such as monocytes, immature cells and abnormal cells can be found in the outer limits of this area. 3. Spun smears produce the most uniform distribution of blood cells.
Biologic causes of a poor smear a. Cold agglutinin- RBCs will clump together. Warm the blood at 37° C for 5 minutes, and then remake the smear. b. Lipemia - holes will appear in the smear. There is nothing you can do to correct this. c. Rouleaux- RBC’s will form into stacks resembling coins. There is nothing you can do to correct this.
II. Fixing the films • To preserve the morphology of the cells, films must be fixed as soon as possible after they have dried. • It is important to prevent contact with water before fixation is complete. • Methyl alcohol (methanol) is the choice, although ethyl alcohol ("absolute alcohol") can be used. • Methylated spirit (95% ethanol) must not be used as it contains water.
II. Fixing the films • To fix the films, place them in a covered staining jar or tray containing the alcohol for 2-3 minutes. In humid climates it might be necessary to replace the methanol 2-3 times per day; the old portions can be used for storing clean slides.
III. Staining the film • Romanowsky staining: Romanowsky stains are universally employed for staining blood films and are generally very satisfactory. • There are a number of different combinations of these dyes, which vary, in their staining characteristics. • May-Grunwald-Giemsa is a good method for routine work. 2. Giemsa stain is thought to produce more delicate staining characteristics.
Romanowsky staining: 3. Wright's stain is a simpler method. 4. Leishman's is also a simple method, which is especially suitable when a stained blood film is required urgently or the routine stain is not available (e.g. at night). 5. Field's stain is a rapid stain used primarily on thin films for malarial parasites.
Principle • The main components of a Romanowsky stain are: • A cationic or basic dye (methylene blue or its oxidation products such as azure B), which binds to anionic sites and gives a blue-grey color to nucleic acids (DNA or RNA), nucleoproteins, granules of basophils and weakly to granules of neutrophils • An anionic or acidic dye such as eosin Y or eosin B, which binds to cationic sites on proteins and gives an orange-red color to hemoglobin and eosinophil granules.
Eosinophilic granules Blue nucleus Basophilic granules
Principle • Leishman's stain : a polychromatic stain • Methanol : fixes cells to slide. • methylene blue stains RNA,DNA: blue-grey color • Eosin stains hemoglobin, eosin granules: orange-red color • pH value of phosphate buffer is very important.
STAINING PROCEDURE • Thin smear are air dried. • Flood the smear with stain. • Stain for 1-5 min. Experience will indicate the optimum time. • Add an equal amount of buffer solution and mix the stain by blowing an eddy in the fluid. • Leave the mixture on the slide for 10-15 min. • Wash off by running water directly to the centre of the slide to prevent a residue of precipitated stain. • Stand slide on end, and let dry in air.
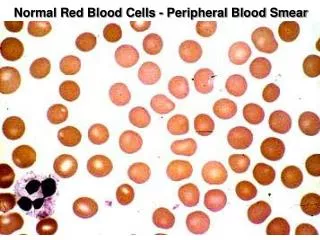
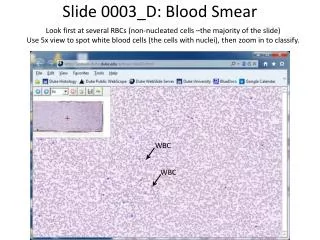
Examination blood smear When completely dry, examine the smear with the microscope as follows: Low power (10x) scan. Determine the overall staining quality of the blood smear. • Stain should not be too dark or too pale. b. There should be no stain precipitate present on smear. c. RBCs should be appropriate color of reddish pink.
Examination blood smear d. Lymphocytes have dark purple nuclei with varying shades of blue cytoplasm. e. Neutrophils have dark purple nuclei with reddish, granular cytoplasm. f. Monocytes have a lighter purple nucleus with a gray-blue cytoplasm. g. Eosinophils have bright red/orange granules. h. Basophils have dark purple nuclei and granules.
Examination blood smear • Determine if there is a good distribution of the cells on the smear. • Scan the edges and center of the slide to be sure there are no clumps of RBCs, WBCs or platelets. • Scan the edges for abnormal cells. • High power (40 x) scan
Find an optimal area for the detailed examination and enumerations of cells. • The RBCs should not quite touch each other. b. There should be no area containing large amounts of broken cells or Precipitated stain. c. The RBCs should have a graduated central pallor. d. Nuclei and cytoplasm of WBCs should be the proper color. e. Platelets should be clearly visible.
Notes on the staining procedure: • Whichever method is used, it is important to select dyes that are not contaminated with other dyes or metallic salts. • Staining time must be specific for each lot of stains and so we must follow the kit procedure. • Bone marrow time staining must be increased.
Staining characteristics of a correctly stained normal film: • Nuclei Purple • Cytoplasm • Erythrocytes Deep pink • Neutrophils Orange-pink • Lymphocytes Blue; some small lymphocytes deep blue • Monocytes Grey-blue • Basophils Blue • Granules • Neutrophils Fine purple • Eosinophils Red-orange • Basophils Purple-black • Monocytes Fine reddish (azurophil) Platelets Purple
Staining faults • Too faint: Staining time too short. Excessive washing after staining. • Stain deposit: Stain solution left inuncovered jar. Stain solution not filtered. Dirty slides.
PH of the phosphate buffer • The phosphate buffer controls the PH of the stain. If the PH is too acid, those cells or cell parts taking up an acid dye stain will stain pinker and the acid components that stain with the basic dye show very pale staining. • If the stain –buffer mixture is alkaline, the red blood cells will appear grayish blue and the white cell nuclei will stain very deeply purple. • Therefore, to stain all cells and cell parts well, the PH of the phosphate buffer is critical.
TOO ACIDIC SUITABLE TOO BASIC
Continue…… • The staining rack must be exactly level to guard against uneven staining of the smear. • Insufficient washing of the smears when removing the stain and buffer mixture may cause stain precipitate on the dried smear. • Excessive rinsing of the stained smear will cause the stain to fade.
MANUAL DIFFERENTIALPrinciple • A stained smear is examined in order to determine the percentage of each type of leukocyte present and assess the erythrocyte and platelet morphology. • Increases in any of the normal leukocyte types or the presence of immature leukocytes or erythrocytes in peripheral blood are important diagnostically in a wide variety of inflammatory disorders and leukemia. • Erythrocyte abnormalities are clinically important in various anemia's. • Platelet size irregularities are suggestive of particular thrombocyte disorders.
MANUAL DIFFERENTIAL • Specimen: • Peripheral blood smear made from EDTA-anticoagulated blood. • Smears should be made within 1 hour of blood collection from EDTA specimens stored at room temperature to avoid distortion of cell morphology. • Unstained smears can be stored for indefinite periods in a dry environment, but stained smears gradually fade unless cover slipped.
MANUAL DIFFERENTIAL • Reagents, supplies and equipment: 1. Manual cell counter designed for differential counts 2.Microscope, immersion oil and lens paper