Download
1 / 6
60 likes | 175 Vues
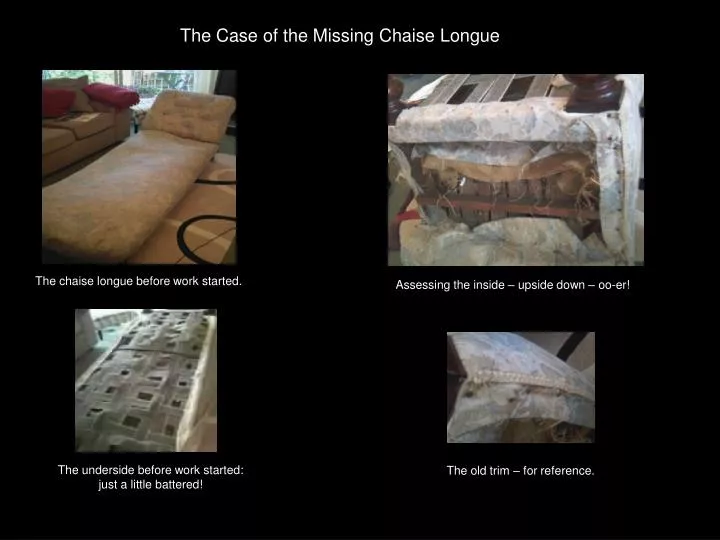
The Case of the Missing Chaise Longue. The chaise longue before work started. Assessing the inside – upside down – oo-er!. The underside before work started: just a little battered!. The old trim – for reference. New webbing applied with a web-stretcher,

E N D
The Case of the Missing Chaise Longue The chaise longue before work started. Assessing the inside – upside down – oo-er! The underside before work started: just a little battered! The old trim – for reference.
New webbing applied with a web-stretcher, followed by first hessian layer on base and scroll back. All stripped down: hundreds of old tacks removed. Old leg, dark, and dull. Same leg, one in each corner, cleaned, danish oiled, buffed, new castors fitted.
A craftsman's signature: John Fairning Jopling - Feb: 22nd 1904 After stripping down the frame, a signature was found, possibly the first person to upholster this chaise in 1904, or perhaps the maker of the frame. It certainly helps to date the chaise longue which we knew to be late Victorian. Does anyone know how the school acquired the chaise and whether John F Jopling is related in any way to the former MTGS staff with the same surname, of which there have been two to my knowledge?
The huge 28-lb bag of “black fibre” as it’s known; it will all be used on this project. Coir fibre stuffing begins – an alternative to horse-hair which was the original material used; it is tied in using jute thread loops [bridle ties] to keep it secure, and there’s a knack to shaping and even-ness. Apologies for this poor photograph: it shows the layer of scrim [hessian] applied over the black fibre, tacked along the edges, and the shape was formed using blind and top stitching, using jute upholstery thread and some very long, very sharp, double ended needles. Also, bridle ties added to hold in the next layer of stuffing.
Above left: A second and final layer of black fibre placed over the stitched hessian base. Above right: A layer of cotton wadding over the black fibre, which helps pad out and creates a soft base for the next layer in the process. Left: A layer of calico, stretched tightly and closely tacked all round the sides. Button tufts added pulled right through to the back using sharp double ended needles and jute upholstery thread. This forms the “lining” for the top layer of upholstery fabric, and the button tufts act as a guide for the real buttons.
Left: Bridle ties all over the base, made from jute upholstery thread; they hold in the black fibre. Below: An even layer of black fibre placed through the bridle ties. Like the back, this is the first layer of stuffing and will be followed by scrim, stitching, more black fibre, cotton wadding and calico. More photos to follow ………… Sue Barrington 6/12/08