Download
1 / 57
1.22k likes | 3.16k Vues
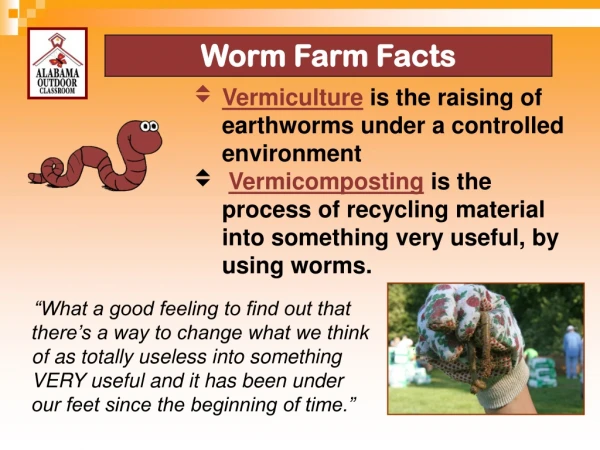
VERMICULTURE. Understanding the Terminology. Vermiculture - the culture of worms Vermicomposting - the use of worms for composting organic materials.

E N D
Understanding the Terminology • Vermiculture - the culture of worms • Vermicomposting - the use of worms for composting organic materials. • Vermicompost - the product of vermicomposting containing worm castings, bedding materials as well as organic matter in various stages of decomposition. • Vermicasts - excreta of worms • Vermiculturist - the Worm Man or a person who farms, breeds and cares for WORMS. eg A professional WORMfarmer is called Vermiculturist.
WORMS These invertebrates are classified under Phylum annelida otherwise known as Annelids. As the name implies, an annelid body is divided into similar rings or segments. Worms under this group is divided into three classes. Composting worm species belong to Class Clitellata under Order Oligochaeta. The representative type is the Lumbricus terrestisor the Nightcrawlers commonly known as earthworms. These are also field worms known as Allolophora. Just like the nightcrawlers, they will attack almost all organic matters from below. Nightcrawlers do not thrive during active composting being killed more easily at high temperature. • .
Seta Clitellum Mouth Male Pores Anus Diagram of an Earthworm
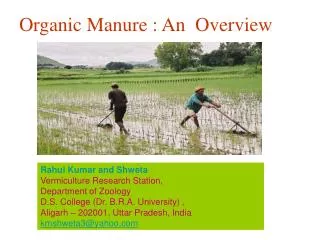
It defines the thrilling potential for waste reduction, fertilizer production, as well as an assortment of possible uses for the future. Vermiculture enhances the growth of plants that provide food along with producing prosperous and financially rewarding fertilizer. The “vermi” or earthworms are important in enriching the soil with organic matter which comes from biodegradable materials such as dead plants and animals which the earthworms ingest. VERMICULTURE
Vermiculture Systemsfocus on producing the maximum level of worm biomass possible in a given space. Vermicomposting is defined as the practice of using concentrations of earthworms to convert organic materials into usable vermicompost or worm castings. These systems focus on the waste material and managing it so that it can be successfully and efficiently processed in a worm system.
The earthworm is one of nature's pinnacle "soil scientists." Earthworms are liberated, cost effective farm relief. The worms are accountable for a variety of elements including turning common soil into superior quality. Worms facilitate the amount of air and water that travels into soil. They break down organic matter and when they eat, they leave behind castings that are an exceptionally valuable type of fertilizer.
How often do worms breed? The breeding cycle is approximately 27 days from mating to laying. Worms can double in population every 60 days. How long do worms live? Researchers don't know the extreme of the scale, but 2-3 years under the right conditions is common. A laboratory experiment in the UK is said to have had a worm in the laboratory for over ten years. Do worms take up heavy metals? There is much anecdotal, but no scientific data to confirm this.
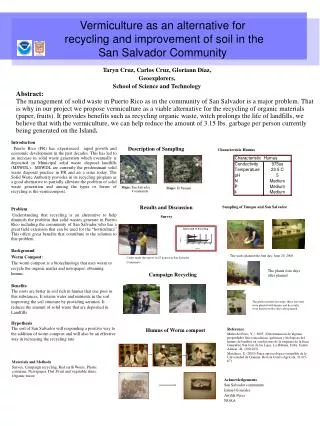
Earthworm Species used in Vermiculture Eisenia fetida* / Eisenia andreii (common name, Red Worm) Eisenia fetida/Eisenia andreii are the worm species identified as the most useful in vermicomposting systems and are the easiest to grow in high-density culture because they tolerate the widest range of environmental conditions and fluctuations, and handling and disruption to their environment of all species identified for this purpose. E. fetida/E. andreii are also common to virtually every landmass on earth, meaning there is no concern over importing potentially alien species to an environment where they might cause damage.
Eudrilus eugeniae(common name, African nightcrawler) • This species is used in some vermicomposting systems around the Mediterranean region and in some areas of eastern Asia. • Temperature range: Minimum; 45° F, maximum; 90° F, ideal range; 70° F-80° F. • Reproductive rate: Approximately 7 young per worm per week under ideal conditions. • Average number of young per cocoon: Approximately 2. • Time to emergence from the cocoon: Approximately 15-30 days under ideal conditions. • Time to sexual maturity: Approximately 30-95 days under ideal conditions.
Amynthas gracilus(common name, Alabama or Georgia jumper) • gracilus is another large worm species well suited for use as bait. • It is also a tropical species with a poor tolerance for cold temperatures. • This worm tolerates handling and disruption to the worm bed as well as does E. fetida and is generally considered an easy worm to culture provided appropriate temperatures can be maintained. • A. gracilus is used in a few vermicomposting systems in Malaysia and the Philippines.
Perionyx excavatus (common name, Indian Blue worm) Eisenia hortensis(European nightcrawler
The art of composting has been part of our global culture since ancient times. • The basic principles are quite simple, and adhering to them will result in an efficient and successful outcome. • Studies have shown that home composting can divert an average of 700 lbs. of material per household per year from the waste stream. • Municipal composting carries a greater environmental cost, but not nearly as high as if leaf and yard wastes are disposed of by conventional means.
1. Worms in the soil improve the structure through: • Creation of a worm-made sponge in the top soil. This "sponge" has certain qualities that enhance the soil. • a) Increased channels. The worms burrow through the soil and break down the root mat. They also open up channels for oxygen and rainfall to penetrate. • b) Increased moisture. This results in the worm-populated soil becoming wet faster and deeper and consequently the soil that has been in contact with worms holds the moisture longer. • c) Increased plant-growth. The tunnels created by worms are coated with mucus, which is rich in nitrates, and plant roots take advantage of the tunnels as easy-growth channels and pathways. Higher available nutrient content. As a result of the combined action of the worms and their bacteria.
a) The litter produced by plants mostly has a carbon:nitrogen ratio greater than 20:1. If the nitrogen level is above 20:1 it cannot be absorbed by plants and the soil beneath and surrounding the litter could become acid, the soluble mineral locked up and the soil itself then becoming less fertile. 2. A positive effect on the Carbon/Nitrogen Mix.
b) Therefore, it is essential that the carbon:nitrogen ratio be reduced to 20:1 or less, and this is greatly assisted by worms feeding on the rotting litter. • Although the rotting is started off by bacterial action, it is accelerated by worms eating the litter and excreting the castings. • It can therefore be strongly argued that without the action of worms, the forests of the world might be very different. • The same can be said of our fertile plains. • The castings produced by worms act as a fertiliser.
c) This conversion process is optimised in the Vermitech vermiculture system. The beds produce ideal conditions for worms to convert the organic material. In summary, worm worked soils exhibit enhanced water holding capacity, improved water infiltration , enhanced microbial activity and significant mineralisation of organic Nitrogen .
Select a place away from direct heat, strong sunlight and incessant rains. Dig a pit measuring 2 feet x 2 feet x 2 feet. Line the pit with polythene (PVC) sheet to arrest escape of earthworm through crevices. (Earthen pot, Brick, Cement tank or Wooden boxes can also be used to house earthworms).
The pit is systematically filled with four layers of waste. First layer -- (Bottom of the pit) is filled up to 2 inches with coconut fibre, rice husk and sugarcane bagasse. Second layer is 2 inches thick, consisting of sawdust, chopped rice/wheat straw. Dampen the bed by sprinkling water. Third layer is the earthworm food, this includes an admixture of cow-dung, green foliage, vegetable remnants, discarded parts of fruits, droppings of horses, asses, pigs, sheep or biogas slurry, human excreta, paper or scrap of cardboards etc. This feed should be spread till a height of 6 to 8 inches.
Release about 100 earthworms on the top without hurting them. These earthworms will start penetrating to the bottom. Once all these earthworms disappear, cover the surface with jute bags and keep them wet by sprinkling water in a judicious way. The jute bags may be turned upside down thrice in the first week, twice in the second week and only once in the third and following weeks, without causing any disruption to the top. Water and heat inside the tank assist the organic matter to decay - proliferates the number of earthworms - both these take place simultaneously. By 4 to 5 weeks, production of heat inside the pit will cease and will come down to 600‡ to 650 Fahrenheit. In case no warmth is felt by hands, understand that the manure is almost ready for use. From one tank, 50 kg. of manure is produced.
Spread a paper on the ground and empty the contents of the tank slowly in sunlight making a pyramid like heap. • Let this heap remain in daylight for about half to one hour. This will induce the earthworms to penetrate deep and reach the bottom. • Now the upper layers of organic manure can be lifted slowly. • Later the earthworms at the bottom may be separated from one another and deposited in the refilled tank.
COMPOST • Compost is simply decomposed organic matters: plants and animals. • It is considered a gardener’s gold for being nutrient rich. • It consists of decomposed and partially decomposed matter that’s dark and crumbly. • It is an excellent source of microorganisms.
Composting • the process of converting organic materials into humus or into forms that plants can assimilate. • as long as we provide the right balance of ingredients in the compost pile, keep it aerated and moist, then the compost organisms particularly the microorganisms will do the rest.
BENEFITS OF COMPOST 1. Protects Plants from Drought • Compost has the ability to hold more moisture. Humus, the end result of composting, is so absorbent that it can almost hold water twice its weight. 2. Improves soil Aeration • Without air, soil tends to become alkaline. Also, it loses the organic matter and nitrogen essential to productivity. Beneficial soil organisms will fail to thrive due to lack of oxygen.
3. Stops Erosion • Compost can prevent erosion by improving soil structure. Soil containing a lot of humus holds together better because water permeates the soil. 4. Slowly Releases Nutrients • Compost acts as a kind of nutrients storehouse releasing nutrients gradually throughout the plant’s growing season.
5. Prevents Disease • Compost has seemingly miraculous powers to prevent and control plant disease better than any chemical fungicide. 6. Recycle Waste • Composting is the only waste disposal conserving nutrients from the waste eventually returned to the soil.
THE PROCESS OF VERMICULTURE AND COMPOSTING REQUIREMENTS Site Selection • Site selection will depend in the selection of worm bin. • It must be shaded (earthworms shy away from strong light). • Flood-free • Accessible to water supply and source of compost material. • Well ventillated
Housing (or Worm Bin) Type • Box type (wood or plastic container with canopy) • Worm bin (cemented floor and wall w/o canopy) • Worm bin (cemented floor and wall with canopy) • Iron bars with plastic lining • Old plastic basins • Hollow block as non permanent structure with plastic lining • Drum type with canopy
Selection of Raw Materials • Consider the source of material • Market waste: Be careful as some market produce such as fruits and vegetables have large quantities of pesticides. • Hog and cow dung that contain large amounts of de-worming chemicals. • Identify materials rich in nitrogen Kakawate Ipilipil Monggo ‘Baging Ilog’ Wild Sunflower Katuray Leaves Agola Peanut All animal manure except dog and cat.
Identify materials rich in carbon Grass Rice straw Corn stalks Wood Saw dust Coco dust Paper • Size and kind of materials • Smaller material sizes are more favorable. Shredded materials decompose more easily. • Easily composted materials. • Materials readily available in forms (decomposed kitchen waste, old cow carabao manure, paper shreds and other biodegradable materials.
DECOMPOSITION PROCESS Anaerobic Stage After mixing and watering the compost substrate, the first phase of the vermicomposting process is called the “anaerobic stage” is started. The substrate is placed in containers or heaped in bead, which may be lined at the bottom or the sides with plastic sheets or other forms of retaining device such as screens and blocks. The substrate can be stocked to a height of 60 cm.
The compost pile is covered with a plastic sheet to speed up the decomposition initiated by the anaerobic bacteria. This stage may last for one to two weeks. The temperature of the substrate can reach 50-70 oC. The hotter the temperature, the faster the decomposition.
Aerobic Stage When the temperature of the compost pile goes down to ambient condition, the plastic cover of the vermicomposting unit is removed. The next phase of the vermicomposting process is known as the “aerobic stage”. Live earthworm can now be stocked into the pile. The earthworms, feed on the substrate. And with the aid of microorganisms in their gizzards, they now produce castings which are deposited on the surface. The vermicomposting units should be watered when necessary to maintain the optimum moisture content and sheltered from heavy rains to minimize leaking of plant nutrients.
Balancing Act Vermi and microbes thrive best when their food source provides carbon to nitrogen ratio (expressed as C:N) between 25:1 to 30:1 meaning, for every 25 to 30 parts of carbon, 1 part nitrogen must be added to the pile. Ratio of carbon to nitrogen is a chemical ratio and is not based on volume you do not need 30 times more brown material than green.
Recommended Mixture • 75% cow manure and 25% sawdust or rice hull is good for breeding, growing and fattening. • 75% shredded fresh grass and 25% kakawate, ipil-ipil is good for the growth and reproduction of the worms and obtaining vermicompost of good quality.
No. of Worms per Bin Size (1.2m x 2m x 1.25m) • 300 worms, 5 months 4,000 worms / 250 kg of casting • 2,000 worms, 2 months 3,000 worms / 250 kg of casting Stock Filling of Substrate • Mixed normally used for shredded materials. • Sandwich: stock with 2-inch layer alternating substrate.
MAINTENANCE OF WORM BIN • Test Humidity: by squeezing a fistful of substrate, five to seven drops of water indicates about 80% humidity or same humidity in a squeezed sponge. • Protect worms from natural predators:Birds, chickens, frogs, mice, snakes, flatworms and even pigs love to eat worms, while ants do not eat worms, they can kill your population if left unattended.
Do not put unwanted materials to your pile: • Meat scraps - these can attract unwanted animal visitors and create unpleasant odors. • Fats, oils and grease - large amounts of these will give your microbes indigestion slowing down composting process. It also attracts unwanted pests. • Droppings from caged birds - Birds droppings may contain dangerous disease pathogens.
Droppings from dogs, cats and other carnivores - These contain disease harmful to humans. Hot composting kills most pathogens but some may survive even prolonged heat. Cat droppings in particular can be dangerous to pregnant women and children. • Human waste: the potential for spreading diseases. • Diseased plants: Yes, hot composting kills most plant pathogens but to avoid risk, burn diseased plants. • Highly acidic materials.
Harvesting • Pick the worm by hand and transfer them to a new worm bed. The vermicompost may be allowed to dry in the shade for few days and sifted if finer compost is desired. • In the shade, pile the vermi-compost in such a manner that it looks like a pyramid. After a day, you can harvest the top part easily because the worm has gone to the bottom of the pile. When you reach the bottom pile, you can extract the worms manually.
Move the contents of the whole bed to one side. Fill the empty half with new substrate. Allow the worms to move freely to the new food. Harvest the casting left by the worms. • Fill an onion bag with fresh food and bury in the bed. After a week or so, the bag will be filled with worms, which you can empty to a new worm bed. • Use mechanical screen.
Vermi Compost Screener • Vermi-compost can be used after harvest. A 3/16” mesh wire is recommended to separate pure vermi-compost from substrate. Drying and Storage • Dry your vermicompost by air under shades only. Exposing organic fertilizer to the sun will cause it to lose its nitrogen content. • Vermicompost can be stored at 30% humidity in plastic bag. Store in cool place away from direct sunlight.