Download

1 / 228
2.28k likes | 2.61k Vues
TRAINING PROGRAM in ANDROID APPLICATION. Android Application Development. Day 1: Introduction to Android Installation of SDK & IDE Exploring the Android Environment Creating a Project Familiarizing the Android Application Structure Day 2: User Interfaces, Widgets and Controls

E N D
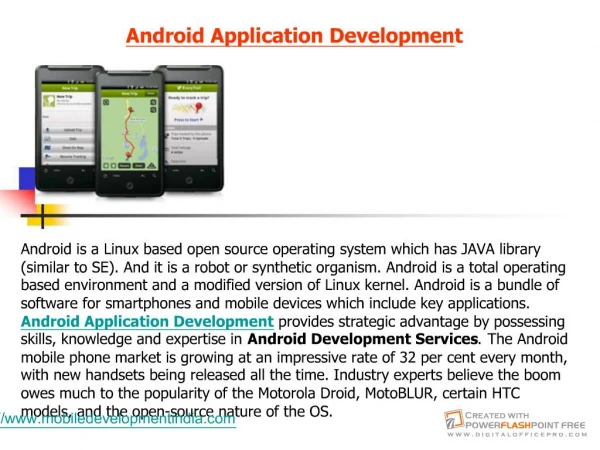
TRAINING PROGRAM in ANDROID APPLICATION Android Application Development
Day 1: • Introduction to Android • Installation of SDK & IDE • Exploring the Android Environment • Creating a Project • Familiarizing the Android Application Structure • Day 2: • User Interfaces, Widgets and Controls • Working with Resources • Using Layouts • Lists and Adapters • Working with Graphics and Animation
Day 3: • Managing and Accessing the Database • Using a Content Provider • Building a Content Provider • Requesting and Requiring Permission • Internationalizing the Application • Day 4: • Using Preferences • Introduction to Intents • Launching Activities and Sub Activities • Creating and Invoking Services • Day 5: • Packaging an Application • Installing Application on Android Device • Publishing on the Android Market
Android, Inc. was founded in Palo Alto, California, United States in October, 2003 by Andy Rubin, Rich Miner. • Google acquired Android Inc. in August, 2005, making Android Inc. a wholly-owned subsidiary of Google Inc. • OHA (Open Handset Alliance)
Software stack for mobile device (Operating system(0.S), Middleware, and key application) • Android O.S based on linux kernel and world’s best selling • Large Community of Developers writing application(“apps”) • The Android open-source software stack consists of Java applications running on a Java-based, • object-oriented application framework • each version is developed under a code name based on a dessert item. The code names are in alphabetical order, as seen by Cupcake, Donut, Eclair, Froyo, Gingerbread, Honeycomb, and the future version, Ice Cream. • “cheap and easy” is a benefit, it’s with mobile development. The Android SDK and tools are freely available on the Android developer website, http://developer.android.com
highly customizable and therefore can be altered to fit your tastes and needs. • Android is the fact that it automatically backs up your contacts for you. • FEATURES • Application framework enabling reuse and replacement of components • Dalvik virtual machine optimized for mobile devices • Integrated browser based on the open source WebKit engine • Optimized graphics powered by a custom 2D graphics library; 3D graphics based on the OpenGL ES 1.0 specification (hardware acceleration optional) • SQLite for structured data storage • Media support for common audio, video, and still image formats (MPEG4, H.264, MP3, AAC, AMR, JPG, PNG, GIF)
GSM Telephony (hardware dependent) • Bluetooth, EDGE, 3G, and WiFi (hardware dependent) • Camera, GPS, compass, and accelerometer (hardware dependent) • Rich development environment including a device emulator, tools for debugging, memory and performance profiling, and a plugin for the Eclipse IDE
Linux Kernel Android relies on Linux version 2.6 for core system services such as security, memory management, process management, network stack, and driver model The Kernel also acts as an abstraction layer between the hardware and the rest of the software stack
Runtime Every android application runs in its own process, with its own instance of the Dalvik virtual machine Dalvik has been written so that a device can run multiple VM’s efficiently. The Dalvik VM executes files in the Dalvik executable (.dex) format which is optimized for minimal memory footprint The VM is register-based, and runs classes compiled in a Java language compiler that have been transformed into the .dex format by the included “dx” tool The Dalvik VM relies on the Linux kernel for underlying functionality such as threading and low-level memory management
Libraries Android includes a set of C/C++ libraries used by various components of the Android system: System C library - a BSD-derived implementation of the standard C system library (libc), tuned for embedded Linux-based devices Media Libraries - based on PacketVideo's OpenCORE; the libraries support playback and recording of many popular audio and video formats, as well as static image files, including MPEG4, H.264, MP3, AAC, AMR, JPG, and PNG Surface Manager – manages access to the display system and seamlessly composites 2D and 3D graphic layers from multiple applications
Media Libraries – support playback and recording of popular audio and video formats, as well as static image files FreeType – bitmap and vector font rendering WebKit – layout engine designed to allow web browsers to render webpages
Application Framework Android ships with a set of core applications including an email client, SMS program, calendar, maps, browser, and others. All applications are written in Java Underlying all applications is a set of services and systems including: • A rich and extensible set of Views that can be used to build an application, including lists, grids, text boxes, buttons, and even an embeddable web browser • Content Providers that enable applications to access data from other applications (such as Contacts), or to share their own data
A Resource Manager, providing access to non-code resources such as localized strings, graphics, and layout files • A Notification Manager that enables all applications to display custom alerts in the status bar • An Activity Manager that manages the lifecycle of applications and provides a common navigation backstack
Exploring the Android System Android ships with a set of core applications including SMS program, calendar, maps, browser, contacts, email clients and others. All applications are written using the Java programming language. The following slides will show your way around the Android system as users see it and list some important features of Android.
Home screen Default screen. This is a common location for app widgets and live folders.
Dialer application Built-in application for making and receiving phone calls. Note that the emulator has limited phone features.
Contacts application Database of contact information.
Messaging application Built-in application for sending and receiving SMS messages. Note that the emulator has limited messaging features.
Browser application Built-in web browser. Note that the emulator has an Internet connection, provided that your machine has one.
Settings application Built-in application to configure a wide variety of “phone” settings for the emulator, such as application management, sound and display settings, and localization.
Application Sliding Drawer Shows all installed applications. From the Home screen, pull the gray sliding drawer tab to see all installed applications.
The Dalvik Debug Monitor Service (DDMS) is a debugging utility that is integrated into Eclipse through the DDMS perspective. The DDMS perspective provides a number of useful features for interacting with emulators and handsets.
Interacting with Emulators DDMS can send a number of events, such as simulated calls, SMS messages, and location coordinates, to specific emulator instances.
Simulating Incoming Calls to the Emulator You can simulate incoming voice calls by using the DDMS Emulator Control tab • In DDMS, choose the emulator you want to call. • 2. On the Emulator Control tab, input the incoming phone number (for example, • 5551212) in the Telephony Actions section. • 3. Select the Voice radio button. • 4. Click the Call button. • 5. In the emulator, you should see an incoming call. Answer the call by clicking • the Send button in the emulator.
Simulating Incoming SMS Messages to the Emulator You can simulate incoming SMS messages by using the DDMS Emulator DDMS • In DDMS, choose the emulator you want a send an SMS to. • 2. On the Emulator Control tab, input the Incoming phone number (for example, • 5551212) in the Telephony Actions section. • 3. Select the SMS radio button. • 4. Type an SMS message. • 5. Click the Send button. In the emulator, you should see an incoming SMS notification.
Creating New Project 1. Choose File, New, Android Project or click the Android Project creator icon, which looks like a folder (with the letter a and a plus sign:) on the Eclipse toolbar. 2. Choose a project name. In this case, name the project AndroidApp01. 3. Choose a location for the project. Because this is a new project, select the Create New Project in Workspace radio button. Check the Use Default Location check box.
4. Select a build target for your application. For most applications, you want to select the version of Android most appropriate for the devices used by your target audience and the needs of your application. If you will be using the Google add-ons (for example, Google Maps), be sure to choose the Google APIs version for your target platform. For this example, the Android 2.2 (API level 8) build target is sufficient. 5. Specify an application name. This name is what users will see. In this case, call the application Android App. 6. Specify a package name, following standard package namespace conventions for Java. (e.g. com.androidtribe.*)
7. Check the Create Activity check box. This will instruct the wizard to create a default launch Activity class for the application. Call your activity AndroidActivity01. 8. Confirm that the Min SDK Version field is correct. This field will be set to the API level of the build target by default (Android 2.2 is API level 8). If you want to support older versions of the Android SDK, you need to change this field. However, in this case, we can leave it as its default value. 11. Click the Finish button.
Exploring the Android Project Files . AndroidManifest.xml —The central configuration file for the application. . default.properties —A generated build file used by Eclipse and the Android ADT plug-in. Do not edit this file. . /src folder—Required folder for all source code. . /src/com.androidbook.droid1/DroidActivity.java —Main entry point to this application, named DroidActivity. This activity has been defined as the default launch activity in the Android manifest file. . /gen/com.androidbook.droid1/R.java —A generated resource management source file. Do not edit this file. . /assets folder—Required folder where uncompiled file resources can be included in the project. . /res folder—Required folder where all application resources are managed. Application resources include animations, drawable graphics, layout files, data-like strings and numbers, and raw files.
What Is an Activity? An activity is a core component of the Android platform. Each activity represents a task the application can do, often tied to a corresponding screen in the application user interface.
Requesting Permissions Requesting the use of other applications’ data or services requires the uses-permission element to be added to your AndroidManifest.xml file. Your manifest may have zero or more uses-permission elements, all as direct children of the root manifest element. The uses-permission element takes a single attribute, android:name, which is the name of the permission your application requires: <uses-permission android:name="android.permission.ACCESS LOCATION" />
Here are some of the more important built-in permissions: • INTERNET, if your application wishes to access the Internet through any means, from raw Java sockets through the WebView widget • READ CALENDAR, READ CONTACTS, and the like for reading data out of the built-in content providers • WRITE CALENDAR, WRITE CONTACTS, and the like for modifying data in the built-in content providers
Requiring Permissions The first step to securing your own application using permissions is to declare said permissions, once again in the AndroidManifest.xml file. In this case, instead of uses-permission, you add permission elements. Once again, you can have zero or more permission elements, all as direct children of the root manifest element.
Declaring a permission is slightly more complicated than using a permission. There are three pieces of information you need to supply • The symbolic name of the permission. To keep your permissions from colliding with those from other applications, you should use your application’s Java namespace as a prefix. • A label for the permission: something short that is understandable by users. • A description for the permission: something a wee bit longer that is understandable by your users. <permission android:name="vnd.tlagency.sekrits.SEE SEKRITS" android:label="@string/see sekrits label" android:description="@string/see sekrits description" />
Enforcing Permissions via the Manifest Activities, services, and intent receivers can all declare an attribute named android:permission, whose value is the name of the permission that is required to access those items: <activity android:name=".DroidApp" android:label=“Android Application" android:permission="vnd.androidexamples.AndroidApp"> <intent-filter> <action android:name="android.intent.action.MAIN“ /> <category android:name="android.intent.category.LAUNCHER“ /> </intent-filter> </activity>
Content providers offer two distinct attributes: readPermission and writePermission: <provider android:name=".DroidProvider" android:authorities="vnd.androidexamples.DroidProvider" android:readPermission="vnd. androidexamples.SEE DROIDPROVIDER" android:writePermission="vnd. androidexamples.MOD DROIDPROVIDER" /> In this case, readPermission controls access to querying the content provider, while writePermission controls access to insert, update, or delete data in the content provider.
Exploring the Android Project Files . AndroidManifest.xml —The central configuration file for the application. . default.properties —A generated build file used by Eclipse and the Android ADT plug-in. Do not edit this file. . /src folder—Required folder for all source code. . /src/com.androidbook.droid1/DroidActivity.java —Main entry point to this application, named DroidActivity. This activity has been defined as the default launch activity in the Android manifest file. . /gen/com.androidbook.droid1/R.java —A generated resource management source file. Do not edit this file. . /assets folder—Required folder where uncompiled file resources can be included in the project. . /res folder—Required folder where all application resources are managed. Application resources include animations, drawable graphics, layout files, data-like strings and numbers, and raw files.
Working with Application Resources Application resources are created and stored within the Android project files under the /res directory. Using a well-defined but flexible directory structure, resources are organized, defined, and compiled with the application package. Application resources are not shared with the rest of the Android system.
Grouping application resources together and compiling them into the application package has the following benefits: • Code is cleaner and easier to read, leading to fewer bugs. • Resources are organized by type and guaranteed to be unique. • Resources are conveniently located for handset customization. • Localization and internationalization are straightforward.
The Android platform supports a variety of resource types, which can be combined to form different types of applications. The following are some of the most common resource types: . Strings, colors, and dimensions . Drawable graphics files . Layout files . Raw files of all types Resource types are defined with special XML tags and organized into specially named project directories. Some /res subdirectories, such as the /drawable, /layout, and /values directories, are created by default when a new Android project is created, while others must be added by the developer when required.
Resource files stored within /res subdirectories must abide by the following rules: . Resource filenames must be lowercase. . Resource filenames may contain letters, numbers, underscores, and periods only. . Resource filenames (and XML name attributes) must be unique.