Download
1 / 42
420 likes | 576 Vues
WELCOME TO THE MEGS SYSTEM. CONSOLIDATED APPLICATION Title I, Part C Migrant Education Regular School Year Presented by: Judy Byrnes. MEGS Michigan Electronic Grants System http://megs.mde.state.mi.us/megs/. The Michigan Electronic Grants System Getting set-up in MEGS Security Levels

E N D
WELCOME TO THE MEGS SYSTEM CONSOLIDATED APPLICATION Title I, Part C Migrant Education Regular School Year Presented by: Judy Byrnes
MEGSMichigan Electronic Grants Systemhttp://megs.mde.state.mi.us/megs/
The Michigan Electronic Grants System Getting set-up in MEGS Security Levels Authorized Officials Modifications, Amendments DS-4044 reporting (tell your business people) MEGS PROCESS
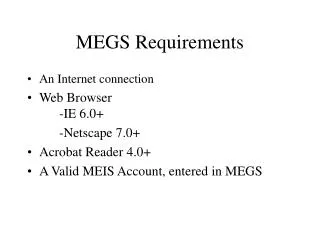
WHAT IS NEEDED TO USE MEGS • An Internet Connection • Web Browser -IE 6.0+ -Netscape 7.0+ • Adobe Acrobat 4.0+ • A Valid MEIS Account entered in MEGS *Internet Explorer RECOMMENDED
Internet connection The faster the connection, the easier it is to use MEGS Beware proxy servers, pop-up blockers, and network security settings MEGS Tips Can be accessed from multiple machines at same time Best viewed through Internet Explorer No preferred sequence for navigating in MEGS MEIS accounts must be entered in MEGS Confirm your email address QUICK FACTS ABOUT MEGS
WHAT IS ADOBE ACROBAT READER AND DO I NEED IT? • Adobe Acrobat Reader allows user to view PDF files. • PDF stands for “Portable Document Format”. • Regular Webpages which are programmed in HTML do not always look good when printed. • The PDF format was designed for the Web to look consistent each time it is printed. • MEGS uses PDF’s for those things that must be printed. Once Acrobat Reader is installed, all files in MEGS with the extension .pdf will be opened with the Acrobat Program. Adobe Acrobat Reader can be downloaded from http://www.adobe.com/products/acrobat/readstep2.html MEGS supports Adobe Acrobat and Adobe Acrobat Reader versions 4.0+
WHAT IS MEIS AND HOW CAN AN ACCOUNT BE OBTAINED? MEIS is the: Michigan Education Information System. MEIS provides one system for the management of user accounts for a variety of MDE applications. In order to use MEGS you must first obtain a MEIS account. This can be done by going to the following URL (Website Address) and clicking Create a MEIS Account: http://meis.mde.state.mi.us/userman/
CONFIRMING YOUR MEIS ACCOUNT The final screen will confirm your account. Hint: Print this page for your records. Hint: Change your password immediately. Warning: Passwords are case-sensitive. Your randomly generated password is guaranteed to cause you problems in the future. Change it immediately after creating your account. Your MEIS account must be entered in the MEGS database. Need to reset your password? Call the MDE Helpdesk: (517) 335-0505 Note: Every MEIS application has its own security system.
HOW TO ACCESS MEGS Once your MEIS account is entered in MEGS, you can log in: http://megs.mde.state.mi.us/megs/ The first screen provides a link to the login screen and a link to the MEGS Website: MEGS Website has: - training materials - presentations - allocation information - MEIS information - general information
THE MEGS WEBSITE Click on “Training” to receive this power-point and other training materials.
LOGGING INTO MEGS Use the Login and Password obtained from the MEIS Registration Process to login. Remember, the MEIS password is case sensitive. If you receive an error message that you have a valid MEIS account, but are not authorized in MEGS, contact your Authorized Official. If you receive a message about becoming a Peer Reviewer, you have not been entered into MEGS yet.
AVOID THE BACK AND FORWARD BUTTONS MEGS is a dynamic, database driven, Web application. Content in MEGS changes according to information that is entered into the system. When applicants enter information into the system, it changes the way they see certain parts of the application. Therefore, it is highly recommended that users use the navigation provided within the application. Using the browser’s Back and Forward buttons to go to a page is not the same as clicking a link to go to exactly the same page. The Back button will simply load the cached (or saved) version of the page that exists on the local hard drive as it was the last time the page was accessed. By using the Back button, the user is not getting the latest information from the website, but rather an “older” saved version of the page. Avoid the Back and Forward buttons in order to always see the latest information.
DESIGNATING AUTHORIZED OFFICIALShttp://megs.mde.state.mi.us/megsweb • Two Authorized Officials per district • Authorized by the Superintendent • Print and send in the MEGS Electronic Form • Very quick turn-around • Log-in to check
MEGS – User Flow • Authorized Official (Level 5) • Initiates Application (Opens) • Assigns Users to Application (At least one Level 4 user) • Grant Administrator (Level 4) • Completes Application • Authorized Official (Level 5) • Submits Application
Level 5 - Authorized Officials Manage MEGS accounts for district/agency Designate Application Administrators (Level 4) Initiate applications Assign lower security levels to allow edit or view status Add users to MEGS Submit, amend and delete applications, amendments, and/or reports Access to all district applications Level 4 - Application Administrators Responsible for managing the application Initiate assigned applications Start modifications or amendments Notify Authorized Officials to submit applications, modifications and amendments Can add/delete consortium/grant members or participating agencies to an application MEGS AUTHORIZATION STRUCTURE
Level 3b Consortium/Grant Member Program Coordinator The fiscal agent can add users from consortia organizations. They have permission to work on their budget and narrative only. They cannot save to any other portions of the grant. Level 3 Consortium/Grant Member-Authorized Officials AllAuthorized Officials from Consortia Members are automatically added to the grant with View permissions. Level 2 - Grant Writers This level has the ability to input and edit data and budget information. Level 2c - Financial Officers This level has the ability to input and edit budget data only. Level 1 – Viewers This level has the ability to view all parts of the application. Cannot input or edit any information. OTHER SECURITY LEVELS
AUTHORIZED OFFICIALS: Getting Started From the Main Menu, Authorized Officials can: • Initiate applications • Add users to MEGS • Review/edit contact information • Assign application security levels • Edit agency information • Edit personal contact information Once an application has been initiated, the application will be listed on the Main Menu. Grants are color coded by years: 2002-2003 are blue 2003-2004 are green 2004-2005 are red 2005-2006 are blue
ADDING NEW USERS TO MEGS Authorized Officials (level 5’s only) • All new users must be entered into the MEGS system • Select the Add Users to MEGS link • Key in the MEIS number (up to ten users can be added) • Click on Verify • If the information is correct, click on Save
ADDING USERS TO THE APPLICATION Users may be added externally from the application or inside the particular application. External • Select application security level(s) • Select the contact person then select each application and security level assigned to that user • Save Users can be added even if the application is already initiated.
MAIN MENU Main Menu Options • View/Edit • Delete Application • Amend Application • View Reports • View History Buttons are controlled by the status of the applications.
MAIN MENU:Initiating an Application (5’s) From the Main Menu: • Select the Consolidated Application (FY-2006) application from the drop down list. • Select the ApplyNow button. Then click the Apply button to initiate the application. This will send the user to the Application Menu. • Option to initiate the grant disappears once the grant is initiated.
APPLICATION MENU Application Menu • Header Details • Application Information • Management Activities • General Information • Budget Pages • Program Information • Attachments • Submitting the Application
Important Information and Assurances and Certifications • Important Information About the Application This link opens a page that provides information about the application due date and the pages that must be submitted, as well as the purposes of the programs included in the application. • Assurances and CertificationsThis link opens a page that lists a set of conditions that must be followed by recipients of funds for programs included in the application.
MANAGEMENT ACTIVITIES:View a PDF of This Application To View a PDF of the Application: Click the View a PDFof this application link to generate a printable version of the application. The PDF will include all information that is entered into the current application. One Click Solution: email sent when ready. Links are also provided for individual page PDFs. This feature is provided for agencies to keep a printed copy of the application that the user submitted electronically. To save the PDF of your completed application, select “File – Save As” and save the file to your hard drive. Blank PDF is also available.
GENERAL INFORMATION:Grant Contact and Fiscal Agent Information • To Assign or Change the Main Contact: • Go to the Control Access to This Application page and make the assignment. • When the assignment is saved, the user will be displayed on the Grant Contact and Fiscal Agent Information page. • Authorized users may delete and replace the Main Contact. • NEW – Additional Email Recipient
GENERAL INFORMATION • School level budgeting – not required • Description of Equitable Access • Participation of Private Nonprofit Schools – required for Federal Programs
BUDGET PAGES: Budget Summary • Budget Totals: • The budget totals are displayed with function codes along the left side and object codes across the top • Budget totals are changed automatically when new budget items are added to the grant • Indirect Costs: • Enter the rate in the indirect cost percent field at the bottom of the budget grid. • Contact Information: • Enter the names and phone numbers
BUDGET PAGES: Budget Detail To enter your detail: • Click on the Add Budget Item tab • Select the appropriate function code • (If the item is your local agency share, select the drop-down menu) • Provide a description and amount • (If Salary, complete the FTE or Hours box) • Click on Add Item to save and continue • Use the tabs to Add or Edit the budget items
BUDGET - Quick Links • This is another way to add multiple items of the same type.
BUDGET NEW – Download Budget • You can now download the information into a spreadsheet that you entered into the system.
BUDGET NEW – Program Links • You can navigate to and from the program page by using this link.
PROGRAM INFORMATIONSchool District Consolidated Plan Page is different for LEAs and ISDs
PROGRAM INFORMATIONDelivery Systems for Special Populations Complete the page – Don’t forget to use the Help link for useful information
PROGRAM INFORMATIONTeacher and Principal Training and Recruiting/Innovative Programs These are not required for the (Title I, Part C) Migrant Education.
ATTACHMENTS Use these links to upload attachments as required
ATTACHMENTS Complete the “Title” “Browse” to the document Click on the “Upload Attachment” button
PRE-SUBMISSIONCheck Errors First • MEGS performs a check for technical errors and will present the information on this page. Clicking on the link will take you to the page with the error. • Run the error checking until the screen indicates: No errors have been detected in this application.
SUBMISSION To Submit an Application: • Review Errors on the Application Menu. • Notify Authorized Official that the application is complete. • AO clicks the Submit Application button on the Application Menu. • If there are any errors, an error list will be generated. • Once all errors are corrected, return to the Application Menu and click Submit Application. • The next page will present conditions that must be agreed upon when submitting the application. • After reading and agreeing with the conditions, click the I Agree button to continue. • MEGS will display a confirmation page. Print this page to keep as a record of the submission of the application. A link to allow you to access the confirmation page will be created on the Application Menu. • MEGS will notify the district administrator and the application Main Contact by email that the application has been received by MDE.
APPLICATION STATUS LEVELS • Applicant Set Status Levels • Application In Progress • Application Submitted • Modifications In Progress • Modifications Submitted • Amendment In Progress • Amendment Submitted • Consultant Set Status Levels • Review In Progress • Modifications Required • Program Office Review Complete • Grant Funds Available to The Applicant Status levels are used to track applications within MEGS and are applied at every step of the process. There are two distinct status categories: Applicant and Consultant. Applicant status levels that are “inprogress” allow the user full access to the application. Submission will “lock” the application to further changes. Consultant status levels are used to show the level of review or to return the application (e.g. Modifications Required) to the user.
VIEW COMMENTS • To View Comments from Consultants: • Click the View Comments link in the header of any page in the application. • A separate popup window opens and displays the application checklist with all comments from consultants. • Click the Print button to print the checklist with comments. • To Respond to Comments from • Consultants: • Enter your comments in the Comments to Consultant box under the appropriate page heading in the checklist. • Click the Save button to save the comments you have entered.
Grants in MEGS will use new MEGS interface GCMRS security is used Access MEGS from the Project Listing Screen Signed for in usual manner DS-4044 Concept
Questions? For MEGS or other technical questions contact: Judy Thelen (517) 335-1266 ThelenJA@michigan.gov