Download
1 / 18
180 likes | 315 Vues
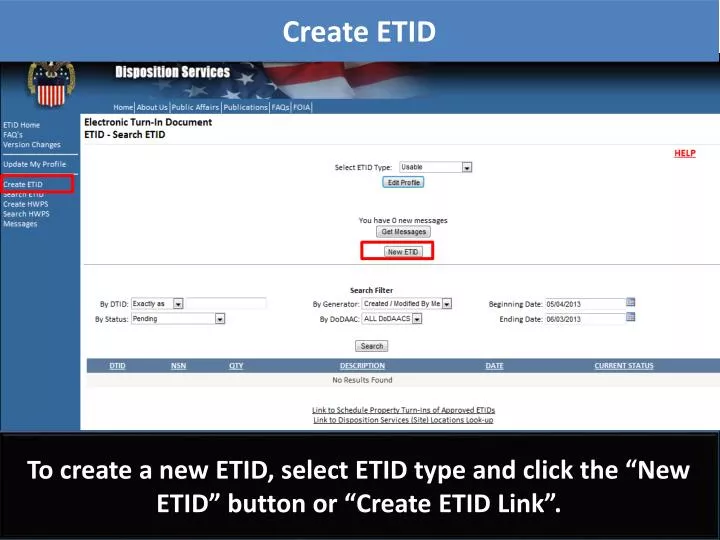
Create ETID. To create a new ETID, select ETID type and click the “New ETID” button or “Create ETID Link”. Create ETID. The input screen has been designed to fit on one screen. Customers will enter DTID information, General Item I nformation, Certifications, and can also add Attachments.

E N D
Create ETID To create a new ETID, select ETID type and click the “New ETID” button or “Create ETID Link”.
Create ETID The input screen has been designed to fit on one screen. Customers will enter DTID information, General Item Information, Certifications, and can also add Attachments.
Create ETID Choose Property Type • Create DTID Number. • DoDDAC populates from user profile. • Current Julian Date populated • Create unique 4 digit serial number • Suffix only when necessary • Enter Stock Number • Valid FSC • NIIN: NSN or DLA Standardized Local Stock Number (LSN)
Create ETID - NSN NSNs characteristics will pre-populate many of the data fields. Complete remaining information. Any field with a * is a required field.
Create ETID - LSN Standardized LSNs have been incorporated into ETID. Enter FSC. Enter “DS” in the NIIN field to obtain list of LSNs to choose. LSNs choices listed are based on FSC entered.
Create ETID - LSN When a LSN is chosen, Item Nomenclature, Unit of Issue and Demil Code will populate. Complete remaining fields. Any field with a * is a required field. Enter any additional information in Comment Lines.
Create ETID – Critical FSC Additional LSN information will be required for critical FSCs.
Create ETID - Certifications Certifications are required for some property types. To attach a certification, Click “Add Certifications”.
Check the box to the left of the certification title. Click “Save Cert Selection”. To view a certification, click on the certification title.
Create ETID - Certifications To view a selected certification, click on certification title
After viewing a certification, select “Close Window” to go back to the ETID.
Create ETID - Attachments To attach a document or image to an ETID, click on “Attach Images/Documents.
3 1 2 Select the file to upload by selecting Browse. Save the uploaded File. To return back to ETID, select “Back To Document”
Create ETID - Attachments To view any uploaded Documents/Images click on button
Click on image to view respective documents. After closing windows, select “Back”.
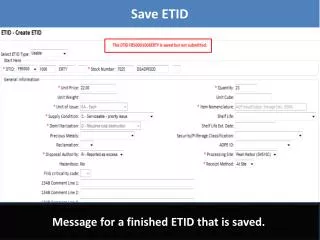
Submit or Save ETID An ETID can be Saved or Submitted. An ETID can be saved unfinished and then finished later or saved finished and submitted later.
Submit ETID Error messages will be given by the field and at the top for any information entered that is not correct when submitted.
Submit ETID Message after successful submittal of an ETIDto a Disposition Services Site for review.