Download

1 / 25
250 likes | 604 Vues
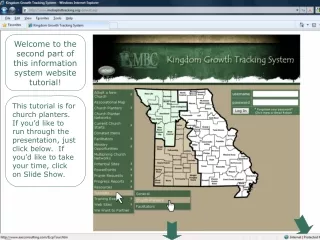
Scooter here. Welcome to the Aeries Gradebook Tutorial. Revision 1.1 May 4, 2010. We will be using the navigation box on the left of your screen quite a bit. Take a look at all of the choices.

E N D
Scooter here. Welcome to the Aeries Gradebook Tutorial Revision 1.1 May 4, 2010
We will be using the navigation box on the left of your screen quite a bit. Take a look at all of the choices. This is how to tell where we are. Either look at the yellow folder. (I agree. It looks like a wedge of cheese.) or you can also check the top of the page we are working in.
Log in and the go ahead and mouse over Grades and click on GradeBook.
Here is where we make our gradebooks. Click on Click here to Add a Gradebook and Get Started Now you get this POP UP box with your classes assigned by the office. Click your first class Click Next.
Now we’re movin’. Click APPLY CHANGES Add New There is your first class. Now we just need to add your other classes. To do that click on Add New.
Repeat your steps from the first class for each of your other classes. Click the Period, click Next, Apply Changes. Now you should have all of your classes showing up here just like mine.
Click on the Enters/Leaves tab right in the middle. In order to protect the identities of my students from unscrupulous eyes, the following pages will have student names blurred out. THERE IS NOTHING WRONG WITH YOUR EYES.
Confirm that these are the students you want in the class you have chosen. Click on Add All Students This box will POP up. Click OK.
Notice that the screen has changed and is allowing us to Add All Students to the other classes automatically. Click OK.
VERY IMPORTANT It is time to click SUBMIT You can click either SUBMIT or APPLY button whether it is on top or bottom of the page. You have worked hard. It might be time for a siesta. If you want to leave and come back be sure to click SUBMIT and then logout. When you are ready to come back follow the directions to get to the gradebook and meet me at EDIT ASSIGNMENT TYPES.
Click on the CODE drop down box and select 0. Type in a Description of the assignment type and then add what percent you want it to count as in your gradebook. Now it is time to setup your grading rules. I am setting this one up as WEIGHTED TYPE grading. Click APPLY after each assignment. The program calculates the total and let’s you know that you haven’t reached 100% yet. When you are finished your total must equal 100%.
If you have more than one class that is the same, let’s say two algebra classes, and you are going to give the same assignments for both classes, you can link the gradebooks. This lets you add an assignment once, but it is automatically added to the other class or classes you have linked. Let’s do it. Click on Gradebook Maintenance
Select Link Gradebooks I am going to link all three of my classes by selecting the same Group number. Now I just click APPLY CHANGES and Ta Da!
Now click on the Final Marks tab. Here you can set up your high and low percentages for your corresponding letter grades. Be sure to click Apply Changes.
Adding assignments. Click on Edit Assignments. If you look closely, it’s rather small, you will see Add New in the right corner of the box. Click it now. The New Assignment box “pops” up. Choose your assignment Type, add a Description if you want, Max. Score, TotalPossible , and Dates.
Notice I put the same amount of points for my Max Score as Max # Possible. That was done on purpose. Keep them the same. Don’t worry about Scale or Grading Completed. They are another lesson. Click Add. Just click Add New to keep adding assignments. Remember to change the Type to the appropriate assignment. Here is mine after adding 5 tasks.
Before we go to far let’s take a minute to do some fine tuning. Click on Options. Here you can change how your gradebook works. If you want to only show student ID numbers for gradebook printing (in order to stick in the window for students to see) you would want to change View Student ??? in Print Preview to Perm. Always click SUBMIT CHANGES. Click on Current Gradebook and we will change some more. The most important thing here is to mark Count Assignment toward Final… This will let you see a student’s grade as soon as you put it in and click SUBMIT. Click SUBMIT CHANGES
Also, check Show Overall Marks w/Score. You have to Click SUBMIT CHANGES and then change classes and do this all over again for each class you have.
Now we are ready to put in some grades. You have some choices here; Scores by Class, Scores by Student, & Scores by Assignment. Let’s look at Scores by Assignment. Click on it in the navigation bar.
Here it’s pretty straight forward. Take a look at the notes. Choose the assignment When you enter scores use the ENTER key or down arrow to move down. Status box gives choices for comments like absent, tardy, etc. Saving the best for last…autofill. Here you can put in 1 score for everybody left blank or everybody in the whole class. Type your score, comment, etc., and click Change Defaults. BAMMM!
Here is a finished assignment. Notice that I put in NA for 2 students. NA means excused. The assignment will NOT be counted against his or her grade. I also checked the Grading Complete box. You only do that once all grades are in. Aeries then calculates the data at the bottom of your screen. Your practically a pro!
Click on Scores by Class in your navigation bar. Here are all of your assignments. This is an easy way to input a lot of grades on one screen, but you sacrifice the Autofill function and Comments box. Notice I have only 1 “completed” assignment, but the students’ grades still show up below. Before you go, here is a super tip from one of my friends, Ally.
If you want to change the order of your assignments you can do that, just click on Edit Assignments. Hi! Glad to be here. Click on that little pencil on paper icon under edit.
Here’s that little “pop” up again. Now change the # to the actual assignment you want it to be and click Apply. I’ll change this to be number 4. (Aeries will tell you that an assignment already has that number. If you click Yes and Apply it will make the necessary adjustments. Look at mine! BEFORE AFTER
Thanks, Ally! Bye everybody! You did it! Way to go! I am sure you still have some questions and a lot to learn, but time will be your guide now. Play with the program and you will find many more cool features I didn’t get to or even knew existed. And, as always, you can contact Scooter at srice@smbsd.net with specific questions.