Download
1 / 10
100 likes | 193 Vues
Lesson 27: Adding Multimedia to Presentations. Learning Objectives. After studying this lesson, you will be able to: Acquire and add audio to a presentation Acquire and add video to a presentation Edit movies and add movie effects Use slide show timings Loop a presentation endlessly.

E N D
Learning Objectives • After studying this lesson, you will be able to: • Acquire and add audio to a presentation • Acquire and add video to a presentation • Edit movies and add movie effects • Use slide show timings • Loop a presentation endlessly
Understanding Multimedia • Types of multimedia • Audio (Sound) • MP3, WAV, AIFF, MIDI, and others • Video (Movies) • MPG, AVI • Animated GIFs • Available with the Clip Art panel and online Tip! Most multimedia files are separate from and linked to presentations.
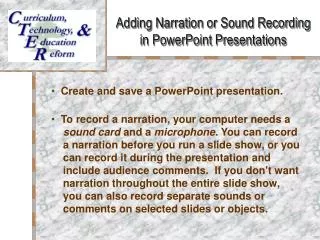
Using Audio in Presentations • Acquiring sound • Clip Art panel • Ripping from a CD • Downloading from the Internet • Recording original • Play sound options • Automatically – Begins when the slide loads • When Clicked – Begins when you click the speaker icon • Play Across Slides – Begins when the slide show loads and continues throughout the presentation
Using Audio in Presentations • Embedding audio • Sound “absorbed” into, rather than linked to, a presentation • Any type of audio file can be embedded if less than 50 MB • Benefit: You don’t have to worry about moving or renaming • Downside: Embedding increases the file size Tip! Presentations with embedded files are significantly larger than those without embedded files.
Creating Slide Show Timings • Set PowerPoint to automatically move to the next slide after a set amount of time • Use for presentations with/without sound • See QR: Determining Slide Timings for the mathematical steps • Rehearse Timings feature • Recite your speech while the slide automatically advance • Adjust timings as necessary • Practice makes perfect!
Using Video in Presentations • Inserting movies • From the Clip Art task pane • From your personal collection • From a website • Animated GIFs • Graphics Interchange Format • Simple animation akin to an old-fashioned flip book\ A star identified an animated GIF Tip! Take care when resizing animated GIFs. If they are made too large, they will look blurry.
Using Video in Presentations • File formats • ASF, AVI, MPEG, WMV • Codes • Compressor/decompressor • Video options • Play Movie • Hide During Show • Hiding the moving placeholder means you can’t start the movie during the presentation! • Play Full Screen • Loop Until Stopped • Rewind Movie After Playing • Slide Show Volume
Using Video in Presentation • Editing videos • Trim the start and end (cut off the beginning/end) • Fade in or out • Video effects • Use Video Styles to apply many different effects