Download
1 / 15
150 likes | 213 Vues
Click to Enter. Introduction to project. You may have used MissionMaker in Year 7. Now we are going to show you how to use it properly. There are 12 lessons altogether. The first 5 will help you to use MissionMaker. In these first 5 lessons, you will not be making a complete game.

E N D
Click to Enter
Introduction to project • You may have used MissionMaker in Year 7. Now we are going to show you how to use it properly. • There are 12 lessons altogether. The first 5 will help you to use MissionMaker. In these first 5 lessons, you will not be making a complete game. • Providing you are up to speed, in the last 7 lessons you will use your new skills to plan, create, test and evaluate a new mission. Click to go to contents
Lesson 1Create first game. • Starter: For 10 minutes, play some Mission Maker example games. Click here. • With a partner, write down some comments on what makes a good game (consider audience) • Use the comments from the to create success criteria in Word • Load MissionMaker – create and edit a 5 roomed world. Teacher will demonstrate or click here. • Plenary: What makes a good game? Back to contents
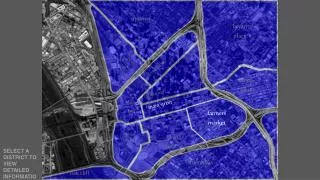
Mission Maker example games Back to contents
Lesson 2Active Props and Rules • Starter: Show and discuss how Active Props and Doors can be used. • Add Active Props and Rules e.g Opening a drawer.Teacher will demonstrate or click here. • Add Doors and Rules.Teacher will demonstrate or click here. • Plenary: Run through tools used so far – can use broadcast on Impero for a pupil to demonstrate. Back to contents
Lesson 3Pickups & Spatial Triggers • Starter: Show and discuss how Pickups and Spatial Triggers can be used (Discuss IF and THEN statements) • Create a one roomed mission. Add a pickup, active prop/door along with Spatial Trigger and Rule e.g Using a key to open a chest/door.Teacher will demonstrate or click here. • Look at Toggle States. Teacher will demonstrate or click here. • Plenary: Run through tools so far Back to contents
Lesson 4Characters & Audio • Starter: Show and discuss how character interaction & audio can improve a game. • Add and edit characters. Teacher will demonstrate or click here. • Add audio. Teacher will demonstrate or click here. • Plenary: Run through tools so far Back to contents
Lesson 5Media & Global Triggers • Starter: Show and discuss how pop ups are used to add communication to games. • Add pop ups e.g. Instruction for opening the door. Teacher will demonstrate or click here. • Show how to use Global Triggers to activate pop ups • Add Global Trigger e.g. Mission Objective at start of game or End of Mission pop up. • Plenary: Run through tools so far Back to contents
Plan a new mission • Starter: What makes a successful mission? You could revisit the blog from Lesson 1 • Plan your mission using the Mission Planning Form. • Ask another pupil to read your plan and give you some feedback. Write the feedback on your plan. Back to contents
Create your mission • Use your skills to create your mission • Test it as you are going along. It is easier to alter a small mistake than trying to find lots of mistakes in a whole game. • If you can’t remember how to do something, look back at this slideshow. Each lesson demonstrates how to apply each technique. Back to contents
Test your mission • Although you have been testing your mission as you have been building it, once it is complete, you need to test it once more. • Use this test sheet for your mission. • By the way, you’ll need to play your mission to test it Back to contents
Evaluate your Mission • Most of the time, when we create something (anything!), if we had the chance to do it again, we may do it differently. • Use this evaluation sheet to review what you have done. You need to talk about things you are proud of and things you may change. If you are going to make a change, what would you do differently. • Remember, the best designers are those that can be critical about their work. As the saying goes “We learn by our mistakes”. Don’t be afraid to point out your mistakes (or bad bits) – it will make you better overall. Back to contents
3rd Party Evaluation • You’ve now earned the opportunity to play on other peoples missions. • Evaluate their mission as you are playing. Complete this 3rd Party Evaluation form. Back to contents
Improve your Mission. • You should have evaluated your own mission and hopefully someone else has evaluated it for you as well. • Use the information on your evaluation sheets to make improvements to your game. • Write down the improvements you have made. Back to contents