Download
1 / 28
1.1k likes | 7.02k Vues
History. 1- Bonded pontic2- Cast perforated resin bonded FPD (Mechanical retention) 3- Etched cast resin bonded FPD (Micromechanical retention )4- Macroscopic mechanical resin bonded (Virginia bridge) 5- Chemical bonding resin bonded (Adhesion bridge).

E N D
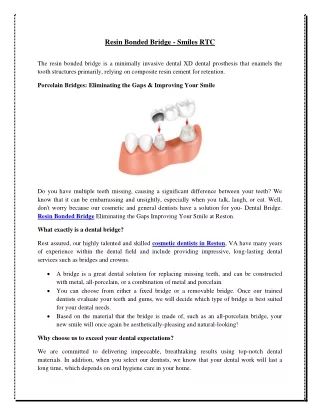
1. Resin-Bonded Fixed Partial Dentures (RBFPD) Dr Wael Al-Omari
BDS, MDentSi, PhD
3. Bonded Pontic Extracted natural tooth or acrylic pontic bonded with composite resin directly to proximal ad lingual surfaces of abutment teeth.
Have limited lifetime
Short-term replacement
4. Cast perforated resin bonded FPD (Mechanical retention) Rochette Bridge (1973)
Cast perforated metal retainers bonded to abutment teeth and metal-ceramic pontic to
replace missing tooth
Periodontal splint
Cemented with composite
Disadvantages:
1- Weakening of metal retainer by perforations
2- Wear of exposed resin at the perforations.
3- Limited adhesion of the metal provided by perforations.
5. Etched cast resin bonded FPD (Micromechanical retention- �Maryalnd Bridge� ) Advantages over perforated retainers:
1- Retention improved due to bonding of resin to etched metal bond which is stronger than resin to etched enamel.
2- Oral surface of cast retainers is highly polished and reduce plaque accumulation.
Electrolytic etching of base metal alloys.
Chemical etching or gel etching with similar results.
First generation of resin cement was used for bonding (Comspan)
6. Macroscopic mechanical resin bonded (Virginia bridge) Visible macroscopic mechanical undercuts
Lost salt crystal technique
Cast mesh pattern
7. Chemical bonding resin bonded FPD (Adhesion bridge) Direct bonding to metal using chemically active agents.
Super bond(methyl methacrylate polymer powder and MMA liquid)? highest initial bond strength , low elastic modulous, high fracture toughness.
BisGMA based composite luting cement modified with adhesion promoter
Panavia ? excellent bond to base metal alloys an to tin-plated gold and gold palladium � based alloy.
Panavia F 2.0? dual cure system that releases fluoride.
Improve bonding by air abrasion, silica-carbon layer & silanation and Rocatec system (silica with alumina)
8. Advantages of RBFPD Minimal tooth preparation
Minimal pulpal trauma
Anesthesia is not required.
Less periodontal irritation
Impression making is simplified
Provisional restorations usually not required.
Chair time and cost are reduced.
Rebonding possible
9. Disadvantages of RBFPD Uncertain longevity
Irreversible procedure
(Enamel removal).
No space correction
No alignment correction.
Esthetic compromised in posterior teeth
10. Indications Short span with caries free and properly aligned abutments.
For children and adolescents
Mandibular and maxillary incisors replacement.
Single posterior tooth replacement with favorable occlusion.
Periodontal splint
11. Contraindications Long span
Deep overbite
Parafunctional activity
Extensive caries or restoration
Compromised enamel structure
Nickel allergy
Edentulous space is larger or smaller than normal tooth size
Presence of diastema
12. Fabrication Three Fabrication Phases:
Preparation of the abutment teeth
Design of the restoration
Bonding
13. Preparation of the abutment teeth Principle of abutment preparation
Distinct path of insertion
Proximal undercuts removed
Occlusal or cingulum rests
Proximal groove or slots to increase resistance.
More than half the circumference of the tooth prepared (wrapped around).
Definitive supragingival margin established
14. Anterior tooth preparation & framework design
Use the largest possible surface of enamel without compromising esthetics.
Ideally, replacing single missing tooth, single mesial & distal abutment is sufficient. If two teeth to be replaced, double abutments can be considered if abutments were periodontally compromised.
Cantilever design proved successful
Supragingival chamfer finish line is preferred.
Light chamfer finish line 1.0 mm supagingivally
15. Anterior tooth preparation & framework design
Margin extend incisally & interproximally.
Margin on the proximal plane should extend as far facially as possible, extending beyond the proximal contact point at the proximal surface adjacent to edentulous space
Prepare 0.5mm slot slightly lingual to the facial margin.
At least 0.5mm interocclusal clearance is needed
Preparation should be 2.0 mm of the incisal edge
17. Posterior tooth preparation & framework design
18. Posterior tooth preparation & framework design
20. Clinical Success
21. Step by Step procedure Leave the margin 1mm from the incisal/occlusal edge, & 1mm from the gingival margin
Prepare more than half the abutment if possible �180o�
Make definitive impressions
Provide temporary occlusal stops.
22. Bonding the Restoration Cements:
Composite resin are used in bonding metal framework
to etched enamel.
Conventional BIS-GMA resins have been replaced by
the recently developed resin-metal adhesives (ex.
Panavia). Use oxygen barrier at the margins
Always air abrade the fitting surface with 50 micron
aluminum oxide
Use tin plating and metal primers for noble alloys
The use of silica coating enhances the bonding.
Rubber dam isolation reduces risk of debonding
23. Step by Step Bonding Clean the tooth with pumice & water, etch the enamel for 30 seconds
Apply the primer for 30 seconds then dry
Apply the luting cement to the fitting surface of the restoration
Seat the restoration firmly & maintain pressure while removing the excess of the cement
Light cure the margins and apply Oxyguard II to exclude air & allow setting around the margins
After 2 minutes remove & rinse ruminants of the Oxyguard material
27. Postoperative Care Regular check ups are important to monitor any possible debonding
Aid of visual examination & gentle pressure with sharp explorer should be performed to confirm such complication
Patients should be warned about such complications
Attention to periodontal health is critical
Clean with air abrasion and acid etch enamel before re-bonding