Download

1 / 45
450 likes | 674 Vues
CC SQL Utilities. CC SQL Utilities Overview. The Primary tech tool used for viewing and changing data directly in the database Backup and restore Import and exporting SQL Query editor Attaching and detaching databases Other tech tools. CC SQL Utilities Logon. Choose SQL sever

E N D
CC SQL Utilities Overview • The Primary tech tool used for viewing and changing data directly in the database • Backup and restore • Import and exporting • SQL Query editor • Attaching and detaching databases • Other tech tools
CC SQL Utilities Logon • Choose SQL sever • computer name\comcash • Enter username and password • sa - no password
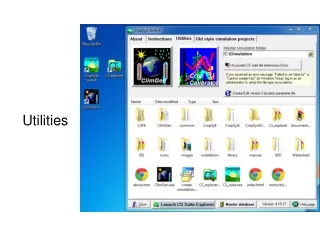
Utilities Launches • Initially the server name appears • Run SQL Server Service Manager • Check Program Versions • Attach Database • Prompts for .mdf file • Check for CC SQL Utilities update • Needs internet connection • Expand the server • The attached databases are displayed
Select a database • The database properties are displayed • Size • Date created • File location • Name of .mdf file • Name of .ldf file
Go Live • Clears out any unwanted data entered while evaluating ComCash • Select to keep some data (optional) • Customers • Cashiers • Registers • Products • Quick Service Menu • Vendors • Consignors • Prompts to backup existing data
Empty one or more tables • Very powerful • Always BACKUP data first
Display row count for all tables in the database • Helpful tool to display the number of rows in all tables • Click on “Number of Rows” column header to list table in order of row count.
Detach Database • Cannot detach until all connections are cleared first
Change Location • Changes the location number the data is associated with
Delete Location • Deletes all records associated with a specified location number
Set modified flags in one or more tables • Marks records as “modified” for specified tables (forces records to poll) • Prompts for location number
Clear modified flags in one or more tables • Clears the “modified” property of records for tables specified. (records will not poll)
SQL Query Interface Utility • Warns user – this is a very powerful utility • Can write and run SQL statements • Select • Update • Delete • Insert • Results are returned in a powerful grid format
Grids in CC SQL Utilities • Click column headers to: • Sort data by any field • Drag the column header up • to group bar to Group data by any field • Filter Data by: • All – no filter • Selection – choose an available value from a field • Custom – use logic to build custom filters (can be saved and recalled)
Custom Filters • Equals \ does not equal • Is less than \ is less than or equal to • Is greater than \ is greater than or equal to • Is like \ is not like • Use _ to represent any single character • Use % to represent any series of characters • Is blank \ is not blank • Use And\or operators to create compound filters
Print Grids as a report • Use the report designer feature to customize the report
Backup Manager Overview • Creates a .bak file manually or automaticallyWhen restored, it replaces existing data (does not add to it) • Backs up, literally, all the data • Can be moved to another computer and restored • All prior backups are listed in the back up registry making them easy to find and restore. • Marked with date\time stamp
Automatic Backups • Turn on automatic backup feature in ComCash Manager Registers • Entire database is backed up daily with close of day • Backups are named for the day of the week (Monday, Tuesday, Wednesday, etc.) • This Monday’s backup will overwrite last Monday’s backup • .bak stored in C:\Program Files\ComCash\CCDatabases\Backups • Offload c:\Program Files\ComCash 8.0\CCDatabase\backups folder once a week for a 365 day accounting of the data • Restore the “auto-backups” just like any other backup
Manual Backups • Create a new backup • Prompts user for a directory • Appears in the registry • Restore selected backup • Overwrite selected backup • Delete selected backup • Register a backup from another server.bak file backed up from another serveronly registered backups can be restored
Expand the database and select a table • Initially the first 200 rows are displayed • One does not want to inadvertently display all rows in a 500,000 line item table • Displayed in powerful grid
Read\Write Mode (toggle) • Read mode • Data can only be viewed • Read\write mode • Allows user to edit, append and delete data directly on grid
SP Helper Stings • Used by programmers and very advanced users to aid writing stored procedures and queries
Clear table • Empties the selected table
Exporting Data Overview • Data from any selected table can be exportedAll fields or only specified fields can be exported • All rows or only rows meeting specified criteria can be exported • Exported files includes field names for column headers • Data is exported to a .csv file (comma separated) • .csv is the most common file type for exported files • Can be imported into Microsoft Excel (and many other programs).Export wizard starts
Step 1 – Enter File Name • Prompts for file name/directoryUser can browse to the directory
Step 2 – Create / Load Data Map • Select fields to export (all or only selected) • Choose the order of fields to export • Save, Load, Rename, and Delete created data maps
Step 3 – Export the data • Offers user the option of entering a SQL ‘where’ clause to limit the exported data by specified criteria (i.e. where dept = 4) • Click Start • Progress bar is displayed • Number of rows exported is displayed
Import Data Overview • Uses a mapping method to import data from a .csv file into the selected table • Errors will be reported at the end of the import process and any rows not imported can be saved in a separate file so that they may be reviewed and corrected.
Step 1 – Pick your CSV File • Type in the name and path for (or browse to) your .csv file • Select the delimiter (tab or comma) • Check box: The first line of the CSV file contains field names • Check the box if you have prepared your file by titling each column with the field name the data is destined for • Check the box if the file was exported using CC SQL Utilities • Check box: Auto generate import rules based on CSV column names • Check the box if you checked the previous box and want the program to “auto-generate” rules for the import process to import data into fields where the field name matches the column header
Step 2 – Create / Load a Map • The table structure is displayed • Field name • Data type • Length • Required? • Delete, rename, load, and save created Maps • Create rules for all fields that are to receive data during the import. (You must create rules for “required” fields)
Import Map Rules • Import from a CSV column • Enter the column number from the CSV file
Import Map Rules • Insert a fixed text value • Enter the text value • Program will populate field with the same value for all rows imported • Example: you can use this feature to populate Size with “Large” for all rows imported.
Import Map Rules • Enter a fixed integer value (whole number) • Enter the integer value • Program will populate a field with the same value for all rows imported • Example: you can use this feature to populate the location_no field with 1 for all rows imported
Import Map Rules • Enter a fixed floating point value (number with a decimal in it) • Enter the floating point value • Program will populate field with the same value for all rows imported • Example: you could use this feature to set the price 1.99 for all rows imported
Import Map Rules • Insert an incrementing integer value from a fixed starting value • Enter the starting value • Enter the incrementing value • Example: if you re importing products, you can use this option to generate PLUs starting from 400000001
Import Map Rules • Insert an incrementing value starting from the columns current max value • Enter the increment value • Example: if you are importing customers, you can use this feature to generate incrementing customer numbers for all rows imported starting with the highest customer number already in you customer table.
Import Map Rules • Bit value • Inserts a fixed bit value for all rows imported • Example: you can use the set the modified field to true (1) for all rows imported
Ready to import • Click Start • Progress bar is displayed • Error log is created and user is given the option to save it • This is where the bad_CSV_rows information will go
Set Modified • Marks records as “modified” for the selected table (forces records to poll) • Prompts for location number • Clear Modified flags • Un-marks records as “modified” for the selected table (records will not poll) • Prompts for location number
View Table Structure • Field names • Field types • i.e. char, int, bit • Length • Required • Nulls allowed / not allowed
View Table Contents • Shows table contents again when viewing table structure