Download

1 / 22
220 likes | 686 Vues
Native Americans Leslee Eldridge ED 417 01 Winter 2008 Native Americans Unit Grade level 3 Lesson: To learn about Native American Culture through literature, arts, and crafts. Objective #1

E N D
Native Americans Leslee Eldridge ED 417 01 Winter 2008
Native Americans Unit • Grade level 3 • Lesson: To learn about Native American Culture through literature, arts, and crafts.
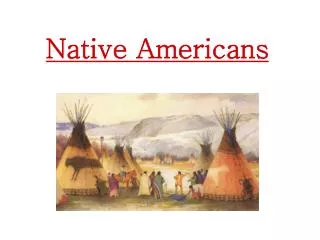
Objective #1 • The first objective is to explore Native American life in the areas of where they lived, their government, their rituals, living conditions, family life, etc.
Objective #2 • The second objective is to experience the life of Native Americans by learning their rituals, songs, dances, and food.
Sand Painting Materials • Empty jars or plastic yogurt containers • Powdered tempera paints in a variety of colors • Sand (from the beach or playground • Paper • pencils • glue • Popsicle sticks • Plastic spoons and a plastic or Styrofoam tray
Sand Painting Directions • Draw out a picture on your paper and remember to keep it simple. • Once the pencil sketch is complete, pour some sand into an empty container. Choose a color of powdered tempera and add just a little to dry sand. You will have to experiment when mixing the sand and the tempera to see how little or how much tempera you need. For more vibrant colors add more tempera. • Once there are a few colors of sand mixed up, the "painting" can begin. Work at one small section at a time. First decide where the color is going, put an even layer of glue on the paper and pour some colored sand onto the glue using a plastic spoon. • Repeat until the entire paper is covered. . • Let the sand painting dry and seal it using either artist's fixative, hair spray, or spray it with a mixture of glue and water (80% glue, 20% water).
Rain Stick Materials • Mailing tube • Colored contact paper (optional) • Colored construction paper • Glue • Thick poster board or cardboard • Scissors • Stapler • Assorted dried beans,dried popcorn, dried rice, et.
Rain Stick Directions • Step One: First decorate the outside of the mailing tube by covering it with the colored contact paper or construction paper. Then use the construction paper (or colored contact paper scraps) to glue decorations on the contact paper. You may even get fancy and use glitter, stickers, or anything you wish! Also take this opportunity to glue the bottom on the mailing tube if there is a removable bottom. This will assure that the rice and beans will not fall out when it is time to put them in. • Step Two: Now you are ready to make the inside of the rain stick. Measure the diameter of the mailing tube and cut 2 identical cardboard strips that are just slightly larger in diameter than the mailing tube and just slightly shorter as well. • Step Three: Next place glue down the center of one of the pieces of cardboard, and carefully glue the other piece evenly on top. If you wish to make it a little stronger, just staple the two pieces of cardboard together by stacking them one on top of the other and placing staples down the very center.
Rain Stick Directions Cont... • Step Four: Take your scissors and make cuts all along each side of each piece of poster board, almost all the way to the center. It doesn't matter how far apart the cuts are, in fact, the more irregular the better! Now open the cardboard and bend all four sides out to create a circular form that will fill the mailing tube. • Step Five: Now it is time to bend the tabs created by the cuts you made in the cardboard. Bend one up, the next down, to make the cardboard tube look like a spinal cord. It needs to be as irregular as possible, so do not worry about being precise. • Step Six: Jam the "spinal cord" down into the mailing tube. There is no technique involved here! • Step Seven: Now it is time to put some dried beans into the tube to make the rain sound. Have fun experimenting with al types of dried beans, rice, corn et. • Step Eight: Glue the top back on the mailing tube and when it is dry, have fun creating your own rain sounds indoors!
Totem Pole Materials • 1 paper towel tube • markers or crayons • Brown construction paper or butcher paper • Ruler • Scissors • Tape • White glue • Popsicle sticks • Glue gun (optional) • Craft foam (optional)
Totem Pole Directions • Step One: Cut a piece of brown construction paper large enough to wrap around the entire paper towel tube with just a little overlap. • Step Two: Lay the construction paper flat and use the ruler to divide it into 4 or more sections. Draw an animal face on the middle of each section, making sure that the face will show on the front of the totem pole. Use paint or colored markers to decorate the faces. Allow it to dry. • Step Three: Wrap the construction paper around the paper towel tube and glue the seams in place. • Step Four: Draw wings for some of the totem faces on construction paper or craft foam, and decorate them with crayons, markers or paint. Cut them out and attach them to the back of the tube with craft glue or tape. • Step Five: Snip a small triangle shape from construction paper, crease it down the center to make it pointy, and glue it to the bird faces. • Step Six: Create a base for the totem pole by gluing it to 2 Popsicle sticks. A hot glue gun works well for this.
Kachina DollMaterials • A toilet paper or other cardboard • tube Scissors • Tape • Hot glue (and paper glue if you're using construction paper for the clothing) • A styrofoam ball or a ping-pong ball (or other object for the doll's head, like clay or a small box) • Tempera paint, • acrylic paint and/or markers • Brushes • Scraps of construction paper, felt and/or fabric, Yarn, Feathers, beads, buttons, shells, ribbons, and other decorative objects • Thick cardboard, cut from a sturdy box (for the doll's base)
Kachina Doll Directions • Make two slits opposite each other in a toilet paper tube - they should go about a third of the way up the tube. • Make two short cuts at the ends of each slit you just made, cutting a "T" shape on each side of the roll (the flaps under the "T"s will be the legs of the doll). • Curve each of the two flaps you just made into small cylinders - these will be the doll's legs. Make sure that the edges meet exactly. Use tape to secure each cylinder (doll's leg). • Using hot glue, attach a styrofoam ball or a ping-pong ball to the top of the tube (this will be the doll's head). You can use other objects for the head, like modelling clay or a small box. • If the ball is a bit too small for the tube, make a series of cuts along the top of the cardboard tube, forming flaps. Then fold the flaps into the tube. Glue the ball to the flaps. Let the glue cool and set. • First, think of the theme that your doll will represent. Then you can decorate and dress your doll.
Kachina Doll Directions Cont... • Paint the head and let it dry. Then draw in the facial features using markers or paint. To make hair, glue on bits of yarn or felt scraps (or something else!). • Cover the body and legs with pieces of construction paper, felt and/or fabric. Glue them to the doll (hot glue works well with felt and fabric - tape or glue is better for construction paper). • Decorate the figure by gluing on feathers, beads, buttons, shells, ribbons, and/or other decorative objects. • Make a base (oval, circular, rectangular or another shape) for your doll out of thick cardboard. • Think of your doll's theme when making its base. If your doll represented water, you could design a base that looked like a pool of water; if your doll represented the sun, the base could look like a sunburst. • Using hot glue, attach the Kachina doll to its base. • Decorate the base using paint, paper, beads, or anything else that fits into the theme of your Kachina doll.
Songs and Dances Materials • Different Native American Music CDs • CD Player • Dance Steps
Songs and Dances Directions • Give the students a copy of the dance moves. Allow the class a time to go through the steps. • Put the CD in the CD Player and turn it on. • Have the children dance to the songs.
Websites • http://www.nativetech.org • http://nativeamericans.mrdonn.org/north.html • http://native-languages.org/kids.htm • http://www.civilization.ca/kids/kidse.asp • http://www.wplwloo.lib.ia.us/kids.html