Download
1 / 29
290 likes | 370 Vues
Winter Weather Precipitation Measurements & CoCoRaHS. So…How Do We Correctly Observe Rain and Snow?. So…How Do We Correctly Observe Rain and Snow?. Rain is easy… We use a “ Rain Gage ”!. So…How Do We Correctly Observe Rain and Snow?.

E N D
So…How Do We Correctly Observe Rain and Snow?
So…How Do We Correctly Observe Rain and Snow? Rain is easy… We use a “Rain Gage”!
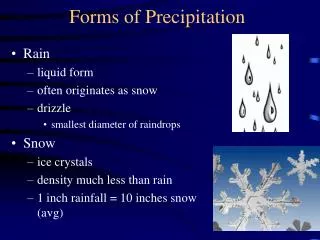
So…How Do We Correctly Observe Rain and Snow? • During the warm season, liquid is measured from a graduated inner cylinder. • During the cold season: We remove the funnel and inner cylinder, to collect snow in the outer cylinder (more on that later).
So…How Do We Correctly Observe Rain and Snow? Winter precipitation is much more complicated and riddled with bad ideas and misconceptions…let’s tackle those first!
First…A Few Misconceptions • 10 to 1 ratio (i.e. 1” of water = 10” of snow) • Relatively accurate for many large scale winter events in the midwest, but MOST of the Lake Effect Snow events in “The Snow Belt” lack the moisture for such ratios. • - Anywhere from 20:1 to 40:1 is more likely. • - Precipitation/Snowfall Ratios are temperature dependent. (Colder Temps = Less Liquid)Here’s a couple “real-world” examples, to show you what I’m talking ‘bout……
First…A Few Misconceptions • 10 to 1 ratio (i.e. 1” of water = 10” of snow) Weather is not That pretty! That’s more Like it!!!
Proper Measuring First, Some Definitions: Snowfall vs. Snow Depth: The difference and why it’s important • Snowfall- The amount of snow that has fallen since the last measurement. A specific amount over a specific time period(then start again at zero) • Snow Depth- The Cumulative Total!!!The accumulation of snow, ice, everything on the ground at reporting time, since winter began (think “snow pack”)
Winter Storm Watches Purpose:Winter weather watches provide our customers 12 to 48 hour notice of a hazardous weather event which has the potential to threaten life or property. Time Frame:They are normally issued for the 2nd and/or 3rd periods of the forecast. Fourth period watches are restricted to the most significant events.
Winter Storm Warnings Purpose:Winter weather warnings are issued when hazardous winter weather is occurring, imminent or has a high probability of occurring. Time Frame: They are normally issued for the 1st and 2nd periods. Occasionally, with high confidence for significant events, warnings will extend into the 3rd period.
Measurement Specifics • Snowfall is measured to the nearest tenthof an inch. (e.g.- 2.3”) • Snow depth is measured to the nearestwhole inch. (e.g.- 2”) • Snowfall is what we use to base and verify warnings and advisories on (6.2” in 12 hours) • You may pick up 4 inches of new snowfall, but it may only add 2 inches to your snow depth.(especially true in our area due to the settling of dry fluffy LES) • Point being, they are two separate measurements and are treated as such
Measuring Snowfall “Perfection” is not possible…“Representative” is the goal! Using a ruler or yardstick (graduated in tenths if possible), measure on a snowboard or other hard, flat and level object. • Grassy surfaces are too variable and inaccurate (big “fluff factor”). • Metal retains heat, especially dark colored. • Wood (preferably white or light colored) or vinyl/plastic composite works best. • Ensure proper sighting: • Snowboard location should not be in a completely sheltered area, or in a wide open field. • A small clearing (such as a backyard) provides a wind break for the snowboard, but open enough to receive representative snowfall. • A 45 degree angle view of the sky all around you is ideal.
Measuring Snowfall • Take several measurements and average to the nearest tenth of an inch. • The more measurements you take, the more representative your reading will be. It may be necessary to have multiple measuring sites. • Clear your board off to prepare for the next measurement. • Reset the snow board level with the top of the existing snow. • If it’s too high, new snowfall could blow off…if it’s too low, new snow could blow on.
Measuring Snow Depth • Measuring Snow Depth- • More straight forward, but still an art. • Take multiple readings from around your yard and average to the nearest whole inch. The more measurements taken, the more representative the report. • Avoid wind blown areas. • Take into account any pocket of air created by grassy surfaces, especially early in the season (again, the “fluff factor”). • Take care (late in the season) not to hit a layer of ice and think you hit the ground.
Let’s Walk Through the Process Step 1 Before the onset of colder weather and/or snow, remove the top and inner cylinder of the gage:
Let’s Walk Through the Process Step 2 – Measure the Snowfall Take 2 (or more) measurements in partially sheltered locations (preferably on snow boards), then average them to get your snowfall. 5.7 +6.1 +5.1 16.9 ÷ 3 5.63 5.6 inches of snowfall. Remember, snowfall is reported to the nearest tenth of an inch.
Let’s Walk Through the Process Step 3 – Measure the Snow Depth Take 2 (or more) measurements throughout your yard, then average them to get the snow depth. 12.9 +11.8 +12.6 37.3 ÷ 3 12.43 12 inches of snow depth. Remember, snow depth is reported to the closest whole inch.
Let’s Walk Through the Process Step 4 Collect the outer cylinder, then add a measured amount of hot water (using the inner cylinder) to melt the new snow. Be sure to write down the exact amount of water added!!
Let’s Walk Through the Process Step 5 Once snow in the inner cylinder is completely melted, pour liquid back into the smaller cylinder and take another measurement. 0.50”
Let’s Walk Through the Process Step 6 Time for some simple math! Reading of 0.50 inches of water minus 0.22 inches of water added gives a final reading of 0.28 inches for liquid equivalent of new fallen snow. • Tube full 0.50 • Water added 0.22 • -------------------------------- • Final reading 0.28
Last Step – Report the Information! Step 7 OK, you made me do all this hard work – now what do I do with the information? Let us know!!
3 Easy Ways to Report • Phone: 1-800-MI-STORM (1-800-647-8676) • - Real time weather reports anytime (24X7) • E-Spotter: http://espotter.weather.gov • - Online real time weather reports anytime (24X7) • CoCoRaHS: http://www.cocorahs.org • - Use 800# to phone in significant events outside normal CoCoRaHS report time.
What is CoCoRaHS? Community Collaborative Rain and Hail (and Snow) Study • Unique, non-profit community-based observing network • Comprised entirely of volunteers – currently total 14,000+ • Volunteers range in age from 7 years old to 80+
Origin of CoCoRaHS • Developed after deadly Fort Collins, CO flash flood event on July 28, 1997 • Only 1 to 2 inches of rain fell at the “official” observing sites, but 9-12 inches fell in the foothills • $200 million in damages and 5 fatalities because “nobody knew it rained up in the mountains” • CoCoRaHS formed a year later to “fill in the gaps”
Why CoCoRaHS? 1) Precipitation isimportant and highly variable2) Data sources are few and rain gauges are far apart3) Measurements are not always accurate (especially snow)4) Floods and Drought are a part of a “normal” climate cycle 5) Storm reports can and do save lives!
Who uses CoCoRaHS data? National Weather Service NASA Private sector meteorologists Hydrologists /climatologists Emergency managers City planners and utilities Insurance adjusters USDA Engineers Ranchers and farmers Researchers and scientists …and many others
Joining CoCoRaHS Thingswe need from you: Completed application form (on-line) A commitment of at least one year A sincere desire to help study and and learn about storms THAT’S IT! No Left Arm Needed!
Come Join Us! • All you need is: • - standard 4-inch rain gage (www.cocorahs.org) • - an internet connection • - a maximum of 5 minutes per day • Sign up at http://www.cocorahs.org. • Simply by sitting through this presentation (anyone still awake?), you are fully qualified to join the CoCoRaHS program. • We welcome your participation • and look forward to your reports!
Thanks for attending! • Questions, comments, or concerns? • Observing Questions Contact: • Keith.Berger@noaa.gov • CoCoRaHS Contact: • David.Lawrence@noaa.gov