Download

1 / 7
80 likes | 85 Vues
Are you looking one the best online kids gaming place, here Just family Fun offers you educational games for kids in which you can get Simply read on Educational Games For Kids Online for the list of free printable worksheets for all the family to enjoy. New Activities are added everyday so make sure to keep checking our website for more.

E N D
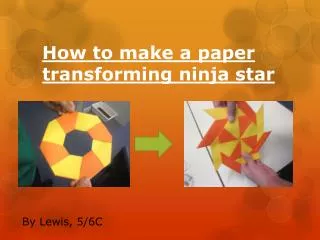
How To Make A Paper Pinwheel Tutorial Paper pinwheels are an amazing craft idea for kids. Learning to make one is a perfect beginning for a lot of learning points such as windmills, wind turbines and renewable energy. Though you are an adult, you can enjoy this craft project too and the pinwheels can be used to decorate your outdoor space in the summer season. Making colorful pinwheels provides perfect decoration for any indoor occasion as well, as you can set up a fan nearby to create the required breeze. Pinwheels spinning in the wind is a view that can be very relaxing for a busy mind.
Materials Needed 1. Colored paper 2. Scissors 3.Straw 4. Glue 5. Craft wire 6. Beads
How To Make A paper Pinwheel • Step 1: Cut four paper squares, 9cm x 9cm each. You can cut these out of four different colors to make a multi-colored pinwheel. • Step 2: Take a square and fold the bottom right corner to the upper left corner to make a crease. • Step 3: Cut along the crease and you will get two triangle shapes. Do this to the rest of the squares. Then, you will have eight triangles in four different colors. • Step 4: Cut a small circle out of paper. • Step 5: Take one triangle and glue the 90 degree corner onto the middle of the small circle.
Step 6: Glue the next triangle as shown in the picture. The upper triangle should overlap so that both outside corners of the bottom one are visible. • Step 7: Continue round with the remaining six triangles so they create a wheel as shown in the picture. Adjust each triangle as you go to make sure they are evenly spaced around the full circle. • Step 8: With each triangle in turn, fold the top corner inwards and glue the edge into the middle one by one. Make sure to start with one and continue consecutively round the circle. Also make sure you bend rather than folding the corners in, so that they loop over and create a 3D effect in the middle of the wheel. • Step 9: Cut another small circle and glue it carefully onto the middle of the wheel to cover the overlapping triangle corners. • Step 10: Take a piece of craft wire and bend the edge into a small ring shape.
Step 11: Place a bead over the end of the wire and squash the wire ring slightly so that the bead will stay in place. • Step 12: Poke the other end of the wire through the center of the ring and pull it through so the bead lies flush with the paper. Then thread another bead onto the wire on the other side. • Step 13: Take the straw and attach it to the pinwheel by wrapping the rest of the wire around it. Ta- Da! You are done. Just look at your pinwheel spinning in the wind and enjoy. If you enjoyed making the paper pinwheel , Please checkout our other step by step tutorials HERE
AnyQuestions? You can find me athttps://justfamilyfun.com/contact@justfamilyfun.com