Download
1 / 49
500 likes | 692 Vues
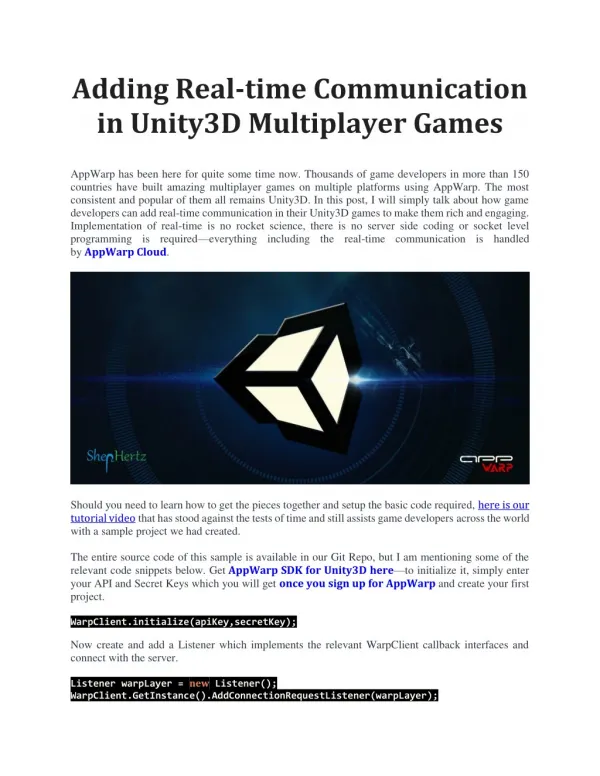
Unity3D Tutorial. What is Unity. Free* multi platform (game) development tool Set up scenes visually Attach components to Gameobjects Logic in scripts (Mono-C# or Javascript) Integrated physics (PhysX), RakNet (networking), sound etc... Multi-platform, including web player

E N D
What is Unity • Free* multi platform (game) development tool • Set up scenes visually • Attach components to Gameobjects • Logic in scripts (Mono-C# or Javascript) • Integrated physics (PhysX), RakNet • (networking), sound etc... • Multi-platform, including web player • Unity 3D uses a left-handed coordinate system
What is Unity • 유니티의역사 • 2005년 6월, 덴마크의 무명 개발자 3명이 모여 맥 전용 게임 엔진 공개 • 2005년 11월, 윈도우 플랫폼 지원 • 2006년 11월, 5종류의 웹브라우저 지원 • 2008년 Wii와 아이폰 지원 • 2010년 9월, 안드로이드, Xbox 360, Playstation 3 지원 • 2012년 2월, 플래시 지원 • Unity 4.3 - 2D Game Development Walkthrough
Where to Get.. • Tutorial • http://unity3d.com/learn • Download • http://unity3d.com/unity/download
Unity Interface • Learning the Interface • The Main Editor Window is made up of several Tabbed Windows, called Views • Project Browser , Hierarchy , Toolbar , Scene View • Game View , Inspector , Other Views
Unity Interface • Project Browser • access and manage the assets that belong to your project
Unity Interface • Hierarchy • contains every GameObject in the current Scene • Parenting • To make any GameObject the child of another, drag the desired child onto the desired parent in the Hierarchy. • A child will inherit the movement and rotation of its parent. Two unparented objects One object parented to another
Unity Interface • Toolbar • The Toolbar consists of five basic controls. Each relate to different parts of the Editor. Transform Tools : used with the Scene View Transform Gizmo Toggles : affect the Scene View display Play/Pause/Step Buttons : used with the Game View Layers Drop-down : controls which objects are displayed in Scene View Layout Drop-down : controls arrangement of all Views
Unity Interface • Scene View • use the Scene View to select and position environments, the player, the camera, enemies, and all other GameObjects • Scene View Navigation • Move around on the X/Z plane : Use the arrow keys • Flythrough mode • Hold the right mouse button • This turns your mouse and WASD keys (plus Q and E for up and down) into quick first-person view navigation • Orbit the camera around the current pivot point • Hold Alt and left click-drag • Drag the Scene View camera around • Hold Alt and middle click-drag • Zoom the Scene View • Hold Alt and right click-drag
Unity Interface • Scene View • Scene Gizmo • displays the Scene Camera's current orientation • allows you to quickly modify the viewing angle • Each of the coloured "arms" of the gizmo represents a geometric axis • Click on the text underneath the gizmo to switch between the normal perspective view and an isometric view
Unity Interface • Scene View • Positioning GameObjects • Focusing • Select any GameObject and press the F key • Translate, Rotate, and Scale • use the Transform Tools in the Toolbar to Translate, Rotate, and Scale individual GameObjects
Unity Interface • Game View • Representative of your final, published game • Play Mode • Use the buttons in the Toolbar to control the Editor Play Mode and see how your published game will play • Game View Control Bar
Unity Interface • Inspector • displays detailed information about your currently selected GameObject, including all attached Components and their properties Modeling Texture Sound
Unity Interface • Other Views • The Console shows logs of messages, warnings, and errors. • The Animation View can be used to animate objects in the scene. • The Profiler can be used to investigate and find the performance bottle-necks in your game. • The Asset Server View can be used to manage version control of the project using Unity's Asset Server. • The Lightmapping View can be used to manage lightmaps using Unity's built-in lightmapping. • The Occlusion Culling View can be used to manage Occlusion Culling for improved performance.
Customizing Your Workspace • Customizing Your Workspace • customize your Layout of Views by click-dragging the Tab of any View to one of several locations
Unity Project • 프로젝트 구조 • Scene 과 Asset 으로구분
Unity Project • Scene • 게임제작을 위해 제공하는 하나의 가상 3차원 공간 • 게임(프로젝트)은 여러 개의 Scene으로 구성
Unity Project • Asset : Scene을 구성하기 위해 공용으로 사용되는 물질적인 자원
Unity Package • Unity Asset • 원본 파일이외에도 인스펙터 뷰를 통해 추가적으로 설정되는 부가정보가 합쳐져서 최종적으로 사용가능 • 유니티로 생성된 패키지: .unitypackage • Package Load • Assets Import Package Custom Package 디렉토리의 전체 경로에 한글이 들어가면 제대로 동작하지 않음
Unity Package • UnityBasic Package
Prefabs • Prefabs • a type of asset : a reusable GameObject stored in Project View • Prefabs으로 만들어진 Game Object는 Prefab설정을 변경하면 만들어진 Game Object의 설정도 동일하게 변경됨
Prefabs • Creating Prefabs • Choose Assets->Create->Prefab from the menu bar and name your new Prefab. • In Hierarchy View, select the GameObject you wish to make into a Prefab. • Drag & drop the GameObject from the Hierarchy onto the new Prefab in Project View. • The GameObject's name will turn blue to show that it is a Prefab.
Your First Game • Project: Roll-a-Ball • Create a simple rolling ball game that teaches you many of the principles of working with Game Objects, Components, Prefabs, Physics and Scripting
Your First Game • Project: Roll-a-Ball • 100. Introduction • 101. Setting up the game • 102. Moving the player • 103. Moving the camera • 104. Creating pick-up objects • 105. Collecting and counting • 106. Displaying text • 107. Publishing the game
Setting up the game • Setting up the game • File Menu New Project “Roll-a-ball” • Save Scene (Ctrl + S) • CreateNew Folder “_Scene” • Save as “MiniGame.unity” • Create Game Object “Plane” • Using Menu • GameObject Create Other Plane • Using Hierarchy Window • Create Tab Plane • Rename “Ground” • Select Gear Menu in Inspector View Reset • Focusing : Select Game Object “Ground” • Edit Frame Seleceted || F Key • Scale X 2, Y 1, Z 2
Setting up the game • Setting up the game • Create Game Object “Sphere” • GameObject in Main Menu Create Other Sphere • Rename “Player” & Reset • Select Gear Menu in Inspector View Reset • Focusing Game Object “Player” (F Key) • Change Position Y 0.5 Scene View Game View
Setting up the game • Add Directional Light • Create Tab in Hierarchy View Directional Light • Rename “Main Light” & Reset • Change Transform in Inspector View • Rotation X 30, Y 60 • Shadow Type : Soft Shadow • Resolution: Very High Resolution • Duplicate “Main Light” • Rename “Fill Light” & Reset • Change Transform in Inspector View • Rotation X -30, Y -60 • Change Color & Intensity 0.1 • Turn off Shadow
Setting up the game • Organizing Hierarchy • Create Empty Game Object Create Empty • Rename “Lighting” & Reset to The Origin • Drag “Main Light” & “Fill Light” into “Lighting” • Change Y Position 100
Moving the player • Moving the player • Moving the player object using player input and physics forces. • Select “Player” & Add Component “Physics” • Using Main Menu: Component Physics Rigidbody • Using Inspector : Press Button “Add Component” • Making Scripts • Create New Folder in Project View • Rename “Scripts” • Create C# Scripts • Assets Create C# Scripts (Main Menu) • Create C# Scripts in Project View • Select Player Add Component New Scripts • Rename “PlayerController”
Moving the player • Open MonoDevelop • Select “PlayerController” & Press Open Button in Inspector • Written below code & Build
Moving the player • Update() • Called Every Frame • Used for regular updates such as • Moving Non-Physics objects, Simple Timers, Receiving Input • Update interval time vary (호출될 때 마다 인터벌시간이 다름) • FixedUpdate() • CalledEvery Physics Step • Fixed Update interval are consistent (인터벌시간 항상일정) • Used for regular updates such as • Adjusting Physics (Rigidbody) objects • LateUpdate • Called once per frame, after Update() has finished • Used for a following camera (모든 Update 함수가 호출된 후 호출)
Moving the player • Open MonoDevelop • Using Help (Ctrl + ' )
Moving the player • Return to Unity Editor • Input Manager • EditProject SettingsInput menu • Play (Ctrl + P) • Use keyboard w, s ,a , d • Change Script Code & Play using UnityEngine; using System.Collections; public class PlayerController : MonoBehaviour { public float speed; void FixedUpdate() { float moveHorizontal = Input.GetAxis("Horizontal"); float moveVertical = Input.GetAxis("Vertical"); Vector3 movement = new Vector3(moveHorizontal, 0.0f, moveVertical); rigidbody.AddForce(movement*speed*Time.deltaTime); } } deltaTime : The time in seconds it took to complete the last frame
Moving the camera • Moving the camera • Select “Main Camera” & Change Transform • Position Y10, Rotation X 45 • Make “Main Camera” as Child of Player • Move & Rotate “Player” • But, Play Game No Good • Camera follow the ball with rotation • Detach “Main Camera”
Moving the camera • Create New script “CameraController” • Add Component to “Main Camera” • Open MonDevelop & Edit “CameraController” • Assign “Player” • Play The Game • Camera follow the ball without rotation using UnityEngine; using System.Collections; public class CameraController : MonoBehaviour { public GameObject Player; private Vector3 offset; // Use this for initialization void Start () { offset = transform.position; } void LateUpdate () { transform.position = Player.transform.position + offset; } }
Creating pick-up objects • Creating pick-up objects • Setting up the play area and creating pick-up objects. • Making Walls • Create Empty “Walls” & Reset Transform • Create New Cube “West Wall” • Move “West Wall” into “Walls” • Change Scale: X0.5, Y2, Z20.5, Translate: X-10 • Duplicate “West Wall” “East Wall” • Change Translate: X10 • Duplicate “West Wall” “North Wall” • Scale: X20.5, Y2, Z0.5, Translate: Z10 • Duplicate “North Wall” “South Wall” • Translate: Z-10
Creating pick-up objects • Create Pickups • Create New Cube “PickUp” & Reset • Select “Player” & Deselect checkbox • Select “PickUp” • Change Transform • Position: Y0.5, Rotation: X,Y, Z45, Scale: X,Y,Z0.5 • Rotating “PickUp” • Create New Script “Rotator” • Open MonDevelop & Edit “Rotator” • Play The Game : Rotating Cube using UnityEngine; using System.Collections; public class Rotator : MonoBehaviour { void Update () { transform.Rotate(new Vector3(15, 30, 45)*Time.deltaTime); } }
Creating pick-up objects • Making Prefabs Asset • Create Folder “Prefabs” in Project View • Drag “Pickup” object into “Prefabs” folder • Create Empty “PickUps” & Reset • Drag “Pickup” object into “PickUps” • Select Y Axis in Gizmo • Change Local Global mode • Duplicate “PickUp” (Ctrl + D) • Creating 12 Pickups
Collecting Pick-Up Object • Collecting Pick-Up Object • discussing physics, collisions and triggers. • Collider(충돌자) : 충돌시 오브젝트의 경계를 설정하는 콤포넌트 • Select “Player” & select checkbox • Check Sphere Collider • Open MonDevelop & Edit “PlayerController” void OnTriggerEnter(Collider other) { if(other.gameObject.tag == "PickUp") { other.gameObject.SetActive(false); } }
Collecting Pick-Up Object • There are 3 types of colliders in Unity3D: • Static colliders • Used for collisions for anything that never moves in your level (level floors, walls, obstacles, etc) • these should only contain a collider without a rigidbody. • Dynamic colliders • Used for collision detection for dynamic objects (enemies, bullets, boulders, etc) • the setup is pretty straightforward, a rigidbody is attached to a collider • Kinematic colliders • Used for collisions for anything that moves using code and not physics (moving platforms, elevators, etc) • these must have a rigidbody marked as kinematic with a collider.
Collecting Pick-Up Object • Add Tag • Add Tag “PickUp” Using Tag Manager • Select Prefabs “PickUp” • Assign Tag “PickUp” • Select checkbox “Is Trigger” in Box Collider • Play It !!! : Collecting Box
Collecting Pick-Up Object • One Small Mistake • Static colliders by changing the Transform position since this will impact heavily on the performance of the physics engine • Dynamic Collider : Add rigidbody into “PickUp” Prefabs • Triggers do not collide “Ground” • Simple Solution : Uncheck “Use Gravity” • Better Solution: Kinematic colliders • Check “Use Gravity” & “Is Kinematic”
Displaying text • Displaying text • Counting, displaying text and ending the game. • Create Object • Create Empty “Display Text” & Reset • Create GUI Text “Count Text” • Making Child: Drag into “Display Text” • Change Transform : X0, Y1 • Change GUIText : Pixel Offset X10, Y-10
Displaying text • Select “PlayerController” : Open MonDevelop & Edit • Select “Player” & Assign “Count Text” • Play It public class PlayerController : MonoBehaviour { public float speed; public GUITextcountText; private int count; void Start() { count=0; SetCountText (); } void FixedUpdate() { ….. 중략 } void OnTriggerEnter(Collider other) { if(other.gameObject.tag == "PickUp") { other.gameObject.SetActive(false); count = count + 1; SetCountText (); } } void SetCountText() { countText.text = "Count: " + count.ToString(); } }
Displaying text • Create GUI Text “Win Text” • Making Child: Drag into “Display Text” • Change Transform : X0.5, Y0.75 • Change GUIText • Anchor middle center • Alignment center • Select “PlayerController” • Open MonDevelop & Edit • Select “Player” • Assign “Win Text” • Play It public class PlayerController : MonoBehaviour { public float speed; public GUIText countText; private int count; public GUIText winText; void Start() { count=0; SetCountText (); winText.text=""; } …. 중략 void SetCountText() { countText.text = "Count: " + count.ToString(); if(count==12) winText.text ="YOU WIN!"; } }
Publishing the game • Publishing the game • Publishing the game to a web player • Save Scene • File Build Setting • Select Platform “Web Player” • Drag & Drop “MiniGame.unity” • Build • Create Folder “Builds” • Save as “Roll-a-Ball_v01”
Publishing the game • Web Play • Copy ““Roll-a-Ball_v01” Folder to Web Server • Failed to download data file ?? • adding the custom file required to define own MIME Types • put a custom web.config in the same folder of the "*.unity3d" files • Play!! <configuration> <system.webServer> <staticContent> <mimeMapfileExtension=".unity3d" mimeType="TYPE/SUBTYPE" /> </staticContent> </system.webServer> </configuration> web.config
Reference • Reference • Project: Roll-a-Ball • Unity3D Tutorial • Walkerboy studio • Tutorial List • Unity Korea • http://www.unitylearning.co.kr/main/main.asp