Download
1 / 20
290 likes | 906 Vues
Laser Projector. Michael Ivey Josh Ibach-MacKeen CMPE 490 Capstone Project. Laser Projector?. A laser projector is a device which uses a laser to either: Draw images and/or text or Provide visual effects. Persistence of Vision.

E N D
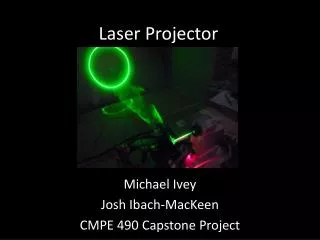
Laser Projector Michael Ivey Josh Ibach-MacKeen CMPE 490 Capstone Project
Laser Projector? • A laser projector is a device which uses a laser to either: • Draw images and/or textor • Provide visual effects
Persistence of Vision • Redraws (almost) the same image at a high speed (typically 15-30+ frames per second) • The laser beam is moved rapidly from point to point, like connect the dots • Variable refresh rate; depends on the number of points (vectors) in an image
Effects • Laser projectors used in many concerts, night clubs, and other large productions • Typically rely on fog/haze • The laser beam scatters off the fine particles in the air, making the beam itself visible
How a Laser Projector Works • Most laser projectors shine a laser beam onto a moving mirror or mirrors • (This is easier to do than waving the laser itself around hastily.) • Most commercial projectors use a pair of mirrors mounted on special motors to deflect the beam in the horizontal and vertical directions
Our Hardware • Atmel AT91EB55 Microcontroller • Lasershowparts ScanPro-30k Galvanometers • 3V Class IIIa Green Laser (taken from a Laserglow Orion laser pointer)
Implementation Three important steps in making the projector work: • Control the galvanometers • Control (modulate) the laser • Parse image files into a format the system can draw
Galvanometer Control • The galvanometers accept an analog input signal • Needed to convert the digital signal inside the microprocessor to analog waveforms • Utilized on the onboard Digital to Analog Converters (DACs) for this purpose Analog Digital
Analog Issues • DACs output 0 – 2.5 V analog • Galvanometers require ±5 V differential input
So We Built Some Amplifiers... Non-Inverting Amplifier Inverting Amplifier
Mirror Synchronization • In order to function properly, a new point (vector) must be drawn at a constant rate • This projector draws 30,000 points per second • DACs were synchronized with an onboard Timer Counter running at 30 kHz • Coordinates of new points are placed into Data Holding Registers (DHRs) • DHRs are expressed at the output on every Timer Counter event
Laser Modulation • In order to draw a discontinuous image, have to lift the “pen” off the “paper” • Modulated the laser using a digital output pin of the microcontroller connected to a BJT switch
Laser Synchronization • To synchronize the output of the laser, the same Timer Counter used for the DACs was set to generate an interrupt • The interrupt handler writes the currently desired value of the laser output to the GPIO pin • Interrupt handler also increments a cycle counter
Image Parsing • Many vector images available online in the International Laser Display Association’s (ILDA) file format • Had to parse those files into a coherent set of points for the projector
Image Parsing Issues • ILDA files are binary packed; wrote a parser in C to convert to a static array of u_shorts • Standard ILDA format uses a range of positive and negative numbers [-32768, 32767] • The DACs use an input range of [0, 1023] • Had to shift and down-sample the values • Limited by hardware; ILDA supports 16 bit points, had only 10 bits of DAC resolution
Drawing the Pictures • Once the ILDA files were converted, the projector was configured to display each array over and over • Each image has its own subroutine • Current image is selected by pushbutton; interrupt is generated which iterates a state machine, moving to the next display subroutine