Download

1 / 7
0 likes | 8 Vues
Are you tired of your outdated car audio system that just doesnu2019t deliver the sound quality you crave? Itu2019s time to take matters into your own hands and upgrade your car stereo installation. With the right equipment and a little know-how, you can transform your driving experience and enjoy crystal-clear audio on the road.

E N D
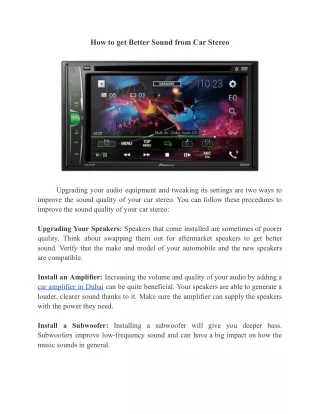
Car Stereo Installation: The Ultimate Guide to Upgrading Your Sound System Are you tired of your outdated car audio system that just doesn’t deliver the sound quality you crave? It’s time to take matters into your own hands and upgrade your car stereo installation. With the
right equipment and a little know-how, you can transform your driving experience and enjoy crystal-clear audio on the road. In this comprehensive guide, we will walk you through the process of installing a new car stereo system, step by step. Why Upgrade Your Car Stereo System? Before we dive into the nitty-gritty of car stereo installation, let’s first explore why upgrading your audio system is worth the time and effort. Here are a few compelling reasons to consider: 1. Enhanced Sound Quality: A high-quality car stereo system can vastly improve the audio experience in your vehicle. Whether you’re a music lover or an audiophile, upgrading your car stereo will allow you to enjoy your favorite tunes in exceptional clarity and detail. 2. Advanced Features: Modern car audio head unit systems come with a range of advanced features such as Bluetooth connectivity, touchscreen displays, voice control, and integration with smartphone apps. By upgrading your system, you can access these features and make your driving experience more convenient and enjoyable. 3. Increased Resale Value: A well-installed and properly functioning car stereo system can add value to your vehicle when it comes time to sell or trade it in. Potential buyers will appreciate the added features and audio quality, making your car more attractive on the market. Now that we’ve established the benefits of upgrading your car stereo system, let’s move on to the step-by-step installation process.
Step 1: Gather the Necessary Tools and Equipment Before you begin the car stereo installation process, it’s essential to gather all the tools and equipment you’ll need. Here’s a list of the basic items you should have on hand: ● Screwdrivers (Phillips and flathead) ● Wire cutters and strippers ● Crimping tool ● Electrical tape ● Panel removal tools ● Multimeter ● Mounting brackets and screws ● Wiring harness adapter ● Antenna adapter (if necessary) Having the right tools will make the installation process much smoother and ensure that you have everything you need to complete the job successfully. Step 2: Disconnect the Battery Safety should always be a top priority when working with electronics, so the first step in car stereo installation is to disconnect the battery. This will prevent any accidental electrical shorts or damage to your vehicle’s electrical system. Locate the negative terminal on your car’s battery and use a wrench to loosen the nut or bolt holding the cable in place. Once the cable is disconnected, secure it away from the battery to prevent accidental reconnection.
Step 3: Remove the Old Stereo Now it’s time to remove the old car stereo from your vehicle. Start by carefully prying off any trim pieces or panels surrounding the stereo using the panel removal tools. Be gentle to avoid damaging the interior of your car. Once the trim is removed, you should see screws holding the stereo in place. Use the appropriate screwdriver to remove these screws, and then gently pull the stereo out of the dash. Step 4: Prepare the Wiring Harness Before you can connect the new stereo, you’ll need to prepare the wiring harness. The wiring harness adapter will allow you to connect the new stereo to your vehicle’s existing wiring without cutting or splicing any wires. Start by connecting the wires from the harness adapter to the wires on the new stereo. Match the colors of the wires according to the wiring diagram provided with the stereo or the adapter. Use the crimping tool to secure the connections, and then wrap each connection with electrical tape for added protection. Step 5: Connect the Wiring Harness With the wiring harness prepared, it’s time to connect it to your vehicle’s wiring. Locate the wiring harness in your dash, which should be connected to the old stereo. Disconnect the harness, and then connect the harness adapter you prepared in the previous step. The connections should be secure and snug to ensure proper function.
Step 6: Mount the New Stereo Now that the wiring is connected, it’s time to mount the new stereo in the dash. Most aftermarket stereos come with a mounting bracket that will allow you to secure it in place. Attach the mounting bracket to the stereo using the provided screws, and then slide the stereo into the dash. Secure it by reinstalling the screws you removed earlier. Step 7: Test the Stereo Before you put everything back together, it’s crucial to test the new stereo to ensure it’s working correctly. Reconnect the negative battery cable and turn on the stereo. Check that all the functions are working as expected, including the radio, CD player, Bluetooth, and any other features. Adjust the sound settings to your preference and make sure the audio quality is up to your standards. Step 8: Reassemble the Dash Once you’ve confirmed that the new stereo is working properly, it’s time to reassemble the dash. Start by reinstalling any trim pieces or panels you removed earlier, being careful not to force anything into place. Double-check that all connections are secure and that no wires are pinched or trapped. Take your time to ensure a neat and professional-looking installation.
Step 9: Install the Antenna Adapter If your new stereo requires an antenna adapter, now is the time to install it. Locate the antenna connector in your dash, disconnect it, and connect it to the adapter. Then, connect the other end of the adapter to the antenna input on the back of the new stereo. This will ensure that you can receive radio signals properly. Step 10: Secure Loose Wires During the installation process, you may have some loose wires that need to be secured. Use zip ties or adhesive tape to bundle any excess wiring and prevent it from interfering with other components or moving parts in your vehicle. This will help maintain a clean and organized installation. Step 11: Fine-Tune the Sound With the new stereo installed, it’s time to fine-tune the sound to your liking. Adjust the equalizer settings to enhance the bass, treble, and overall balance. Play around with the audio settings until you achieve the desired sound quality. This step is crucial for getting the most out of your new car stereo system. Step 12: Enjoy Your Upgraded Car Stereo Congratulations, you’ve successfully installed your new car stereo system! Now it’s time to sit back, relax, and enjoy your favorite
music, podcasts, or audiobooks on the road. With your upgraded audio system, every drive will be a pleasure. Conclusion Upgrading your car stereo installation is a rewarding project that can significantly enhance your driving experience. By following this step-by-step guide, you can confidently install a new car stereo system and enjoy superior sound quality on the road. Remember to prioritize safety, gather the necessary tools, and take your time during the installation process. With a little effort, you’ll be cruising in style with your new car audio system. Happy driving!