Download
1 / 30
300 likes | 396 Vues
ECS-tools for the CCPC/Tell1 (a tutorial in 3 acts):.

E N D
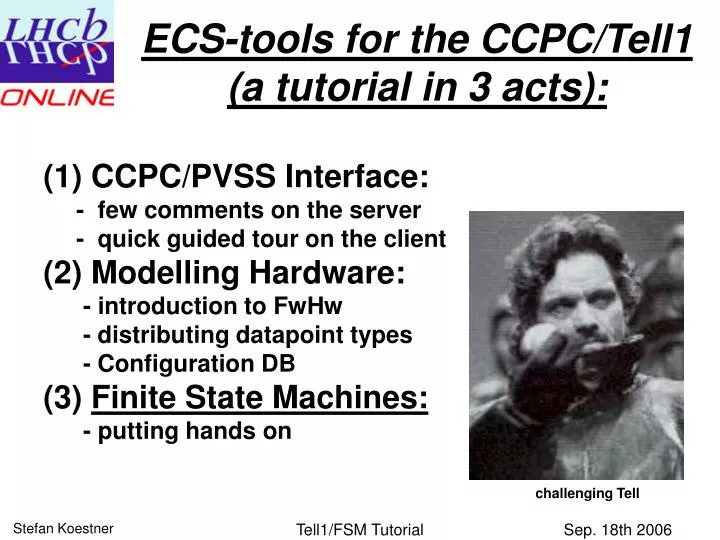
ECS-tools for the CCPC/Tell1 (a tutorial in 3 acts): (1) CCPC/PVSS Interface: - few comments on the server - quick guided tour on the client(2) Modelling Hardware:- introduction to FwHw - distributing datapoint types - Configuration DB(3) Finite State Machines:- putting hands on challenging Tell Tell1/FSM Tutorial
FSMs for Tell1: The Tell1 boards are integrated into the ECS under the DAQ and trigger domain. We provide two versions. laboratory/basic: The configuration is mainly based on the processing and editing of the .cfg file, which is the usual way to configure boards so far. experiment/complex: This FSM together with the device unit panels is supposed to be used in the final experiment. Users can familiarize with the basic FSM which is easy to modify while the complex one is further developed and optimized. Guidelines for FSM design at LHCb and integration can be found in: https://edms.cern.ch/file/655828/2/ LHCb-FSM-Guide.pdf Mir ist das Herz so voll, mit Euch zu reden. Das schwere Herz wird nicht durch Worte leicht.Wir könnten viel, wenn wir zusammenstünden. Beim Schiffbruch hilft der einzelne sich leichter.Verbunden werden auch die Schwachen mächtig. Der Starke ist am mächtigsten allein. Tell1/FSM Tutorial
FSMs for Tell1: A general tutorial on FSM can be found under: http://clara.web.cern.ch/clara/fw/FSMConfig.pdf It is distinguished between control units (logical decision units which can act on children) and device units (interface to the hardware). Commands can be sent downwards the hierarchical tree which can trigger state transitions. State transitions can also be triggered by the change of the state of any child. A transition of device units can be invoked by a change of some register values. Device units can act on the hardware after receiving a command. The possible states of the Tell1: From NOT_READY to READY the configuration of the Tell1 is done a compilation of applying recipes, pulling trigger lines and hardcoded sequences on the server side, which is the main job. The transition from Ready to Running is less massive (e.g. enabling triggers). UNKNOWN appears if ECS control is lost (e.g. server crashes) Tell1/FSM Tutorial
in a nutshell… The ECS tree is built from control units (some call it ‘bubbles’), where commands are propagating downwards to their children. The last ‘leave’ is always the device unit, acting on the hardware. At some point you have to add your subdetector ‘bubble’ (ask Clara for detailed design rules). Inside your subdetector branch you might want to add a control unit for your Tell1s and some device units acting on them. This is what we try to provide. Note: If you would like to add control units in your subdetector branch for grouping reasons to obtain a more organized structure, use a ‘logical’ control unit. It is less heavy and is launched from the same thread as its parent. Tell1CU Tell1DUs Tell1s Tell1/FSM Tutorial
FSMs for Tell1: The PVSS FSM interface is part of the JCOP framework. Download the framework and install fwCore with the installation tool: http://itcobe.web.cern.ch/itcobe/Projects/Framework/welcome.html On top of it install the Tell1_FSM components: http://lhcb-online.web.cern.ch/lhcb-online/ecs/PVSS_TELL1/default.html Start the User Interface of the ‘Device Editor & Navigator’. The following gives you an introduction of the quickest way to get your FSM running for the Tell1 using the provided device & control units. It is not intended to be a FSM course! (more how to make it work with a minimum amount of time…) Tell1/FSM Tutorial
FSMs for Tell1: (1) Select tab ‘FSM’ and switch to ‘Editor mode’ (2) right click on top node and choose ‘add’ (3) a window pops up where you tick ‘Add New Object’ (it’s a control unit) (4) after ticking another window pops up where you can choose the type of the control unit. For the Tell1 it is called Tell1CU. Type a name and click ‘Ok’. Tell1/FSM Tutorial
FSMs for Tell1: For device units – as they are linked to datapoint types – a bit more effort is required: First make sure that you have the appropriate DPT for your Tell1 installed (see tutorial Nr.2)! The most generic we can offer is a ‘template’ for a device unit: Click on ‘Create/Configure FSM…’ Then click ‘AddDeviceType’. Select your datapoint type and click ‘Ok’. This already creates your device unit linked to your datapoint. Tell1/FSM Tutorial
FSMs for Tell1: From ‘FSM Types’ panel choose your device unit and double click on it. A window pops up which allows further configuration. This is the time where you simply upload the provided template. In ‘Copy from Type’ select ‘HwTypeCCPCTELL1_DET’ which overwrites the current configuration. Tell1/FSM Tutorial
FSMs for Tell1: Your device unit becomes now populated with a predefined behavior. In ‘Configure Device’ you find three scripts: ‘Configure Device States’ defines the behavior (state transitions) of the device unit triggered by hardware (datapoint ‘status’). This further triggers a transition in the control units above. ‘ConfigureDeviceActions’ defines the behavior after receiving a command from the control unit. Actions can be performed on the hardware by calling the fwCcpc functions. Tell1/FSM Tutorial
FSMs for Tell1: A snapshot from the ‘status’ script: Each DPT must have a datapoint element ‘status’ which invokes this script (function) when its content changes. The ‘status’ script is very simple and basically just makes the device unit follow the datapoint change with the appropriate transition of state. Tell1/FSM Tutorial
FSMs for Tell1: A snapshot from the ‘action’ script: Here comes the intelligence. This part will be heavily under construction for the final version. It is where you call the recipes and all the start up sequences. However for the lab version this can be reduced to a call of the currently used .cfg file. As we cannot follow each lab setup you can easily populate it with your own scripts using fwCcpc. Tell1/FSM Tutorial
FSMs for Tell1: • Back to the tree: right click on the previously created control node and choose ‘add’. You can choose between ‘device’ (device unit) and ‘control’ (control unit). Choose ‘device’. (2) Tick ‘Add Device(s) from Hardware View’ and another window pops up. (3) Choose your datapoint type and select the appropriate instance. Then click the arrow towards right and ‘Ok’. Finally confirm also in the ‘Add Node’ panel. Your device is going to be installed… Tell1/FSM Tutorial
FSMs for Tell1: As an exercise you can go to the FwHw tool and clone a new dp. Then redo the exercise with the new datapoint and create another device unit. The result is a FSM tree with one control unit on top ‘Tell1Control’ containing two device units ‘myTell1’ and ‘Tell1Clone’. Important: How to generate the FSMs and making the tree becoming alive (connecting the various processes with each other): (1) Go to Editor mode. Right click on ‘System1’ and choose ‘Generate ALL FSMs’. You have to do this whenever you do changes on your device or control units. This automatically rewrites all the necessary scripts. (2) Go to Navigator mode. Always click ‘Stop All’ first (to make sure). Then click ‘Start/Restart All’. All the processes are started and your FSM tree is alive. Watch the LogViewer to make sure! Tell1/FSM Tutorial
FSMs for Tell1: (1) Go to Navigator mode and right click on the node from where you want to see the FSM tree. (2) Click on the locker and take control of the FSM tree. Now you can start operating it. Tell1/FSM Tutorial
FSMs for Tell1: Clicking on the state of the control node shows you a menu with all the accessible commands at this state. For ‘NOT_READY’ there is ‘Configure’ and ‘LoadFrmwr’. Partitioning: If you want to operate just on a single Tell1 you can simply exclude one board. No commands are received and its state is ignored. More info about partitioning can be found in: http://clara.web.cern.ch/clara/fw/FSMConfig.pdf Tell1/FSM Tutorial
FSMs for Tell1: To specify a background panel go to ‘Create/Configure FSM Object Types’ double click on the object (Tell1CU) and give the name of the panel which has to be stored in C:\\project_path\panels\FSMUser For control units it is up to the user to make their own panels – as it is very specific and up to the users taste. For the device unit which acts on the board some panels are provided. IMPORTANT: after any modification you have to regenerate the FSMs and restart the tree. (see previous slide!) Tell1/FSM Tutorial
FSMs for Tell1: The next step is that you enter some important information into the datapoints corresponding to the device units: (1) what is the name of the ccpc assigned to the board (2) path of the .pof and .cfg file Open the PARA module and edit the datapoint ‘ccpc’. Edit also the ‘pof’ and ‘cfg’ datapoints and provide the correct paths. (use slash instead backslash) From now on your tree should work properly! Note: in the coming versions the ccpc name will be taken from the common settings of the Tell1 datapoint! Tell1/FSM Tutorial
Remark: • I experienced the installation procedure in general as a bit sensitive: • make sure that you always do ‘stop all’, ‘generate all fsms’ and ‘restart all’ • in case of troubles check if you have a smi process running and kill it by hand • edit also the status as NOT_READY from the para module (although the default in the status script is NOT_READY) Tell1/FSM Tutorial
FSMs for Tell1: In the state NOT_READY you can download the firmware to the board. When configure is choosen the .cfg file is called and the registers are written. The Tell1 board is now entirely configured and the state switches to READY. In this basic FSM version nothing is happening when moving to RUNNING. Tell1/FSM Tutorial
FSMs for Tell1: A draft of a basic user interface. Configuration (Start-up) allows you to assign a ccpc and the .pof and .cfg files without entering the PARA module. Tell1/FSM Tutorial
From User to User: Please send comments about useful information, which you were missing in the slides before! It will be posted here. Tell1/FSM Tutorial
Conclusion: a famous way … • To implement your Tell1 boards into the ECS tree, we try to support in the following way: • we provide a control unit which applies the rules of the DAQ domain and a template for a device unit including the datapoint type. • The start up and configuration of the Tell1 is currently sorted out with Lausanne and will demand serious testing. Meanwhile you can use the device unit which applies the .cfg file. • Panels for the device unit will also be provided in collaboration with Lausanne (currently under construction). These panels will emulate the same functionalities as the C-code you are currently familiar with. “Was die dunkle Nacht gesponnen, Soll frei und fröhlich an das Licht der Sonnen.!” Tell1/FSM Tutorial
Outlook: • All the generic solutions required for the ECS • integration of the Tell1 boards are developed, • tested and are available for the users! • Further steps: • providing better documentation • revising the framework functions • in general optimizing and improving performance • implementing user requests(?) • Coordination: • Cedric will take over the distribution of the specific user requirements (for ST & VELO) under the supervision of Guido. • In addition he will help to translate Guidos ‘wisdom’ into PVSS panels • (the GUI for the device units) “Hat der Tell Auch so an euch gehandelt? Nicht mit müß'gen TränenBeklagt' er dich, in den Nachen sprang er, Weib Und Kind vergaß er und befreite dich -” Tell1/FSM Tutorial
some panels provided by Cedric Potterat… email: cedric.potterat@epfl.ch Tell1/FSM Tutorial
The Actual Rates Panels for the device unit Tell1/FSM Tutorial
Panels for the device unit The Event Monitor Counters Tell1/FSM Tutorial
Panels for the device unit The Pedestals Tell1/FSM Tutorial
Panels for the device unit The Linear Common Mode Suppression's (LCMS) Average and Slope Tell1/FSM Tutorial
Panels for the device unit The last 128 MEP in the MEP buffer, and all the information attached to. Tell1/FSM Tutorial
Panels for the device unit Global information about the TELL1, the server (ccserv) and PVSS components Tell1/FSM Tutorial