Download
1 / 12
120 likes | 254 Vues
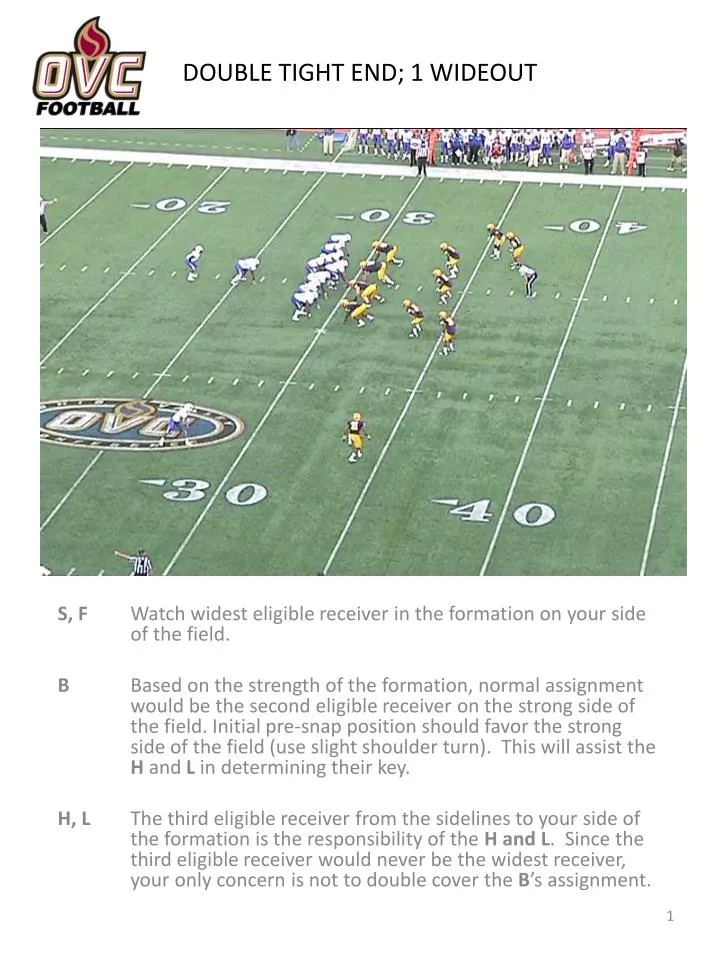
DOUBLE TIGHT END; 1 WIDEOUT. S, F Watch widest eligible receiver in the formation on your side of the field.

E N D
DOUBLE TIGHT END; 1 WIDEOUT S, F Watch widest eligible receiver in the formation on your side of the field. B Based on the strength of the formation, normal assignment would be the second eligible receiver on the strong side of the field. Initial pre-snap position should favor the strong side of the field (use slight shoulder turn). This will assist the H and L in determining their key. H, L The third eligible receiver from the sidelines to your side of the formation is the responsibility of the H and L. Since the third eligible receiver would never be the widest receiver, your only concern is not to double cover the B’s assignment.
DOUBLE TIGHT END; 2 WIDEOUTS A balanced formation is one where there is the same number of receivers on each side of the formation. The location of the ball does NOT have to be in the middle of the field. The B will assist on the L’s side when the formation is balanced.
DOUBLE TIGHT END; 1 WIDEOUT; 1 WING BACK This formation is balanced. BUT even though the wide side is to the H side of the field B would still take the tight end on the L side of the field..
FULL HOUSE BACKFIELD This is a balanced formation but there is no strong side to the formation. Therefore, the B will key the first back out of the backfield.
DOUBLE WING This double wing formation is not balanced as the tail back is on the left side of the ball making it the strong side. The F and S has the widest receiver. The B has the second receiver in on L’s side of the field and L has the back in the backfield if he comes out.
DOUBLE - DOUBLE Here is another look at a Double - Double receiver set . The F and S has the widest receiver. The H has the second receiver in on his side. The B has the second receiver in on L’s side of the field and L has the back in the backfield if he comes out.
TRIPS SPREAD To the trips side of the field, the widest receiver will be covered by the F and S, the second receiver from the sideline will be covered by the L and S and the third receiver by the B. The B takes the #3 receiver only is there are three receivers outside the tackle, otherwise he will take the #2 receiver on the strong side. TRIPS ALERT: B and F/S – when you have trips to your side – note quickly if your receivers are in “press” coverage at the line of scrimmage. If not, give help on the 2nd receiver in when the QB rolls, sprints, or options into trips. H and L are vulnerable on this play – with QB and in some cases a running back coming to their area and their key taking an inside route as a potential receiver, but also as a potential blocker.
TRIP SET With a Wing Back right off the Tight Ends tail and if B’s key (#3) stays in and blocks B will immediately go to L’s key (#2) and L will go back to B’s key (#3). NOTE: If receivers cross, all officials will need to be ready to switch. Press coverage or soft coverage dictates the timing of the switch.
5 RECEIVER SET With a 5 receiver set the F and S will have the widest receiver. The L and H have the second receiver in and the B has the third receiver on the strong side.
4 RECEIVER DIAMOND SET With a 4 Receiver Diamond Set the F and S will have the widest receiver. The L and H have the back receiver and the B has the other 2 receivers. Again when these receivers are bunched like this all three officials will go to zone faster than normal and let the receivers disclose which one comes into their zone. IF YOU HAVE RED ZONE COVERAGE: STAY WITH YOUR KEYS LONGER
MAN IN MOTION INSIDE The B always takes the initial motion man. Responsibility for the motion man may be determined by location of motion man at snap. If the motion man starts between the tackles and stays between the tackles, it's as if there were no motion.
MAN IN MOTION OUTSIDE The B always takes the initial motion man. Responsibility for the motion man may be determined by location of motion man at snap. The B will release the motion man once he becomes the widest receiver in the formation, moving toward the sideline. The man in motion will then be put into the normal numbering of wide man, second man in, etc. Also remember that motion outside the tackles always out ways trips or strong side.