Download
1 / 27
280 likes | 445 Vues
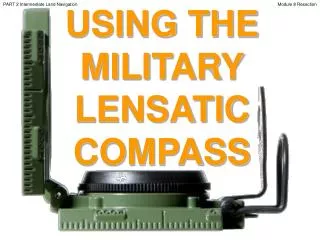
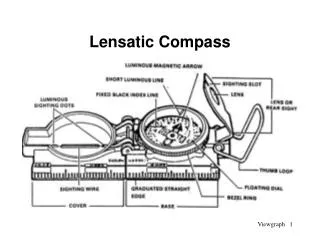
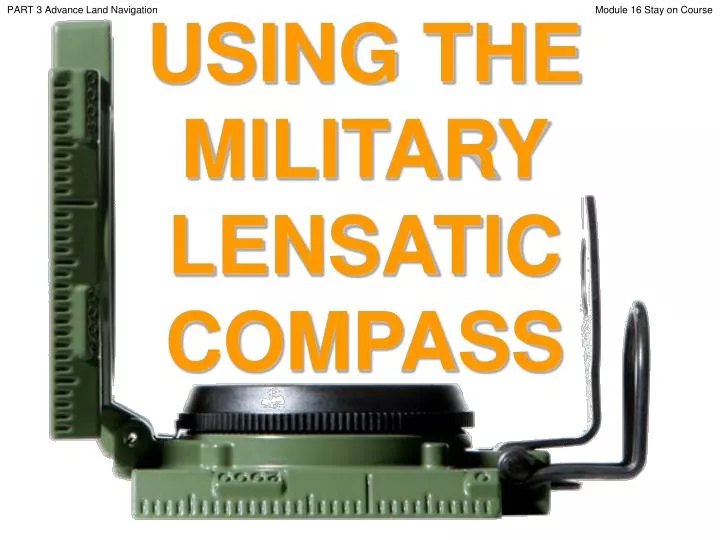
PART 3 Advance Land Navigation. USING THE MILITARY LENSATIC COMPASS. Module 16 Stay on Course. PART 3 Advance Land Navigation. Module 16 Stay on Course. WARNING.

E N D
PART 3 Advance Land Navigation USING THE MILITARY LENSATIC COMPASS Module 16 Stay on Course
PART 3 Advance Land Navigation Module 16 Stay on Course WARNING This presentation is intended as a quick summary, and not a comprehensive resource. If you want to learn Land Navigation in detail, either buy a book; or get someone, who has the knowledge and skills, to teach you in person.
PART 3 Advance Land Navigation Module 16 Stay on Course NOTE To get the ideas across presented on these slides, many figures, pictures, and calculations may not be to scale and may be exaggerated for clarity.
PART 3 Advance Land Navigation Module 16 Stay on Course Note: Prior to being issued any training *equipment, you will be required to sign a “statement of liability” agreeing to pay for anything you damage or lose. All items will be inspected and inventoried prior to your signature and at the end of the training day too. If you do not intend to sign this statement, then you may be denied training. *You may use your own equipment.
PART 3 Advance Land Navigation Module 16 Stay on Course Any Questions?
PART 3 Advance Land Navigation Module 16 Stay on Course LAND NAVIGATIONPRESENTATIONPART 3Module 16Stay on Course
PART 3 Advance Land Navigation Module 16 Stay on Course . . . and now on with the . . . PRESENTATION
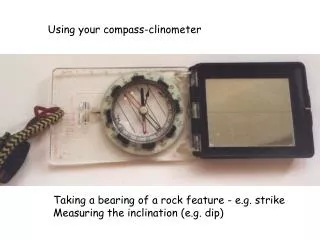
PART 3 Advance Land Navigation Module 16 Stay on Course LAND NAVIGATION WITH MAP ANDLENSATIC COMPASS
PART 3 Advance Land Navigation Module 16 Stay on Course LAND NAVIGATION • Why Learn Land Navigation? • Tracking present location • Determining Distance • Sense of direction • How to read a topographic map • Terrain and map association • Spatial skills • Planning safe, practical routes • And more Navigational skills • The best way to learnLAND NAVIGATION is to get "dirt time", that is, get out there with a map and compass! • Navigation is not about finding yourself after you are lost (although that’s what happens sometimes); it’s about keeping track of your position as you move away from a known point. As you move you have to remain cognizant of the terrain you are leaving, of the terrain you are passing, and of the terrain that is ahead. • Navigation in the wilderness means knowing your starting point, your destination, and your route to get there. • These skills will allow you to venture farther off the beaten path than you ever thought before. Training and practicing land navigation on foot provides the following everyday navigation (how not to get lost) benefits; (Where am I?) (How far is it and am I there yet ?) (Where do I want to go and where am I actually going ?) (Do I understand the map ?) (What hill or river am I looking at ?) (Can I mentally visualize the landscape in 3D ?) (Take a long safe route or a short risky route ?)
PART 3 Advance Land Navigation Module 16 Stay on Course • THIS PRESENTATION IS DIVIDED INTO FOUR PARTS • ________________________________________________________________________________________________________________________________________________________ • PART 1 Basic Land Navigation • The Lensatic Compass module 1 • The Topographic Map modules 2, 3, 4, • The Land and Map Association modules 5, 6 • PART 2 Intermediate Land Navigation • Making Sense of Direction module 7 • Tracking Present Location modules 8, 9, 10, 11 • Determining Travel Distance modules 12, 13, 14 • PART 3 Advance Land Navigation • Navigation Methods to Stay On Course module 15 • Additional Skills of Land Navigation module 16 • Planning to Navigate module 17 • PART 4 Expert Land Navigation • Navigation in different types of Terrain module 18 • Night Navigation module 19 • Sustainment module 20
PART 3 Advance Land Navigation Module 16 Stay on Course THESE ARE THE TRAINING MODULES Module 1 Lensatic Compass – parts and features, and how to sight the compass by two different methods. Module 2 Topo Map Margin – what map margin data represents, map care, and how to properly fold a map. Module 3 Topo Map Scale – map sizes and how it affects amount of detail that will be shown. Module 4 Topo Map Symbols – you must understand them; to read and speak map language to others. Module 5 Terrain Relief – shows elevation, indicates terrain features and heights of natural features. Module 6 Map Information – what a protractor is for and how a map provides four kinds of information. Module 7 Sense of Direction – lateral drift, current bearing, obstacles, back azimuth, deliberate offset. Module 8 Resection – locate position with map only. Modified resection is with a map or compass. Module 9 Intersection & Triangulation – two methods to locate position by compass. Module 10 Map Speaks Compass Language - there is no need to orient the map to find your position. Module 11 Plotting Position Coordinates – exact positioning, used to communicate to others with a map. Module 12 Route Measure – mapping straight-line distance, curvature distance, and slope distance. Module 13 Pace Count – using ranger pacing beads and estimating hiking speed. Module 14 Travel Distance Estimation – estimating by 100 meter rule, rule-of-thumb, and by time. Module 15 Plan to Navigate – in a group or alone, equipment, safety, responsibilities, route selection. Module 16 Stay on Course – advance reference points and advance baselines. Module 17 Additional Land Navigation Skills – estimate daylight, conserve energy, blisters, weather insight. Module 18 Navigating Different Terrain – special environments, featureless terrain, visibility, dense foilage. Module 19 Night Navigation – night adaptation, protecting night vision, navigate with lensatic compass. Module 20 Sustainment – maintaining skills, training others, setting up a land navigation course.
PART 3 Advance Land Navigation Module 16 Stay on Course Any Questions?
PART 3 Advance Land Navigation Module 16 Stay on Course PART 3ADVANCE LAND NAVIGATION MODULE 16 • Navigate to Stay on Course • Description • Staying on Course
PART 3 Advance Land Navigation Module 16 Stay on Course STAYING ON COURSEDESCRIPTION The difference from classroom into the wilderness is the difference between THEORYandPRACTICE. The wilderness is not crisscrossed with reference grid lines, like a map, to aid the navigator. There is difficulty encountered in holding to a selected course under conditions where the objective cannot be seen. • Wilderness navigation is a DISCIPLINE when traveling off the beaten path. To stay on course DO NOT rely on your “sense” of direction. You must rely on your compass and all navigation techniques available to you. • Human reference point • Making a reference point • Baselines • Thumbing the map
PART 3 Advance Land Navigation Module 16 Stay on Course NAVIGATOR #2 NAVIGATOR #1 MOVE DESIRED AZIMUTH MOVE STAYING ON COURSEHUMAN REFERENCE POINT • Navigator #1 stays stationary, while navigator #2 goes ahead to the limit of visibility. • With binoculars and walkie-talkies, the distance can be further. • Then navigator #1, with compass in hand at desired azimuth, signals navigator #2 to move left or right till navigator #2 is aligned with compass azimuth bearing. • Navigator #1 catches up with navigator #2 and the process is repeated. NOTE By keeping track of distance as well as the direction of each zig & zag while traveling, and doing some careful map work, the group will have a running assessment of their approximate location.
PART 3 Advance Land Navigation Module 16 Stay on Course NAVIGATOR #2 ON COURSE MOVE AHEAD STOP I WILL CATCH UP WITH YOU MOVE THIS WAY MOVE THIS WAY NAVIGATOR #1 STAYING ON COURSEHUMAN REFERENCE POINT Even though this is a slow process, it is very effective when needed.
PART 3 Advance Land Navigation Module 16 Stay on Course REFERENCE POINT MOVE 305º BACK AZIMUTH 125º DESIRED AZIMUTH MOVE STAYING ON COURSEMAKING A REFERENCE POINT • As a lone navigator, this is an alternate method to the “human reference point” when resources are available. • However, it is time consuming to assemble. • At your current position, pile up rocks or other landscape debris laying around. • Ensure it is large enough to be seen from a long distance away on your route. • Set your desired azimuth, say 125º and calculate your back azimuth (125º + 180º = 305º back azimuth). • Walk as far as you can on your desired azimuth 125º, occasionally looking back to the reference point and checking the back azimuth 305ºto the reference point, as you walk forward. • Move left or right to maintain the back azimuth 305º, which keeps you on course, eliminating lateral drift.
PART 3 Advance Land Navigation Module 16 Stay on Course Any Questions?
PART 3 Advance Land Navigation Module 16 Stay on Course STAYING ON COURSEBASELINES ADVANCED Azimuths can serve as baselines that let you explore a “trail less” area from your camp sight. 1. You create a baseline with the first azimuth measured from your camp (starting point) to a landmark (58º peak 1). 2. Taking a second azimuth landmark (340ºpeak 2) fixes the campsite’s exact location on the first azimuth baseline. 3. With the cross azimuths written down you’re free to wander around the area. 4. You explore the area and sight on peak 1 to find your azimuth is 354º, which puts you east of the baseline. 5. You head west towards the baseline till your azimuth to peak 1 is 58º, which puts you on the baseline. 6. Now you are at the baseline of 58º, but which way to turn, to go to camp? West or east? 7. You sight on peak 2 to find your azimuth is 38º, which puts you west of camp, so you turn east. 8. Walk the 58ºbaseline till peak 2 is 340º, if you don’t stray off the baseline, you will reach the camp sight. (1st azimuth 58º peak 1) NOTE To avoid getting off course from the baseline, remember to make use of intermediate landmarks along the baseline, keeping close track of deviations as you make them, and correct for any detours, get back to the baseline as soon as possible. (2nd azimuth 340º peak 2) (Trail sighting 354º) Baseline (Trail sighting 38º) Baseline
PART 3 Advance Land Navigation Module 16 Stay on Course STAYING ON COURSEBASELINES ADVANCED • Going somewhere you cannot see - You want to travel to a destination beyond the next group of hills. • Orient the map and mark your start and destination points. • Choose the best route between them and draw the route legs. • Measure the route leg azimuths on the map and estimate distance between each leg of the route. • Locate features or landmarks on the map that will help you identify each leg junction on arrival; such as junction 1 (hill at 139º and hill at 185º) MN azimuth on the compass or use “Pace & Time Count”. • Write them down on the map or on a paper and follow your bearings (BASELINES). START 217º 300 meters 185º 139º 149º 1.7 km 336º 275º 230º 700 meters NOTE If you have MN LINES drawn on the map, align the protractor to a MN LINE and get the MN azimuth, you DON’T have to do any MN conversions for compass. FINISH
PART 3 Advance Land Navigation Module 16 Stay on Course STAYING ON COURSEBASELINESADVANCED • HERE IS ANOTHER EXAMPLE • Here you use intermediate landmarks as • LEG ( x ) JUNCTIONS. • LEG 1 starts at base of hill • LEG 2 starts between two hills • LEG 3 starts between three landmarks • ( stream, ridge spur, and hill ). • LEG 4 starts between two orchard fields and ends at road junction.
PART 3 Advance Land Navigation Module 16 Stay on Course Any Questions?
PART 3 Advance Land Navigation Module 16 Stay on Course STAYING ON COURSETHUMBING THE MAP goal • It is a great technique that will keep you from getting lost or confused. As you gain skill, it becomes a great technique for increasing your travel speed as well! It is based on maintaining map contact. • Fold the map so it is more manageable. (see map folding techniques – Part 1 Basic land Navigation) • Find your location on the map. • Hold your map in one hand with your thumb close behind your location (don't cover it up). • Shift your thumb on the map as you progress on the ground. • When you come to an obvious feature on the map and on the ground, shift your thumb to mark your new location. • Keep your thumb on your map as a "You Are Here" marker and you'll save yourself lots of time and confusion! • NOTE • It is mostly used for “Orienteer Trail Racing”. But this can be used • for normal navigation. And there are other ways to thumb the • map, i.e. use a pencil to quickly mark your location, as you travel. Shift thumb now you are here Shift thumb X you are here
PART 3 Advance Land Navigation Module 16 Stay on Course Any Questions?
PART 3 Advance Land Navigation Module 16 Stay on Course Note: Prior to being issued any training *equipment, you will be required to sign a “statement of liability” agreeing to pay for anything you damage or lose. All items will be inspected and inventoried prior to your signature and at the end of the training day too. If you do not intend to sign this statement, then you may be denied training. *You may use your own equipment.
PART 3 Advance Land Navigation Module 16 Stay on Course TESTING Now it is time for the following . . . • Written exam • Hands-on / Outdoors exam
PART 3 Advance Land Navigation Module 16 Stay on Course THE END OFLAND NAVIGATIONPRESENTATIONPART 3Module 16Stay on Course