Download

1 / 52
520 likes | 812 Vues
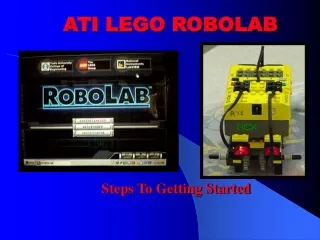
ROBOLAB. What is ROBOLAB?. It’s a language used to program the robots. Pictures, which are called Icons represent different functions and create the logic of your program. Using the InfraRed Tower you can download the programs you write to your RCX. Getting Started.

E N D
What is ROBOLAB? It’s a language used to program the robots. Pictures, which are called Icons represent different functions and create the logic of your program. Using the InfraRed Tower you can download the programs you write to your RCX.
Getting Started • Double click the ROBOLAB shortcut to launch the application.
Getting Started • Click the Programmer button
Getting Started • Double click Inventor 4 to bring up a blank program window
A Simple Program • We will now write a simple program with ROBLAB • This program will turn on one of the motors for 2 seconds and then turn it off.
A Simple Program Blank Program Window • This is a blank program window. • The green light is the start of the program. • The red light is the end of the program. • The functions palette contains all of the icons you will need to write the program. Functions Palette
A Simple Program • The first icon is the motor. Select the icon with the A over the motor because the motor is connected to Port A. • The arrow shows what direction the motor will run. Choose the one pointing to the right. • Click the icon and place it in the program window. Click again over the spot where you want to place the icon. • For information about each icon, click Help, then Show Help. Help Window
A Simple Program • Motors can be programmed to run at different power levels, from 1(lowest) to 5(highest).
A Simple Program • Power Level icons are found the the modifiers sub-palette, located on the Functions palette. • Click on the level 5 icon and place it under the motor.
A Simple Program • Next we place a time delay to make the motor run for 2 seconds. • The icon can be found in the sub-palette with the picture of a watch.
A Simple Program • Now we place a stop sign to turn off the motor. • Be sure that you place the stop sign with the matching letter of your motor. This is the one with the “A”.
A Simple Program • To link all of the icons together to make the program run, we now need the wire tool. • Select the Windows menu, then Show Tools Palette
A Simple Program • Here the wire tool has been selected Wire Tool
A Simple Program • Click on the upper right corner of the first icon. • Then click the upper left of the next. • Continue this for each icon until they are all connected.
A Simple Program • Don’t forget to connect the Power Level Modifier to the motor.
The RCX • This is the brain of your robot. • The inputs (sensors) are connected to ports 1, 2, and 3 • The outputs (motors, lamps) are connected to ports A, B, and C
RCX Buttons • On-Off turns the RCX on and off. The RCX shuts itself off after 15 minutes unless changed in setup • Run starts and stops the program • Prgm selects which program you want to run. You can store up to 5 at once. • View lets you view the values at the ports. This is useful when looking at sensor values.
Downloading to the RCX • Turn on the RCX. • Select a program number to store it. • Place the InfraRed Tower 6 to 8 inches from the RCX. • Make sure the receiver is facing the tower. InfraRed Tower
Downloading • Select Run from the Operate menu. • This starts downloading the program. • The RCX will make a rising sweep sound if the download was successful.
Problems when downloading • If any of the icons are not connected properly you will see an error list describing what the problem is.
If you get an error • Make sure the InfraRed Tower’s serial cable is connected to the computer. • Make sure the RCX is on. • Try moving the RCX closer to the tower. • Check the batteries (9V in tower and 6 AA in RCX).
Other Tools Select • The Select tool lets you select icons so you can move them or delete them. • The Text tool lets you put text in the program window. Text
Other Tools • The replace tool lets you replace an icon without rewiring. Replace Tool
Using the replace tool • Let’s replace the 2 second delay with an 8 second delay.
Using the replace tool • Select the replace tool and left click the 2 second display icon. • Select replace from the menu and a new functions palette should appear. Replace New Functions Palette
Using the replace tool • Select the 8 second delay from the palette. 8 second Delay
Using the replace tool • The program has now been changed from a 2 second delay to an 8 second delay.
Loops • Loops allow you to repeat part of the program so you don’t have to rewrite the same part over. • These are the icons beginning and end of a loop.
Loops • You can specify the number of times you want the loop to repeat with a text box modifier. • You can also use the random dice modifier to have the loop repeat a random number of times.
Jumps • These are the jump and land icons • You can have more than one jump per program. • Keep them separate by assigning a number or using a different color for each.
Examples using loops and jumps • Here are some examples of a program that tells the RCX to beep every second. • The first 2 are examples of finite loops. • The 3rd implements an infinite loop.
Example 1 • This program beeps every second. • It does this for 10 loops.
Example 2 • This program beeps every second. • It does this for a random number of loops.
Example 3 • This program beeps every second. • It does this forever.
The Touch Sensor • Remember to specify the port that the sensor is connected to. • The sensors are usually used to control motors and lights. • The fork allows the program to run based on the position of the sensor. Touch Sensor Fork Wait until pressed Wait until released
The Rotational Sensor Wait for a number of counts Rotation Sensor Fork • This sensor waits a certain number of counts before doing something. • 16 counts = 1 revolution. • The fork runs a portion of the program depending on the sensor count. Reset
The Light Sensor • These are used to detect light levels between 0 and 100. • The top icon waits until the level is above the given value of 50. • The bottom icon waits until the level is below the given value of 50.
The Light Sensor • The top icon waits until the light level is a certain percentage above the current level. • The bottom waits until the light level is a certain percentage below the current level. • In both cases, the percentage is 5%.
Timers • There are 3 timers. • The program can wait for a certain amount of time. • 1 sec = 10 timer counts. • Make sure you reset the timer at the beginning of your program.
Example using a timer • This program times how long it takes for someone to push in a touch sensor. • If the sensor is pressed within 3 seconds of starting the program a descending sweep sound will be played. • If more than 3 seconds pass a different rising sweep sound will be played.
Timer Example • Reset the red timer. • Wait for touch sensor to be pressed. • Play appropriate sound based on the time elapsed.
Containers • Another word for container is variable. • Variables are a number you don’t know until you run the program. • Can have up to 3. • You can zero a container, give it a number, or give it the value of a sensor.
Container Math Operations Subtract 3 from the container value. Add 4 to the container value. Multiply container value by 2. Divide container value by 1.
Containers • You can use the value of a container to set the power level for an output such as a light or motor. Container Value
Example using a container • This program starts out with the power level of the motor at 0. • Every time the sensor is pressed the power level increases by 1. • When the sensor has been pressed 6 time the motor shuts off.
Container Example • Zero the red container and loop forever. • If the sensor is touched, make a sound and add one to the container. Otherwise turn motor A on at the level the container holds. • If the red container value > 5 stop and exit. • Repeat until value of container is > 5.
Multiple Tasks • This allows your program to do 2 or more things at the same time. • Each task must end with a red stoplight. • You can have up to 10 separate tasks in a program.
Example using tasks • This program has 3 tasks. • The 1st turns on motor A for 45 seconds then turns it off. • The 2nd plays a rising sweep then waits a random amount of time before repeating – this happens 4 times. • The 3rd turns motor C on for 1 second then turns it off and waits 2 seconds – this happens a random number of times.