Download
1 / 42
470 likes | 729 Vues
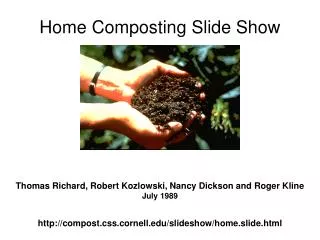
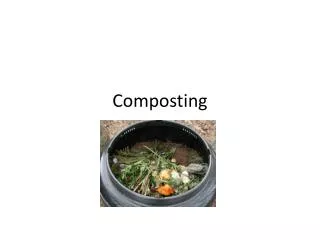
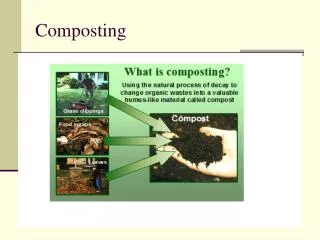
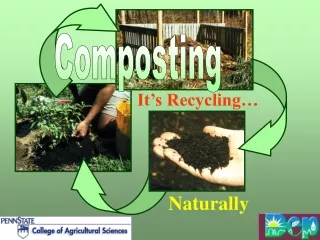
Home Composting. What is Composting?. The process of “composting” is the decomposition of plant remains and other once-living materials into an end product known as compost. Final compost is a dark, crumbly substance with an earthy odor. . Organic Waste. Microorganisms. Water. Air.

E N D
What is Composting? The process of “composting” is the decomposition of plant remains and other once-living materials into an end product known as compost. Final compost is a dark, crumbly substance with an earthy odor. Organic Waste Microorganisms Water Air Carbon dioxide and heat Compost
Why Compost? • Compost is an inexpensive soil amendment that • supplies nutrients and organic matter • Improves soil structure and water holding capacity • According to the EPA, home composting can divert 700 lb. of waste per household per year from municipal waste. This includes both yard waste (nearly 17% of municipal solid waste is yard waste) and food scraps (approx. 6.7% of solid waste is from food scraps).
Create Your Own Compost Pile • Locate a site • Determine compost structure • Prepare and maintain the compost pile • Materials for composting • Proper carbon-to-nitrogen ratio C/N (“brown” to “green” ratio) • Particle size • Aeration (involves turning and mixing) • Moisture • Troubleshooting your compost pile
Overall concept……….. • Think of composting as the process of growing microbes; they need air, water, and food!
Locating a compost site • Compost site should be convenient and not interfere with activities or neighbors • Often near garden or kitchen or between garage and house are good options • Compost site will perform best if protected from wind but receive partial sunlight
Choosing a Compost Structure • Unenclosed usually not allowed in Urban settings because they can become unsightly • Choose bin approx 3-5’ in each direction (square or round) • Smaller than this tend not to develop enough heat • Larger than this and air and water are not as able to penetrate • Need approximately 1 cubic yard of waste to generate proper temp (130-150 F)
Common compost structures • Compost pile (simplest but not as neat and may not be allowed) • Barrel or drum composter • Bin-type structure • Three-chambered bin
Horizontal rotating drum Easy turning!
Make your own barrel composter • 55 gal container with secure lid (no chemical storage) • Drill ½” holes; 6-9 rows for aeration and moisture drainage • Situate barrel upright on blocks • Aeration through rolling drum on its • Great choice for small space
Bin-type structures • Made with small spaced woven wire fencing- fasten together with chain snaps • 4-5’ diameter and height • Stake may be driven into center to maintain shape and aid water addition • Aeration can be done by unsnapping wire, moving fence and turning compost back into it. • Practical for larger quantities of waste
Three chambered bin structure • Use rot resistant wood (cedar or redwood) but avoid chemically treated wood • Each bin should be ~5 ft. x 3 ft. and about 4-5 ft. high • Ideal volume for maintaining heat but is still manageable for turning • Removable slats in front allow for complete access to contents for turning
Three chambered bin structure • Compost ‘assembly line’; three portions of compost at varying stages of decomposition • Use first bin for initial materials and allow to compost for 3-5 weeks • Move first compost to second bin for 4-7 weeks and start another batch in the first • Third bin is for finished or nearly finished (can age here)
Preparing your Compost Pile What can be composted? • Clean paper and paperboard (cereal boxes, paper plates, etc), newspaper • Shred or break into small pieces • Cotton rags, dryer lint • Coffee grounds and filter, tea bags • Hay, straw, wood chips, sawdust • Cut to less than 2 inches • High in carbon • Do not use products from treated wood
Preparing your Compost Pile What can be composted? • Leaves • Garden debris (old plants) • Reduce to less than 2 inches • Grass clippings • Pack well, mix with coarse materials • Avoid use of clippings from treated lawns
Preparing your Compost Pile What can be composted? • Egg shells • Adds calcium • Fruit and vegetable waste • Again, reduce in particle size • May compact since wet, add dry, coarse materials with • Nut shells
Preparing your Compost Pile What shouldn’t be composted? • Black walnut tree leaves or debris • Release substances that may be harmful to plants • Coal or charcoal ash • Diseased or insect infested plants • Weeds with seeds
Preparing your Compost Pile What shouldn’t be composted? • Dairy products; Fats, grease, lard, oils; Meat or fish scraps • Create odors and attract rodents and flies • Pet or human wastes • May contain parasites, pathogens, harmful viruses • Yard trimmings with chemical pesticides • Plastic wrap and aluminum foil • Will not break down
Mixing the materials in the right ratio (i.e. carbon to nitrogen ratio) • Remember, we’re growing microbes. • Microbes need carbon for energy and nitrogen for protein • All materials contain both carbon and nitrogen, but in different amounts. • Most compostable material has more C than N. • Based on the ratio of carbon to nitrogen, the rate at which the microbes grow is different.
Mixing the materials in the right ratio (i.e. carbon to nitrogen ratio) • The ideal ratio is 20-30 parts carbon (brown) to 1 part nitrogen (green) for the most rapid growth. • For high C/N material, may need to supplement with nitrogen sources • For example: straw, leaves, and paperboard is very high in carbon. In order to achieve the appropriate C/N, a high nitrogen fertilizer or animal manure should be added. • Generally, ½ c 27-0-3- or 1-2” animal manure for each 8-9” layer in a pile area of 25 square ft. • DO NOT ADD FERTILIZER WITH HERBICIDE
Carbon to Nitrogen ratios • Tree leaves (and misc. foliage) • 30 to 80:1 • Corn stalks 60:1 • Straw 40 to 100:1 • Bark 100 to 130:1 • Paper 150 to 200:1 • Wood chips, sawdust 200 to 500:1 • Pig manure 5 to 7:1 • Poultry manure(fresh) • 10:1, (with litter) 13 to 18:1 • Vegetable wastes 12 to 20:1 • Coffee grounds 20:1 • Cow manure 20:1 • Grass clippings 12 to 25:1 • Horse manure (fresh) 25:1, with litter 30 to 60:1
Carbon to nitrogen ratio • If you have the same amount of grass clipping and leaves, the overall carbon to nitrogen ratio is 20 + 50 = 70/2 = 35:1 GREAT! • If calculating isn’t for you, then estimate! • You’ll see this in a few slides.
Create the compost pile • Chop or shred compost materials to ensure fast decomposition • Remember, size of thumb or postage stamp is best. Larger will decompose, just slower (don’t want larger than 2 inches). Tree leaves mow before raking • Also, larger coarser materials will decompose faster if placed on the bottom • Carbon or brown layer should be the top and bottom (to moderate odors)
Create the compost pile • Easiest is to create a pile in layers • Layer approx. 6-10 inches of organic matter and then add approx. 1-2 inches of a high nitrogen matter. This can be manure, high nitrogen fertilizer, blood or cottonseed meal or green grass clippings . A small amount of soil can also be added. • Water each layer until moist. Should be as wet as a well wrung sponge. • Continue to layer ending with a brown layer.
Compost pile layering Layering makes it easy to ensure proper nutrient ratio
Compost pile layering: Is soil and ‘compost starter’ necessary? • Soil can be added as a source of microbes, but is not essential • Surfaces of compostable materials generally have adequate microbes. • Commercial compost ‘starter’ is not necessary
Create the compost pile: How to check for proper air space • ‘The Five Gallon Bucket Test’ • Equipment/Supplies Necessary: • -five gallon pail • -one-gallon plastic milk jug • -typical mix of the materials you add to your compost pile • Fill the 5 gallon pail with water by filling and emptying the 1 gallon milk jug five times into the pail. Mark this level as the ‘full line’. • Empty the water from the five gallon pail. • Fill the 5 gallon pail 1/3 full with typical compost mix and drop the pail 10 times from a height of 6 inches onto hard surface.
Create the compost pile: How to check for proper air space • ‘The Five Gallon Bucket Test’ • Fill the 5 gallon pail to 2/3 full and drop 10 times. Fill the pail to 3/3 full and drop 10 times. • Now add water and track the amount of water you can add to the 5 gallon pail. • If you add 2.75 -3.25 gallons you have adequate free space. • If you can’t add at least 2.75 gallons you have inadequate free space. Add more bulking materials such as straw or coarse wood chips.
Create the compost pile: How to check for proper air space • ‘The Five Gallon Bucket Test’ • If you can add more than 3.25 gallons, then you have too much air space. Reduce particle size in the mixture (grind, shred or add finer materials to the mixture). • 4. Retest if necessary.
Lime and composting • Limestone can be added to reduce acidity in the compost pile. • Limestone addition is not necessary in most conditions because acidity will drop over time. • Can be used for pine needles, fruit wastes, and anaerobic decomposition to neutralize acids. • Apply 1 cup limestone per 25 sq ft for every 8-9” layer.
Maintaining your compost pile • Check periodically and add water. • Should be as wet as a well wrung sponge. • Need to check more during hot, dry weather. • Turn or mix your pile once or twice a month to hasten decomposition. • Well-mixed will help pile reach higher temps for longer time periods. • Heat is from microbial growth: 130-150F in middle (mixing moves outer part of pile to the inside and it heats again……why turning is necessary)
Maintaining your compost pile • Turning more will not overcome compost material that does not have enough free air space. • New materials should be dug into pile (not left on surface).
Maintaining your compost pile:Temperature • A minimum pile temperature of 130-150F for at least 3 days is necessary to destroy weed seeds and plant pathogens (15 days is more effective)
When is your compost ready? • Varies quite a bit! • Well-managed and correctly prepared pile • 4-9 months (doesn’t include winter) • Unattended and poorly prepared • May take 1-3 years (doesn’t include winter) • Outdoor piles prepared in fall will not be ready in the spring
When is your compost ready? • In general, when the compost is finished the pile is half the original size and has an earthy aroma • Looks like soil, and you won’t see much original material • Also, finished compost will not heat up again when the pile is mixed
What can you do with compost? • Soil amendment • Add 1-2” to soil surface and incorporate 6-8” deep • Improve the moisture holding capacity of sandy soils (slightly lower rate of addition) • Add to heavy clay soils to improve drainage and aeration (slightly higher rate of addition) • Increases the ability of the soil to hold and release essential nutrients.
What can you do with compost? • Soil amendment • Promotes activity of earthworms and soil microorganisms. • Improves seed emergence and water infiltration due to reduction in soil crusting.
What can you do with compost? • Mulch • Use and maintain 2-4” around base of plant: • Weed suppression • Modified soil temperature • Less fluctuation in winter and cooler in summer • Reduced water evaporation • Reduced soil erosion
References http://extension.missouri.edu/explore/agguides/hort/g06956.htm http://www.extension.umn.edu/distribution/horticulture/components/3296-03.html#02 Master Gardener Core Course 2008. Composting. Prof. Carl Rosen