Download

1 / 17
170 likes | 320 Vues
Process of Making Cat 5e Cables. Rana Radwan. GATHERING OF SUPPLIES. RJ-45 Connectors (4) RJ-45 Crimp Tool Desired feet of Cat 5e cable Cable Tester. PARTS. Crimper Tool. Tester. PREPARE WIRE. Cutting desired wire length Made one long and one shorter

E N D
Process of MakingCat 5e Cables Rana Radwan
GATHERING OF SUPPLIES • RJ-45 Connectors (4) • RJ-45 Crimp Tool • Desired feet of • Cat 5e cable • Cable Tester
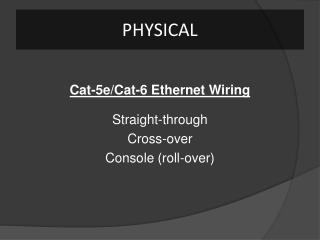
PARTS Crimper Tool Tester
PREPARE WIRE Cutting desired wire length Made one long and one shorter Cut the cable with sharp part on the middle of the crimp tool
STRIPPING INSULATION Take wire and place it in the stripping part Careful not to cut the wire part Cut about 1 inch of insulation that is around the wire Remove insulation
SEE THE WIRES • Now all the 4 twisted pairs of wire are visible • There was a silky braid, which I got rid of that was with the wires • 4 Colors: • Brown, White/Brown Stripe • Green, White/Green Stripe • Blue, White/Blue Stripe • Orange, White/Orange Stripe • Separate the braids
PUTTING IN ORDER • In order for the Ethernet cable to work, the order must be correct • Bring wires together, keeping colors in place, pinch them together and cut wires down to ½ inch • 568-B (T568B) Standards • Going from left to right • Brown, White/Brown Stripe, Green, White/Blue Stripe, Blue, White/Green Stripe, Orange, White/Orange Stripe • Bring wires together, keeping colors in place, pinch them together and cut wires down to ½ inch
THE CONNECTORS Place a RJ-45 connector in one hand and cable in the other hand Push the wire all the way through the connector
CHECKING THE ORDER • Make sure to turn the connector up-side down (tab against you, so that you can see the wires) • Pattern should be (left to right): • Brown, White/Brown Stripe, Green, White/Blue Stripe, Blue, White/Green Stripe, Orange, White/Orange Stripe
CRIMP TOOL After the order of the wires are correct, bring out the crimp tool Place connector inside crimp tool Squeeze handles to secure the connector to the wire Remove wire from crimp tool
CABLE TESTER Placed a 9v battery in the cable tester Turned the on switch on and saw a green light. Indicating that it is on and working
TESTING CABLES • With the cable tester on, I placed each connector from the wire in its place • There should be 2 connectors on each wire, on each end • One part of the tester is the sender and the other is the receiver
LIGHTS • If done correctly, should see all the lights turn green • There are 4 parts that turned green, this indicated that the Ethernet cables are successfully working • Path followed: • 1&2 3&6 4&5 7&8 • Indicates straight pair
OTHER CABLE I made the other cable the same exact way Checked it as well to make sure that it worked All the light turned green
PROBLEMS I RAN INTO Cutting into the wires while stripping the insulation Not getting the order of the wires correct Having a different order on each end Not getting all the lights to go green
WHAT I LEARNED There are many things that are important when putting together Ethernet cables: Order is crucial for working cable When taking off insulation, be careful not to cut into wires Order of the colors must be the same on both ends When testing, all the lights must turn on
THE END