Download
1 / 30
300 likes | 306 Vues
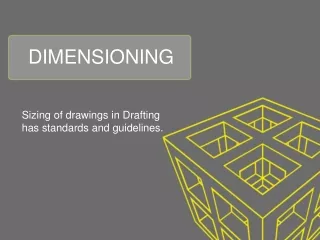
CHAPTER 3 Dimensioning. Extension lines. Dimension lines (with arrowheads ). Leader lines. DIMENSIONING COMPONENTS. EXTENSION LINES. indicate the location on the object’s features that are dimensioned.

E N D
Extension lines Dimension lines(with arrowheads) Leader lines DIMENSIONING COMPONENTS .
EXTENSION LINES indicate the location on the object’s features that are dimensioned.
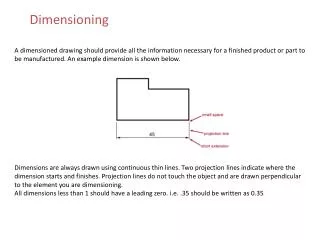
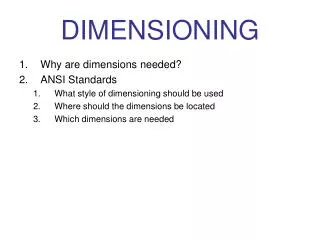
A dimensioned drawing should provide all the information necessary for a finished product or part to be manufactured. Dimensions are always drawn using continuous thin lines. Two projection lines indicate where the dimension starts and finishes. Projection lines do not touch the object and are drawn perpendicular to the element you are dimensioning. Dimensioning
Types of Dimensioning • Parallel Dimensioning • Parallel dimensioning consists of several dimensions originating from one projection line.
Superimposed Running Dimensions • Superimposed running dimensioning simplifies parallel dimensions in order to reduce the space used on a drawing. The common origin for the dimension lines is indicated by a small circle at the intersection of the first dimension .projection line.
Chain Dimensioning • Combined Dimensions • A combined dimension uses both chain and parallel dimensioning.
Dimensioning of circles (a)shows two common methods of dimensioning a circle. One method dimensions the circle between two lines projected from two diametrically opposite points. The second method dimensions the circle internally. (b)is used when the circle is too small for the dimension to be easily read if it was placed inside the circle.
Dimensioning Radii • All radial dimensions are proceeded by the capital R. • shows a radius dimensioned with the centre of the radius • located on the drawing. • (b) shows how to dimension radii which do not need their • centres locating.
Aligned System values read from bottom and Right side. Unidirectional System values read from bottom only
INCORRECT CORRECT
Leave a visible gap (≈ 1 mm) from a view and start drawing an extension line. Extend the lines beyond the (last) dimension line 1-2 mm. EXTENSION LINES COMMON MISTAKE Visible gap
Do not break the lines as they cross object lines. EXTENSION LINES COMMON MISTAKE Continuous
Dimension lines should not be spaced too Close to each other and to the view. DIMENSION LINES Leave a space at least 2 times of a letter height. 16 11 34 35 Leave a space at least 1 time of a letter height.
The height of figures is suggested to be 2.5~3 mm. Place the numbers at about 1 mm above dimensionline and between extension lines. 34 11 DIMENSION FIGURES COMMON MISTAKE 11 34
When there is not enough space for figure or arrows, put it outside either of the extension lines. DIMENSION FIGURES Not enough space for figures Not enough space for arrows 16.25 1 1 1 16.25 or
Length dimension in millimeters without specifying a unit symbol “mm”. Angular dimension in degree with a symbol “o” place behind the figures (and if necessary minutes and seconds may be used together). DIMENSION FIGURES : UNITS The JIS and ISO standards adopt the unit of
DIMENSION FIGURES : ORIENTATION 1. Aligned method The dimension figures are placed so that they are readable from the bottom and right side of the drawing. 2. Unidirectional method The dimension figures are placed so that they can be read from the bottom of the drawing. Do not use both system on the same drawing or on the same series of drawing (JIS Z8317)
30 30 30 30 30 30 30 30 EXAMPLE : Dimension of length using aligned method.
30 30 30 30 30 30 30 30 EXAMPLE : Dimension of length using unidirectional method.
EXAMPLE : Dimension of angle using aligned method. 45o 45o 45o 45o 45o 45o 45o 45o
45o 45o 45o 45o 45o 45o 45o 45o EXAMPLE : Dimension of angle using unidirectional method.
Drawing Scales Scale is the ratio of the linear dimension of an element of an object shown in the drawing to the real linear dimension of the same element of the object. Actual size Size in drawing 2 1
Drawing Scales • Designation of a scale consist of the “SCALE” followed by the indication of its ratio, as follow SCALE 1:1 for full size SCALE X:1 for enlargement scales (x>1) SCALE 1:X for reduction scales (x>1) • Dimension numbers shown in the drawing are correspond to “true size” of the object and they are independent of the scale used in creating that drawing