Download
1 / 39
390 likes | 497 Vues
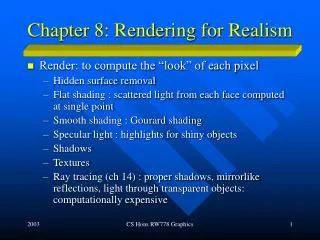
Rendering faces for visual realism. Modeling Surface Reflectance. r = -s + 2 *(s*m)/(|m|*|m|) *m – mirror reflection direction f is cosine of Falloff of the specular light with the angle. Ambient Light

E N D
Modeling Surface Reflectance r = -s + 2 *(s*m)/(|m|*|m|) *m – mirror reflection direction f is cosine of Falloff of the specular light with the angle
Ambient Light is the light that has a source, but is evenly spread around the room. Objects that have ambient light are evenly lit and always visible. Light is evenly distributed that there is no way to tell its source. For example, due to reflection of light from walls. Diffuse Light is a light that comes from a particular direction and reflects evenly off the surface. Points where the light is directly normal (perpendicular) from the light source to the surface appear brighter. Specular Light is similar to the Diffuse light where the light comes from a particular direction, but the reflection is much more dynamic. This effect can usually cause a shine or a glare.
paining glShadeModel(GL_FLAT) Smooth shading
Sources of light GLfloat myLightPosition[] = {3.0, 6.0, 5.0, 1.0}; GLLightfv(GL_LIGHT0, GL_POSITION, myLightPosition); glEnable(GL_LIGHTING); //enable lighting glEnable(GL_LIGHT0); //enable this particular source Infinitely remote source (directional light): GLfloat myLightPosition[] = {3.0, 6.0, 5.0, 0.0}
RGB Values for Lights and Materials For light the numbers correspond to a percentage of full intensity for each color: • If the R, G, and B values for light’s color are all 1.0, the light is the brightest possible white. • If the values are 0.5, the color is still white, but only half intensity, so it appears gray. • If R=G=1 and B=0, light appears yellow.
RGB Values for Lights and Materials For materials, the number corresponds to reflected proportion of those colors. So, if R=1, G=0.5, and B=0 for a material, that material reflects all the incoming green, and none of the incoming red light, half the incoming green, and none of the incoming blue light.
RGB Values for Lights and Materials • OpenGL light has components (LR, LG, LB), and material has corresponding components (MR, MG, MB), then ignoring all other reflective effects, the light arrives at the eye is given by (LR*MR, LG*MG, LB*MB). • Similarly, if we have two light source that sends (R1, G1, B1) and (R2, G2, B2) to the eye, OpenGL adds the components (R1+R2, G1+G2, B1+B2). • If a color intensity is bigger than 1, OpenGL makes it 1.
Lighting Terms in OpenGL • GLfloat amb0[] = {0.2, 0.4, 0.6, 1.0}; • GLfloat diff0[] = {0.8, 0.9, 0.5, 1.0}; • GLfloat spec0[] = {1.0, 0.8, 1.0, 1.0}; • glLightfv(GL_LIGHT0, GL_AMBIENT, amb0); //attach them to LIGHT0 • glLightfv(GL_LIGHT0, GL_DIFFUSE, diff0); • glLightfv(GL_LIGHT0, GL_SPECULAR, spec0);
Normal • As far as the API is concerned, a square, or any object, is just a collection of points to form an object. • Even with simple objects, OpenGL knows nothing of the properties of that object. • In order to give more information to OpenGL about an object and light, a normal should be defined.
Normal A normal vector is a line perpendicular to a plane in three-dimensional space. OpenGL uses normalized normal: a normal vector of length 1, to calculate how light may reflect off an object.
Normal (1, 0, 2), (2, 3, 0), (1, 2, 4) a = (2, 3, 0) – (1, 0, 2) = (1, 3, -2) b= (1, 2, 4) - (1, 0, 2) = (0, 2, 2) n = (ay . bz – az . by).i + (az . bx –ax . bz).j + (ax . by –ay . bx).k n =(10, -2, 2)
Calculating the Normal vector Objects may have analytic surfaces and non-analytic surfaces I. Calculating normal vector for analytic surfaces: • Analytic surfaces are surfaces that are non-coplanar, such as spheres. • Because calculating normal vector are only done at vertices, it becomes incredibly complicated to determine where the vertices are for an object such as a sphere. • If the object being drawn is a predefined GLU shape, then using the gluQuadricNormals() function, will generate the normal vector for you • GLUT predefined shapes automatically calculate the normal vector.
Calculating Normal vector II. To find a normal of a surface that is non-analytic • Means that the surface lies on the same plane, or is co-planar. • This means that the normal vector on this surface is the same on all vertices. • We have to get two vectors v1, v2 that are non-collinear and share a tail. • The result of the cross product of the two vectors is a vector normal to the surface.
Materials OpengGL lighting model makes the approximation that a material’s color depends on the percentage of the incoming red, green, and blue light it reflects. For example, a perfectly red ball reflects all the incoming red light and absorbs all the green and blue light that strikes it. When such a ball is viewed in a white light (composed of equal amounts of red, green and blue light), all the red is reflected and you see a red ball. If the ball is viewed in a pure green light, it appears black (all the green is absorbed and there is no incoming red, so no light is reflected).
Materials Like lights, materials have different ambient, diffuse and specular colors, which determine the ambient, diffuse, and specular reflectance’s. A material’s • ambient reflectance is combined with the ambient component of each incoming light source, • the diffuse reflectance with the light’s diffuse component • specular reflectance with the light’s specular component.
Materials In addition to ambient, diffuse, and specular colors, materials have an emissive color, which simulates light originating from an object. In OpenGL, the emissive color of a surface adds intensity to the object, but is unaffected by any light source. Materials are what we use to give an object a certain type of reflective (or non-reflective) quality.
Materials Example: glEnable(GL_COLOR_MATERIAL); float red[] = {0.94, 0.2, 0.15, 1.0}; glMaterialfv(GL_FRONT, GL_AMBIENT_AND_DIFFUSE, red); // draw some objects glDisable(GL_COLOR_MATERIAL);
Materials • Enabling the material properties with a call to glEnable allow the materials to be manipulated. • Next, it is needed to set which side the material colors it to be used for. • The only three possible choices are GL_FRONT, GL_BACK, or GL_GL_FRONT_AND_BACK.
Materials • The next parameter allows you to set the types of light to set (GL_AMBIENT, GL_DIFFUSE, GL_SPECULAR, or GL_AMBIENT_AND_DIFFUSE). • One thing to note is that in most cases the ambient and diffuse materials are set to the same values, and this is why OpenGL has an option for combining the two in one line. • The last parameter is an array (vector) of the intensities of the Red, Green, Blue and Alpha values that define the (in our case) ambience and diffuse properties (the second parameter).
Materials • For use with lighting, we always set the alpha value to 1.0. • Finally a call to glDisable() may speed up graphic intensive operations if the machine doesn’t have to check for material colors anymore.
Rendering • How to render in different modes to get either a solid or an outlined object? • OpenGL allows both sides of an object to be rendered in a different mode. • A question appears: “How does OpenGL know which side of an object is the front?” • Rule: OpenGL assumes that anything drawn in counter-clock-wise direction is the front side by default.
Example: program fragment drawing a red square with front solid and back outlined glPolygonMode(GL_FRONT, GL_FILL); //Front filled glPolygonMode(GL_BACK, GL_LINE); // Back Outlined glColor3f(1.0, 0.0, 0.0); glBegin(GL_QUAD); // Square drawn counter clockwise glVertex2d(-1, -1); glVertex2s(1, -1); glVertex2d(1, 1); glVertex2d(-1, 1); glEnd(); glPolygonMode(GL_FRONT_AND_BACK, GL_FILL); // return the drawing mode
Notice that the points are ordered from the bottom left to the top left in a counter-clock-wise direction. This means that we will never see the outline back unless we rotate the camera.
GLFrontFace(): changes the default rule • A call to glFrontFace(enum Mode) can change the default counter-clock-wise front facing polygons to back facing. • The accepted Modes are GL_CCW for counter-clock-wise, and GL_CW for clock-wise front facing polygons. • This function is rarely used, but may be useful for porting applications from different graphic environments. • For example, Microsoft’s DirectX uses clock-wise as front facing. In this case, making a call to this function may be easier than reordering the position of the vertices.
void glCullFace (enum Mode); • Culling is a term in three-dimensional graphics that means not drawing. • When an object is drawn to the screen, all vertices are mapped to where they would be on the screen even if they are not going to be seen. • If it is not necessary to draw a face of an object, calling the glCullFace function will save rendering if you know that a face will not be seen. • The possible Modes correlate to the faces of the object. They are GL_FRONT, GL_BACK, and GL_FRONT_AND_BACK. In order to use this function, you must enable the culling with a call to glEnable(GL_CULL_FACE).
Hidden Surface Removal How does OpenGL know what objects are in front of other objects? Assume, two objects are rendered. Object 1 is behind object 2 and object 2 is partially obscuring object 1. The display function would draw the object 1 first and then object 2. What if the camera rotated 180 degrees behind object 1? Now the tables are turned, and object 1 is in front with the respects to the camera. If the objects are drawn in the same order, object 2 will always look like it is in front of object 1 no matter what the camera location is.
Hidden Surface Removal • OpenGL uses Z-buffering to solve this problem of hidden surface removal. • Z Buffering is when every pixel’s z-coordinate is compared to every other pixel’s z-coordinate on a line from the camera. • Only the pixel that is not covered by any other pixel is actually drawn to the screen. Pixel_example
Hidden Surface Removal To enable this powerful feature: • First, in your setup function call to glClear should also contain GL_DEPTH_BUFFER_BIT along with any other buffer bit you wish to clear. glClear(GL_COLOR_BUFFER_BIT|GL_DEPTH_BUFFER_BIT); • Second, your application should include GLUT_DEPTH in the main function’s glutInitDisplayMode. This would look something like this: glutInitDisplayMode(GLUT_DEPTH | …); • Third, a call to glEnable(GL_DEPTH_TEST) to tell the API to use depth testing.
3D GLUT predefined shapes • void glutSolidTorus(double InnerRadius, double OuterRadius, int sides, int rings); • void glutWireTorus(double InnerRadius, double OuterRadius, int sides, int rings); • InnerRadius is the inner radius of the torus. • OuterRadius is the outer radius of the torus. • Sides is the number of sides for each radial section. • Rings are the number of radial divisions for thetorus.
3D GLUT predefined shapes • void glutSolidTeapot(double size); • void glutWireTeapot (double size); • Sizeis the relative size of the teapot.
3D GLUT predefined shapes The prototype for four more shapes are shown below. • void glutSolidIcosahedron(); • void glutWireIcosahedron (); • void glutSolidOctahedron(); • void glutWireOctahedron (); • void glutSolidTetrahedron(); • void glutWireTetrahedron (); • void glutSolidDodecahedron(); • void glutWireDodecahedron ();
3D GLUT predefined shapes • By changing the Display function of the triangle program, we can get some good three-dimensional graphics. • Example: a program fragment that draws a yellow teapot to the screen:
3D GLUT predefined shapes void Display() { glClear(GL_COLOR_BUFFER_BIT); // Clear pixels in buffer glColor3f(1.0, 1.0, 0.0); glutSolidTeapot(0.5); glFlush(); // Draw to the screen }