Download
1 / 72
760 likes | 1.19k Vues
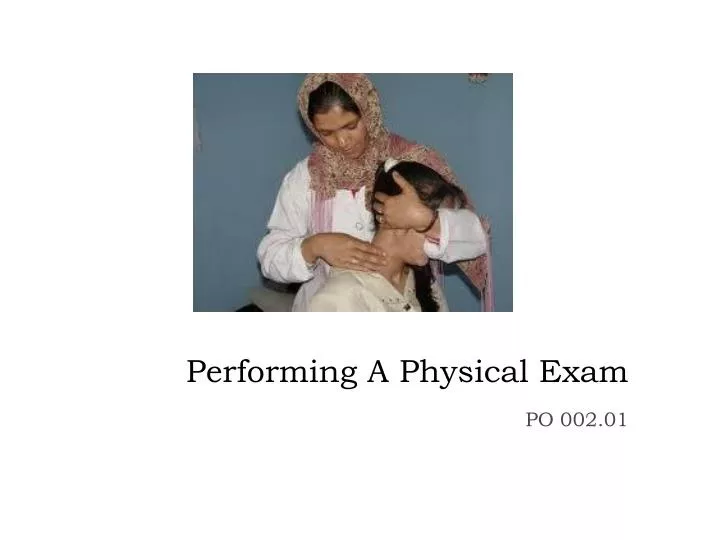
Performing A Physical Exam. PO 002.01. Physical Examination . The evaluation of a patient is conducted in two parts: The subjective exam The objective exam

E N D
Performing A Physical Exam PO 002.01
Physical Examination • The evaluation of a patient is conducted in two parts: • The subjective exam • The objective exam • The purpose of the assessment is to fully and clearly understand the patient's problems and the physical basis for the symptoms that cause the patient to complain • It is important to do complete physical exams to ensure that the patient is assessed properly and that the treatment plan addresses the patients issues
Subjective Exam • The first step of an evaluation when the PTT will verbally ask the patient questions pertaining to their condition, signs and symptoms to obtain as much information to help determine the best possible treatment plan • Based on the information gathered from the subjective examination, the clinician will determine which tests to perform designed to confirm or refute their hypothesis on the source of a patient’s symptoms • Most of the valuable information will come from the subjective exam so take time to be thorough and ask follow-up questions to patient’s response
Components of Subjective Examination • A good subjective exam should include the all of the following information: • Demographic information • Chief complaint or history of present illness • Past medical history • Current medical history • Medications • Social status • Occupational information • Previous treatments • Red flag questions
Chief Complaintشکایت عمده • This is the reason the patient is seeking medical advice: Example: A 22-year-old male complains of left knee pain • این دلیل است که مریض نیاز به مشوره طبی دارد: • مرد 22 ساله از درد زانو چپ شکایت دارد
History of Present Illness • The acronym “OPQRST” can be used to help remember what questions to ask: • O: Onset • P: Provocation/Position • What brought symptoms on?, Where is pain located? • Q: Quality • Sharp, dull, crushing etc… • R: Radiation • Does pain travel? • S: Severity/Symptoms Associated • 1/10 scale, What other symptoms occur? • T: Timing/Triggers • Occasional, constant, intermittent, only with certain activities…
Completing the History • Another acronym to help remember questions for the subjective history is “SAMPLES”: • S: Signs & Symptoms (review of other systems) • A: Allergies/Social History • M: Medications • P: Past Surgeries/Past Medical Problems • L: Last Time Symptoms Occurred • E: Events Leading Up To Injury/Illness • S: Social History (Occupation, Tobacco/Alcohol Use, home life/support network)
Red Flags • Red Flag findings are symptoms or conditions that may require immediate attention and supersede the PTT being the primary provider of service • Red flag findings are typically indicative of non-mechanical (non-neuromusculoskelteal) conditions or pathologies of visceral origin and patient’s presenting with red flags need to be referred back to the doctor immediately • Red flags can come from both the subjective and objective exam. There are also specific red flags for specific areas of the body
Red Flags: Medical History • History of Cancer (personal or familial) • Unwarranted general fatigue/malaise • Recent Infection, Illness, or Constitutional symptoms • Immunosuppression • Injection drug use • Altered Vital Signs (BP, HR, PR, body temp) • Fever/Night Sweats
Red Flags: Clinical Presentation • Unknown etiology with insidious onset • Symptoms unaltered by examination or intervention (for better or worse) • Symptoms unaltered or inconsistent with specific positions or postures • Diminishing symptomatic relief value from previously effective remedies • Disproportionate symptoms • Symptoms do not fit in typical or recognizable pattern • Unexplained symptoms (swelling, paraesthias, weakness, tone alteration) • Significant, unintended weight loss or Gastrointestinal Disturbances • Palpable, growing mass • Skin/Nail Changes • Cardiovascular Changes (shortness of breath, chest pain, pulsatile findings) • Bowel/Bladder Change or Dysfunction
Red Flags: Abnormal Pain Symptoms • Pain despite full passive ROM • Pain inconsistent with emotional or psychological status • Nocturnal pain (sleep interruption) • Constant and/or poorly localized pain • Severe, unremitting, or unusual pain
Red Flags: Neuro Presentation • Altered mental status • Altered attentiveness (drowsy, lethargic, sleepy) • Blurred vision, altered speech, hearing deficits • Difficult swallowing • Headache • Balance/Coordination Deficits or altered DTRs
Objective Exam • The hands on part of the exam where the PTT will put the patient through several tests based on the information provided in the subjective exam • The tests performed in the objective exam will provide quantifiable (measurable) data that can be used to track patient progress and the effectiveness of the treatment • During the objective exam, the PTT will collect and record the data from the various tests and the patients response to each test
Components of Objective Exam • The objective exam consists of: • Inspection • Palpation • Range-of-Motion (ROM) • Muscle strength testing • Motor & Sensory testing • Special tests
Objective Exam • Inspection: • Ask the patient to place one finger on the one spot that hurts the most • This simple request will localize the problem and narrow the differential diagnosis • Look for swelling, bruising, tone, and muscular atrophy • تفتیش را شروع نمائید • از مریض تقاضا نمائید که انگشتش را بالای یک نقطه که درد مینماید قرار دهد. • این درخواست ساده شما مشکل را موضعی ساخته و تشخیص تفریقی را اسان تر میسازد • تورم، ساحه مصدومه، و اتروفی عضلی را جستجو نمایید
Objective Exam • Inspection continued: • Note the patient's body habits and standing posture • Compare the affected area with the unaffected area on the opposing side of the body • This comparison is important to define subtle abnormalities and to rate the severity of the problem • شروع با تفتیش (ادامه آن) • یادداشت کردن عادات مریض و وضعیت ایستاده • مقایسه کردن نهایات متاثر شده با نهایات غیر متاثر شده • این مقایسه جهت تعین ابنارملتی های دقیق و تعین درجه مشکل مهم میباشد.
Inspection Left hand muscle wasting from denervation Left calf atrophy and Right calf hypertrophy
Inspection Continued . . . • Watch the patient walk and transfer to and from sit to stand, or turn in bed if applicable • Analyze the stance and swing phases of gait to identify antalgic gait patterns • Look for compensations in movement and comparisons of sides during the movements
Objective Exam: Palpation • The affected area should be palpated for: • Tenderness or pain • Abnormal masses • Temperature changes • Sensation changes • ساحه متاثر شده باید برای موارد ذیل جس گردد: • حساسیت • کتله های غیر نارمل • تغیرت درجه حرارت
Objective Exam: Range of Motion (ROM) • Measuring joint motion is important • Joint mobility is essential to perform activities of daily living • Losses in ROM can be a clue to the diagnosis • Also determines if therapy/treatment is effective? • Predicts the patient function? • در مریضی حاد، درجه حرکت مفصلی عبارت از کلید تشخیصی میباشد • آیا تداوی یا معالجه موثر است؟ • آیا مریض خوب فعالیت میکند؟
Range of Motion دامنه حرکت • Measuring joint motion is important • In some conditions, the degree of ROM provides an index to the severity and progression of the disorder, as well as providing important information concerning the results of treatment • اندازه کردن حرکت مفصلی خیلی ها با اهمیت است • در وضعیت های مزمن مثل التهاب عظمی مفصلی، درجه حرکات مفصلی یک شاخص برای شدت و پیشرفت مرض را نشان میدهد، همچنان معلومات مهم برای نگرانی های نتایج تداوی را نیز نشان میدهد
Basic Principles of ROM Measuringاساسات عمده اندازه دامنه حرکت • Joint ROM is an objective measurement • The parameters for rating musculoskeletal disability are based largely on the degree that joint motion is impaired • حرکت مفصلی یک اندازه گیری مورد هدف میباشد • پارامتر های میزان معیوبیت عضلی اسکلیتی به اساس عدم کفایه در درجه حرکت مفصلی میباشد
Basic Principles of ROM اساسات عمده دامنه حرکت • ROM can be estimated visually however, a goniometer enhances accuracy • A device used in physical therapy to measure the ROM around a joint in the body • Usually made of plastic and is often transparent. Occasionally are made of metal • There are two "arms" of the goniometer: • The stationary arm and the moveable arm • Each arm is positioned at specific points on the body and the center of the goniometer is aligned at the joint to be measured
ROM Starting Positionوضعیت با شروع صفر • Knowing the accepted starting position for each joint is necessary to provide consistent communication between observers • For most joints, the starting position is somewhere in the middle of the available anatomical range • If the starting position is not used when taking a measurement, the position used needs to be recorded in the patient’s chart
Strength Testing • Physical therapy uses the Oxford Scale to assess muscle strength • According to the Oxford scale, muscle strength is graded on a scale of 0 to 5 • It is important that the same PTT test the patient throughout treatment as the Oxford scale has poor reliability between different testers • Strength testing should be done in the same starting positions as ROM testing
Strength Testing Continued • Strength testing should be performed on initial assessment to those muscles that are involved or potentially could be involved because of the specific injury • If the patient experiences pain with testing it should be recorded in addition to the strength grade • If a patient has pain or not with a weaken muscle, it can help determine or confirm a diagnosis
Strength Testing Guidelines • Place the patient in a position that provides overall support to the body (i.e. sitting or supine) • The area to be tested is placed in the same starting position as for ROM testing • The proximal part of the area being tested should be stabilized to reduce the opportunity for compensatory action by muscles
Strength Testing Guidelines Continued . . . • Resistance needs to be applied directly opposite the "line of pull" of the muscles being tested • i.e. If testing the quad muscles, force needs to be applied to flex the knee as the patient tries to extend • Gradual application of pressure should take place slowly eventually applying resistive force to meet the patient’s maximal effort • Both sides should be assessed to provide a comparison of the patient’s potential strength
Objective Exam: Motor and Sensory Testing • Nerve root function should be tested if the patient's presenting complaints suggest a neck or back problem (spine) • Peripheral nerve function should be tested if the disorder is localized to the extremities • فعالیت ریشه عصبی باید خوب تست گردد یعنی اگر مریض شکایات را بگوید و مشکل عنق یا کمر (نخاع) نشان دهد • فعالیت عصبی محیطی باید خوب تست گردد اگر تشوش در نهایات موقعیت داشته باشد
Motor and Sensory Evaluation • The nerves at each level in the spine correspond with a specific muscle(s) (Myotome) and sensation to a specific area on the body (Dermatome) • Myotome = relationship between the spinal nerves and a muscle • Dermatome = relationship between the spinal nerves and sensation to skin
Reflex Testing • A reflex arc has afferent (sensory) & efferent (motor) branch • Disruption of any part of path alters reflexes: • Upper Motor Neuron (UMN) Lesion • Reflexes more brisk (hyper-reflexia) • Lower Motor Neuron (LMN) Lesion or Peripheral Sensory Lesions • Reflexes are reduced or absent (hypo-reflexia)
Reflexes ریفلکس ها • A scale used to describe the strength of deep tendon reflexes 0 reflex absent 1+ reflex somewhat diminished; low normal 2+ reflex average; normal 3+ reflex brisker than average 4+ reflex very brisk, hyperactive • میزان مورد استفاده برای تشریح قدرت عمیقه ریفلکس های وتری • 0 غیابت ریفلکس • 1+ ریفلکس پائین و کم ، کمتر از نارمل • 2+ ریفلکس متوسط، نارمل • 3+ ریفلکس بیشتر از حد متوسط • 4 + ریفلکس خیلی ها سریع و خیلی ها فعال
Reflex Basics • Reflexes generally assessed in 5 places: • 3 in the arm (biceps, triceps, brachioradialis) • 2 in the leg (patellar & achilles) • Basic Technique for assessing a reflex: • Clearly identify tendon of muscle to be tested • Position limb so muscle is at rest • Strike tendon briskly with reflex hammer • Observe for muscle contraction & limb movement
Reflex Basics Continued . . . • Reflex Trouble Shooting: • Make sure the patient is relaxed & that you are striking the tendon directly • Hammer must swing freely • Reinforcement (distraction) helps if you’re having problems getting a response • When testing legs, ask patient to push their hands together as you strike the tendon • When testing the upper extremities, ask them to clench teeth
Biceps (C5,6) • Identify biceps tendon • Have patient flex elbow against resistance while you palpate tendon • Place arm so it’s bent to 90 degrees • Place one of your fingers on tendon and strike it briskly • Muscle should contract & forearm flex
Triceps (C7, 8) • Identify triceps tendon • Have patient extend elbow against resistance while you palpate tendon • Arm can hang down at ninety degrees or have hands on hips • Strike tendon directly or place finger on the tendon & strike it • Triceps muscle contracts & arm extends
Brachioradialis (C5,6) • Tendon for brachioradialis is ~ 10 cm proximal to wrist –you cant see or feel it • Place arm so resting on patient’s thigh, bent at elbow • Strike firmly • Muscle will contract & arm will flex at elbow & supinate
Patellar (L3,4) • Patellar tendon extends below knee cap • It is thick & usually visible & palpable, if not, palpate while patient extends lower leg • Strike firmly on tendon • Muscle will contract & leg extend at knee
Achilles (S1,2) • Achilles tendon is a thick structure connecting calf muscles to the heel • If having trouble finding, palpate as patient pushes their foot into your other hand • Hold foot at 90 degrees • Strike tendon firmly • Muscle will contract & foot plantar-flex (move downward)
Babinski Testing • The Babinski reflex occurs when the big toe moves upward and the other toes fan out after the sole of the foot has been firmly stroked • This reflex is normal in children up to 2 years old. It disappears as the child gets older. It may disappear as early as 12 months • When the Babinski reflex is present in a child older than 2 years or in an adult, it is often a sign of a brain or nervous system disorder (UMN lesion)
Babinski Testing • Firmly stroke bottom of foot, starting laterally & near heel –moving up & across balls of feet (metatarsal heads) • Normal = great toe moving downward • If UMN lesion (or in newborns), great toe will extend & other toes fan out