Download

1 / 30
300 likes | 310 Vues
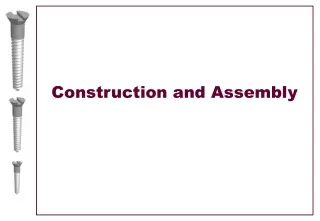
Building and assembly. HOW DO WE CUT WOOD?. Hand Saws Table Saws. Radial Arm Saws. Chop Saws. Scroll Saws. Jig Saws. Circular Saws. Reciprocating Saw.. Grinding Wheels. Hole Saws. What are the different types of Cuts. Rip-cuts. Cross-cuts. Resawing. Rip cuts.

E N D
HOW DO WE CUT WOOD? • Hand Saws • Table Saws. • Radial Arm Saws. • Chop Saws. • Scroll Saws. • Jig Saws. • Circular Saws. • Reciprocating Saw.. • Grinding Wheels. • Hole Saws.
What are the different types of Cuts • Rip-cuts. • Cross-cuts. • Resawing.
Rip cuts • A rip-cut is cutting wood parallel to its grain.
Cross-Cut • A Cross-Cut is cutting wood perpendicular to its grain.
Resawing • Resawingis cutting/splitting the wood from the end grain.
What is Drilling? • The process of boring holes through materials.
How can we make holes? • In order to make holes you need a machine and drills bits.
What types of machines make holes? • Drill Press. • Hand Drills. • Hammer Drills • Hole Saws.
What are Drill bits? • Drill bits are cutting tools used to remove material to create holes, almost always of circular cross-section. Drill bits come in many sizes and shape and can create different kinds of holes in many different materials.
Techniques for bonding wood • Wood Joints. • Screws. • Nails. • Nuts and Bolts. • Wood Glue.
Types of Wood Joints • Basic Butt Joint • Mitered Butt Joint. • Half-Lap Joint. • Tongue and Groove Joint. • Mortise and Tenon Joint. • Dado. • Rabbet. • Dove Tail Joint.
Wood Glue • Wood Glue because it sets fast and bonds strong, even stronger than wood! Carpenter's Wood Glue is sandable and paintable, so you'll have the perfect finish every time
Filing and Sanding • Filing is the act of using a tool to rubbed off small particles to shape an object. It removes more material then sand paper does. • Sanding is the process of removing, or smoothening a material.
What is Grit • Grit is the way sand paper is categorized. • The lower the GRIT # the rougher the sand paper will make the item being sanded • The higher the GRIT # the smoother you project will be. • You must start at the lowest GRIT possible, Sand the entire project with that GRIT, then change to the next highest number GRIT closest to the one you were just working on.
Staining • We may sometimes pre-stain the wood which is a coating that allows the stain to be absorbed evenly. • Staining is the process of changing the colors of the wood. • We can darken the colors of wood by choosing different stainers • We can also darken the stain by applying a coat of stain, letting it dry and applying another coat. • Stainers not only change the color of the wood, but they also give it a textured look. • Stainers can be water-based or oil-based. • It should be brushed. • Make sure to wipe up any excess stainer. • https://www.youtube.com/watch?v=kt7lrXy7D9A
Finishing (Clear coating) • Polyurethane or Clear coat finish protects the wood from any damage. • It gives the wood a glossy or shiny look. • The coating must be stirred not shaken. • It should be brushed on in the direction of the grain. • Must be lightly sanded with very fine Grit sand paper for smoothness and remove stickiness.