Download
1 / 32
330 likes | 471 Vues
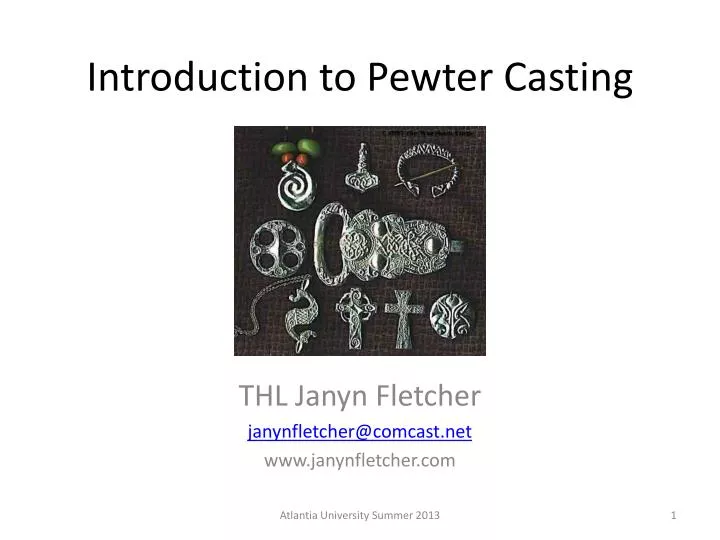
Introduction to Pewter Casting. THL Janyn Fletcher janynfletcher@comcast.net www.janynfletcher.com. Class Agenda. Introduction Materials Tools Designs and Carving Prepping the Stone Initial Design Pouring and Casting Cleaning the piece. Introduction. Why pewter cast?

E N D
Introduction to Pewter Casting THL Janyn Fletcher janynfletcher@comcast.net www.janynfletcher.com Atlantia University Summer 2013
Class Agenda • Introduction • Materials • Tools • Designs and Carving • Prepping the Stone • Initial Design • Pouring and Casting • Cleaning the piece Atlantia University Summer 2013
Introduction • Why pewter cast? • Reproduction of period pieces • Provide event / site tokens • Its fun! • Pewter casting involves melting pewter, which is a mixture of mostly tin and sometimes silver, antimony, or any number of alloying metals that can make the tin base either harder or softer. Pewter melts at different temperatures, or add sharpness to details in the casting. Lead should not be used as it is toxic! Atlantia University Summer 2013
WARNING!!! • The Three Rules of Casting • ** Hot metal looks just like cold metal ** • ** Hot stone looks just like cold stone ** • ** Avoid foundry accidents ** Atlantia University Summer 2013
Molds • Molds for pewter casting can be made from a wide variety of materials. Casters have used wood, cuttlefish bone, casting sand, soap stone, and copper to temporarily hold onto the molten pewter until it freezes. There are more modern methods, such as automotive bondo as a cheap solution. • Soap stone is my preferred mold material. A mold carved from soap stone can make a thousand or more casts, holds sharp detail, and can be easily pinned together to provide consistent positioning of the mold halves when they are taken apart and put back together again. In soap stone molds the pins are carved out of the stone and poured in place with molten pewter. Atlantia University Summer 2013
Materials • Soapstone or African Wonder stone (Pyrophyllite) • Can be difficult to find • Comes in stone form and must be cut to required shape • Easy to carve and work with Atlantia University Summer 2013
Tools used in Pewter Casting • Files • Wood Carving gouges • Diamond tipped Dremel bits / Dremel tool • Just about anything (nails, files, etc) Atlantia University Summer 2013
Tools Continued (Heat Source) • Heat Source • You will need some way to heat and melt the pewter. There are many that are acceptable. (Need to achieve 500-600 degrees F) Atlantia University Summer 2013
Tools Continued (Metal) • You will need raw pewter to use in the casting process. There are various grades of pewter and I like using Roto Metals alloy which is 92% Tin, 7.75% Antimony and .25% Copper. You can typically get 1lb or 2lb bars. http://www.rotometals.com/product-p/alloy_ac_pewter.htm Atlantia University Summer 2013
Tools Continued (Misc) • The tools you use to complete your project will depend on your needs and how you decide to cast. These are some of the other items I found useful in my project. Heavy Gloves Cookie Sheet Jewelers Visor Clamp on Desk Lamp Atlantia University Summer 2013
CASTING, THE PROCESS Atlantia University Summer 2013
Choosing a Design • Choosing a design is a personal preference. You can choose a design of your own or maybe a design based on a historical piece you would like to recreate. • Make sure you choose a piece that is simple for your first piece so you can learn from it correctly. Atlantia University Summer 2013
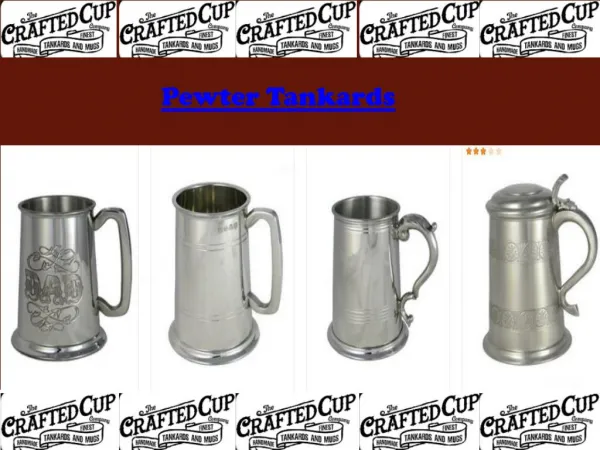
Choosing a Design • Here are some examples of pewter castings: Atlantia University Summer 2013
Types of Molds • Choosing your design will dictate what type of mold you will require. 2 Piece Mold 3 Piece Mold 1 Piece Mold / Flat Pour Atlantia University Summer 2013
Prepping your mold • If your stone is not already cut into slabs, you will need to do this. A wet saw (tile) is the best way but the stone can be cut with a band saw or hack saw as well. (Wear a dust mask or respirator!) • Once the stone is in slabs, you will need to sand the faces to make it smooth and make both pieces meet with no light between them. Atlantia University Summer 2013
Registering the Mold (Cont) • This is the process to properly use registry pins on the mold. **NOTE** Slant the drill bit over at the top of the stone so the pin holes are not straight on top Bottom View Top View Atlantia University Summer 2013
Registering the Mold • Sometimes it is advantageous to “register the mold.” What this means is drilling the mold and making alignment pins so that the mold stays aligned each time it is put together. I don’t always register my molds, it depends on the complexity of the design and if it is a front/back carving or not. Register Pins Atlantia University Summer 2013
Mold Layout • Spacing Make sure to leave at least ¼” between the edge of your mold design and the edge of the soapstone or any other design. You will also want ¾” left at the top to carve your sprue. • Sprue The funnel used in multi-part molds to get the molten metal to the design is called a sprue. The sprue serves three purposes: • It directs the metal into the mold. • It provides a weight on top of the mold to compress the pewter and get better detail. • As pewter cools, it contracts. The sprue provides a reservoir of extra pewter to pull from as this happens. • Mold Orientation Your design should be laid out such that metal can flow down and sometimes sideways to fill the mold… never up (the X in the illustration). For multi-part molds, more than one sprue can be used if needed. You should also leave an exit path for the air that the metal will be displacing. Atlantia University Summer 2013
Laying out the design • I use the “pin hole” method of transfer for the design from tracing paper to the mold. Atlantia University Summer 2013
Carving the Mold • Remember design backwards!!! When carving a mold remember that left is right and up is down. You should carve your design as the inverse of what you would like to see. Designs should face the opposite direction and lettering will need to be backwards! Also the lowest part of your mold will be the highest part of your casting. *** Wear a dust mask or respirator, soapstone dust can cause lung and respiratory issues. Atlantia University Summer2013
Carving the Mold • Adding “vent” lines is imperative to assuring that your mold flows as best that it can. Vent Lines Sprue Vent Lines Sprue Atlantia University Summer 2013
Its all in the Details • With your basic design carved into your mold, your piece is looking nice. But sometimes the difference between nice and “really cool” is in the little stuff. Edging, detail lines and dots, lettering and diapering (background patterns) can make a major change to the impression your piece makes. Atlantia University Summer 2013
Checking the Mold • I use “silly putty” to check my molds to see how the carving came out prior to pouring the first cast. Atlantia University Summer 2013
Preparing the Mold for Casting • Sprue Now is the time to carve that sprue. This funnel can be pretty rough cut since it will be cut off and reused. The sprue should be ½” to ¾” wide at the top and about ½” deep and should taper down and barely penetrate the design. You can always make it bigger later. Because carving the sprue involves larger chunks of rock, now is a good time for eye protection before you start launching rock splinters at yourself. (Trust me on this!) • Air Vents When pouring in the metal, the air that was previously using the space will need to escape. Much of it will go back up the sprue. You may find some areas do not fill well and trapped air may be a culprit. Carving an air vent is as simple as a deep scratch going from that spot of the mold outward and upward to the edge of the stone. Pretty much carve these all over the place. • Final Check for Undercuts Now, before pouring the metal, is a good to give your mold a last going over for undercuts. Check your sprue too. Atlantia University Summer 2013
Casting the Piece • SAFETY FIRST!!!! This metal isn’t hot enough to kill you; just to make you wish it had. But this is an activity that can be safe if you are aware of what you are doing. • First make absolutely certain that your mold is bone dry. If there is any moisture in your mold, when you pour the molten metal in, that moisture will expand and turn into steam, forcing the molten metal out of the mold in a volcano-like action. This is unpleasant and I do not recommend it. One way to be certain that the mold is dry is to preheat it in an oven. Passing a blowtorch flame over it once or twice will also do the trick. If you leave your mold for any period of time, water can have condensed on it and I would repeat the procedure. If you make any changes in the design, repeat the process (when you blow off the dust, trust me that you are also spitting on the rock!). • Touch everything as though it is hot. Use gloves to touch anything that you are uncertain of. The only thing that you can be sure is hot is the molten metal. Heat up your pewter until it is all melted. You will get a feel for what the metal looks like when it is ready to pour. You can overheat your metal. The hotter the metal is, the more likely it is to oxidize. This is the black or oily looking film on top. When your dregs are looking very oxidized, you can carefully pour out the last drops of good pewter and then tap the dregs out off to the side. If you have a complicated piece, a light coating with baby powder will decrease the surface tension of the poured metal and allow it to travel further into your mold. • When Pouring Use your gloved hand or a clamp to keep the molds together. The metal can force the sides of the mold apart and make a mess. As soon as the metal has solidified (only a couple of seconds), take the mold apart and let the piece fall out or remove it with pliers if it needs some encouragement. Let the piece cool. Once the piece(s) are cool, cut off the sprue and any other excess metal. These parts can be melted and reused along with any failed pours. The piece can be finished further using sandpaper and rasps to remove excess and sharp edges. The filings can be reused but tend to produce more sparks. You may choose to wear eye protection while pouring. My experience, though, is that the metal is much more likely to target your hands. Atlantia University Summer 2013
Heating the Pewter for pouring • The ideal temperature for Pewter casting is 50 degrees hotter than the melting point of pewter (437 to 464 degrees F). Don’t over-heat the pewter, you can burn it! There are impurities in the pewter that can effect your project. This impurity is called the “Dross” that forms on top of the pewter. It is dust and other things in the air that form on top of the pewter and burn. You can remove it with a spoon or any other means. This is what overheated pewter looks like. The burn Is typically where the sprue is because this is where the most concentrated heat is. Atlantia University Summer 2013
Working with the impurities • Like we discussed prior, we are not working with pure pewter and we need to manage the impurities. I recommend a heating vessel with a ladle vs. the bottom pour heaters. The copper and antimony are heavier than the pewter and will sink to the bottom of the heater. If you use a bottom flow heater you risk these impurities flowing into your work. Atlantia University Summer 2013
Reclaiming your metal • When you are done pouring, I like to reclaim my un-used pewter into bars that I can mange and store. I use a Lee lead mold to do this. Atlantia University Summer 2013
Trimming and Finishing • Once your cast has cooled, you will need to trim off the sprue and the overcast if there is any. If the tokens need to be polished you can polish them with any type of metal polish (mothers, flitz, etc…) Atlantia University Summer 2013
Tools and Materials Listing • Tools • Melting pots / ladles • www.midwayusa.com • www.amazon.com • www.ebay.com • Metals • Pewter • www.rotometals.com • www.amazon.com • Soap Stone • http://stonemandist.homestead.com/SoapstoneBlocks.html • http://www.sculpt.com/ • www.etsy.com Atlantia University Summer 2013
References • Front Page Picture - http://www.warehamforge.ca/old-castings/oldcastings.html • Page 13 – Coral Branch, Atlantia badge and Castle are all works from Master Christopher MacConing, LCSA , OL Atlantia • Page 18 – Figure of images from Baroness GilianaAttewatyr, OL • Page 22 – Figure of images from Baroness GilianaAttewatyr, OL Atlantia University Summer 2013
Questions? Atlantia University Summer 2013