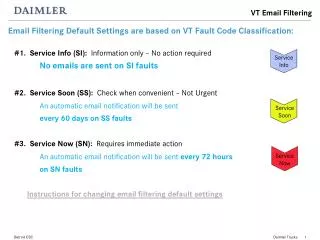
Download
1 / 68
730 likes | 1.14k Vues
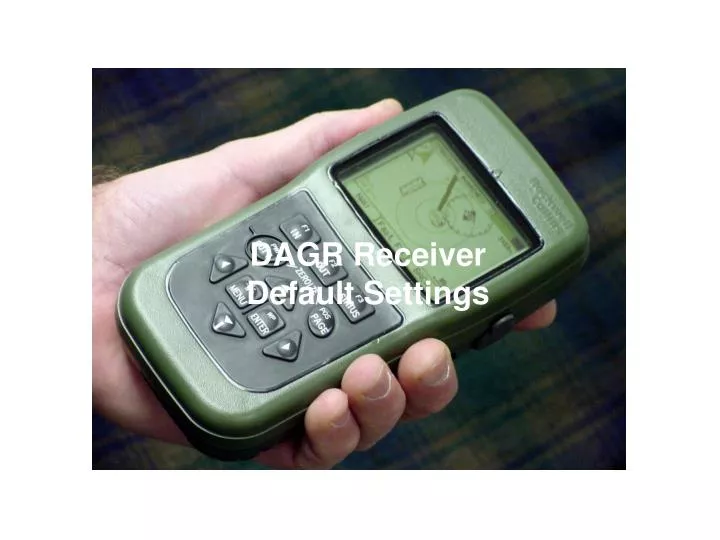
DAGR Receiver Default Settings. GPS Setup Page. Page Function Page Fields Operating Mode Power-On Operating Mode Frequency SV Code Elevation Hold Receiver Autonomous Integrity Monitor (RAIM) Mode and Status Rehearsal Route and Ground Speed Anti-Jam Accessory Mode and Status

E N D
GPS Setup Page • Page Function • Page Fields • Operating Mode • Power-On Operating Mode • Frequency • SV Code • Elevation Hold • Receiver Autonomous Integrity Monitor (RAIM) Mode and Status • Rehearsal Route and Ground Speed • Anti-Jam Accessory Mode and Status • Differential Global Position System (DGPS) Mode and Status (Advanced) • Wide Area GPS Enhancements (WAGE) Mode and Status (Advanced) • Mask Mode and Angle (Advanced) • SV Hold (Advanced)
GPS Setup Page 1 From the GPS Setup page, push the ENTER key to highlight a field. 2. Use the cursor control keys to highlight the desired field, then perform one of the following: (a) To edit field text or numeric content, push the ENTER key. For some fields, field content is chosen from a list and pushing the ENTER key displays the list editor.
GPS Setup Page • Operating Mode Field • Continuous • Fix • Average • Time Only • Standby • Rehearsal • Test • Off
GPS Setup Page • Power-On Operating Mode Field • Default • Continuous • Standby • Fix • Average • Time Only • Frequency Field Selections • L1 Primary • L2 Primary • L1 Only
GPS Setup Page • Frequency Field Default • L1 Primary • L2 Primary • L1 Only
GPS Setup Page • SV Code Field • All-Y • Mixed • Note • Mixed Susceptible to spoofing signals
GPS Setup Page • Elevation Hold Field • Automatic • Manual
GPS Setup Page • RAIM Mode Field • RAIM Status Field • Unavailable • No Faults • Faults Found
GPS Setup Page • Rehearsal Route Field • Rehearsal Ground Speed Field
GPS Setup Page • Anti-Jam Mode Field • Anti-Jam Accessory Status Field • Not Connected • Off • Pass Through (Normal) • Nulling • Test In Progress • Self-Test Failed
GPS Setup Page • Mask Mode Field (Advanced) • Mask Angle Field (Advanced)
GPS Setup Page • DGPS Mode Field (Advanced) • DGPS Status Field (Advanced) • Unavailable • Receiving • Using
GPS Setup Page • Wage Mode Field (Advanced) • Wage Status Field (Advanced)
GPS Setup Page • SV Hold (Advanced) To access the field menu list, push the MENU key. Scroll to the desired menu item (e.g., Edit Field), then push the ENTER key.
GPS Setup Page (3) For list editors, scroll to the desired field content, then push the ENTER key. (4) Display returns to the GPS Setup page with change made to field content.
CHECK ON LEARNING • Name 3 of the DAGR operating modes. • Continuous, fix, average, time delay, average, stand-by, rehearsal, test, and off. • What are the two SV-Code fields? • All-Y and mixed
Power Saver Page a. Enable Auto-Off Function • NOTE • Auto-Off Mode • From the Power Saver page, highlight the Auto-Off Mode field. Push the ENTER key. - Auto-off Mode Field
Power Saver Page • Highlight On, then push the ENTER key. The display returns to the Power Saver page with the Auto-Off Mode field highlighted including changes made. • From the Power Saver page, highlight the Auto-Off Timer field. Push the ENTER key. - Auto-Off Timer Field
Power Saver Page (4) Enter the desired time value (15 seconds up to 30 minutes), then push the ENTER key. The display returns to the Power Saver page with the Auto-Off Timer field highlighted including changes made
Power Saver Page b. Enable Auto-Standby Function • NOTE • Auto-Standby Mode • From the Power Saver page, highlight the Auto-Standby Mode field. Push the ENTER key. - Auto-Standby Field
Power Saver Page (2) Highlight On, then push the ENTER key. The display returns to the Power Saver page with the Auto-Standby Mode field highlighted including changes made.
Power Saver Page • From the Power Saver page, highlight the Auto-Standby Timer field. Push the ENTER key. - Auto-Standby Timer Field Note - Set Battery Page to enable auto-standby
Power Saver Page (4) Enter the desired time value (5 minutes up to 9 hours), then push the ENTER key. The display returns to the Power Saver page with the Auto-Standby Timer field highlighted including changes made.
Power Saver Page Enable/Disable Off Mode Display Heater • From the Power Saver page, highlight the Off Mode Display Heater field. Push the ENTER key. - Off Mode Display Heater Field
Power Saver Page Note - Off Mode Display heater has no effect on operation (2) Highlight Enabled or Disabled, then push the ENTER key. The display returns to the Power Saver page with the Off Mode Display Heater field highlighted including changes made.
CHECK ON LEARNING • What is the desired time range for the auto-off timer field? • 15 seconds to 30 minutes • What is the desired time range for the auto-standby timer field? • 5 minutes to 9 hours
Auto-On Page Disable Auto-On Function • From the Auto-On page, highlight Mode field, then push the ENTER key Note - Must be Off for other fields can be configured. - Mode Field
Auto-On Page (2) Highlight Off, then push the ENTER key. (3) Display returns to the Auto-On page with the Mode field highlighted and changes made.
Auto-On Page Select Time Zone • From the Auto-On page, highlight the Start Time and Date or Stop Time and Date fields. Push the MENU key. (2) Highlight Select Time Zone, then push the ENTER key. (3) Highlight the desired time zone, then push the ENTER key. Returns to the Auto-On page with the time zone reference changed.
Auto-On Page Set Start of Auto-On Function Note - Two Options • Start auto-on when mode is switched from off. (a) From the auto-on page (with or without a field highlighted), push the MENU key.
Auto-On Page • Highlight Start When enable, then push the ENTER key. • The auto-on page displays the Start Time and Date filed with Start When Enabled. - Start Time and Date Field
Auto-On Page (2) Start Auto-On at specific time and date (a) From the Auto-On page, highlight the Start Time and Date field, or highlight the Start Time field. Push the ENTER key. (b) Enter desired start time, then push the ENTER key.
Auto-On Page (c) Highlight the Start Date field, then push the ENTER key. (d) Enter desired start date, then push the ENTER key. (e) The Auto-On page Start Time and Start Date fields display entered data.
Auto-On Page Set Stop of Auto-On Function Note - Two Options • Stop auto-on when mode switched to Off. (a) From the auto-on page (with or without a field highlighted), push the MENU key.
Auto-On Page • Highlight Stop When Disable, then push the ENTER key. • The auto-on page displays the Stop Time and Date filed with Stop When Disabled. - Stop Time and Date Field
Auto-On Page (2) Stop Auto-On at specific time and date (a) From the Auto-On page, highlight the Stop Time and Date field, or highlight the Stop Time field. Push the ENTER key. (b) Enter desired stop time, then push the ENTER key.
Auto-On Page (c) Highlight the Stop Date field, then push the ENTER key. (d) Enter desired stop date, then push the ENTER key. (e) The Auto-On page Stop Time and Start Date fields display entered data.
Auto-On Page Set Time interval Between Auto-On Functions (1) From the Auto-On page, highlight the Time Interval field. Push the ENTER key. - Time Interval Field
Auto-On Page (2) Enter desired time interval, then push the ENTER key. (3) The Auto-On page Time Interval field displays entered data.
Auto-On Page Enable Auto-On Function • From the Auto-On page, highlight the Mode field. Push the ENTER key. (2) Highlight desired mode of operation (Manual or Automatic), then push the ENTER key.
Auto-On Page (3) Auto-On function is now enabled and will start and continue operating as previously set up until disabled. After auto-on is enabled, only the Mode field content can be changed.
CHECK ON LEARNING • What is the format for the stop date field data? • DD-MM-YYYY
Units Page Set Units Page • From the Units page, push the ENTER key to highlight a field. Push the ENTER key again for edit capabilities of the field.
Units Page - Coord/Grid Field - Resolution Field
Units Page - Datum/Ellipsoid Field - Datum ID Field
Units Page - Position Error Field - Elevation Field
Units Page - Reference Field - Range Field
Units Page - Speed Field - Time Zone Field
Units Page - Angle Field - North Reference Field