Download
1 / 63
670 likes | 815 Vues
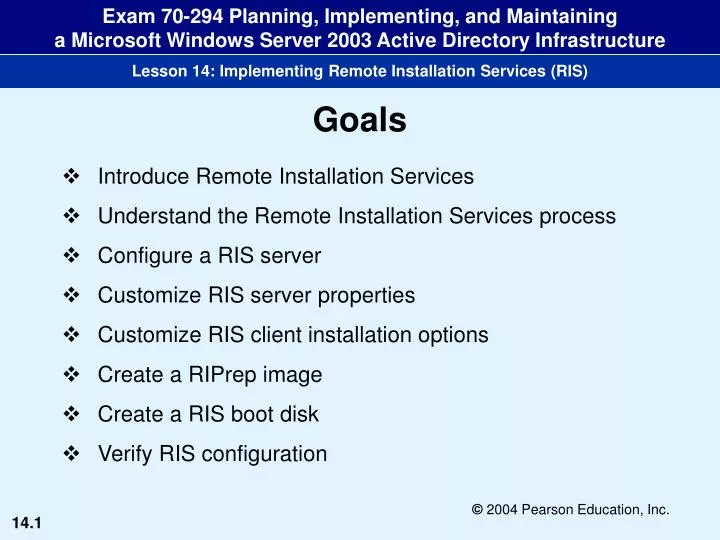
Goals. Introduce Remote Installation Services Understand the Remote Installation Services process Configure a RIS server Customize RIS server properties Customize RIS client installation options Create a RIPrep image Create a RIS boot disk Verify RIS configuration. (Skill 1).

E N D
Goals • Introduce Remote Installation Services • Understand the Remote Installation Services process • Configure a RIS server • Customize RIS server properties • Customize RIS client installation options • Create a RIPrep image • Create a RIS boot disk • Verify RIS configuration
(Skill 1) Introducing Remote Installation Services • Remote Installation Service (RIS)enables you to automate operating system installation • Windows 2000 • Windows Server 2003 • Windows XP Professional • Used to install the operating system on multiple computers simultaneously
(Skill 1) Introducing Remote Installation Services (2) • RIS requirements • DHCP server • DNS server - Windows 2000 or Windows Server 2003-compliant • Active Directory service
(Skill 1) Introducing Remote Installation Services (3) • Major components • RIS servers • Information required for the installation, such as computer names, time zone settings, and network settings, is specified on RIS servers • RIS clients • The computers on which the operating system is to be installed
(Skill 1) Figure 14-1 Components of RIS
(Skill 1) Introducing Remote Installation Services (4) • Services added when RIS is installed on a server • Boot Information Negotiation Layer Service (BINLSVC) • Trivial File Transfer Protocol Daemon (TFTPD) • Single Instance Store (SIS)
(Skill 1) Introducing Remote Installation Services (5) • Boot Information Negotiation Layer Service (BINLSVC) • Listens for client network requests • Manages the RIS environment • Controls the response to network service requests from RIS clients
(Skill 1) Introducing Remote Installation Services (6) • Trivial File Transfer Protocol Daemon (TFTPD) service • Manages file transfer requests from RIS clients during a remote installation • Downloads • Initial files such as the bootstrap files • Client Installation Wizard (CIW)
(Skill 1) Introducing Remote Installation Services (7) • Single Instance Store (SIS) service • Minimizes the disk space required to store the RIS installation images on the RIS server • Tries to link together all files related to the installation • Removes redundant copies
(Skill 1) Introducing Remote Installation Services (8) • Two types of RIS clients • Computers that support Preboot Execution Environment (PXE) DHCP-based remote boot ROMS • Computers with network cards that the RIS boot disk supports
(Skill 1) Figure 14-2 RIS clients
(Skill 1) Introducing Remote Installation Services (9) • Client computers that support Preboot Execution Environment (PXE) DHCP-based remote boot ROMS • PXE technology enables computers to start an operating system installation from a remote source (like the RIS server) • PXE architecture enables computers to connect to the network and execute programs by booting directly from a network image
(Skill 1) Introducing Remote Installation Services (10) • Client computers with network cards that the RIS boot disk supports • If a computer does not support PXE DHCP-based remote boot technology, you can create a RIS boot disk • Use Rbfg.exe to create a RIS boot disk • Rbfg.exe emulates PXE remote boot technology
(Skill 1) Figure 14-3 Creating an RIS boot disk
(Skill 2) Understanding the Remote Installation Services Process RIS-based remote installation process • Step 1: Locating a RIS server for RIS installation • A computer without an operating system should boot from the network • The computer then sends a DHCP discover packet to request an IP address with its GUID or UUID
(Skill 2) Understanding the Remote Installation Services Process (2) RIS-based remote installation process • Step 1: Locating a RIS server for RIS installation • The DHCP server allocates an IP address to the computer • The RIS server sends its IP address to the computer along with the name of the boot file • The system prompts the user to press F12 to start the installation
(Skill 2) Understanding the Remote Installation Services Process (3) RIS-based remote installation process • Step 2: Downloading Client Installation Wizard (CIW) • The selected RIS server checks the pre-staged computer accounts in Active Directory for an account with a matching GUID • The Client Installation Wizard (CIW) is downloaded to the computer • The CIW prompts the user to log on to the network
(Skill 2) Understanding the Remote Installation Services Process (4) RIS-based remote installation process • Step 3: Checking the account • The RIS server checks the account information • The RIS server determines the installation options • If the machine is pre-staged, the GUID/UUID is checked at this time
(Skill 2) Understanding the Remote Installation Services Process (5) RIS-based remote installation process • Step 4: Selecting the operating system image • The user selects the required operating system image • The CIW displays a warning that the hard disk will be reformatted • The remote installation starts
(Skill 2) Understanding the Remote Installation Services Process (6) RIS-based remote installation process • Step 5: Completing installation • CIW confirms the installation settings with the user • If the computer has not been pre-staged and its account is not created in Active Directory, the BINL service creates the computer account • The operating system is fully installed
(Skill 3) Configuring a RIS Server • There are two steps involved in configuring a RIS server • Add the RIS component to the server • Run the Remote Installation Services Setup Wizardto install and configure RIS
(Skill 3) Figure 14-4 Tasks Performed by Remote Installation Services Setup
(Skill 3) Figure 14-5 Installing Remote Installation Services
(Skill 3) Figure 14-6 The Remote Installation Services Setup Wizard
(Skill 3) Figure 14-7 The Friendly Description and Help Text screen
(Skill 3) Figure 14-8 Completing the Remote Installation Services Setup Wizard
(Skill 4) Customizing RIS Server Properties • The RIS server can be customized in how it handles client requests • You use the Remote Install tab of the Properties dialog box for the selected server to change the settings
(Skill 4) Customizing RIS Server Properties (2) • Properties you can modify • Prevent client installation • Select the Do not respond to unknown client computers check box • Stop/start service • Select the Respond to client computers requesting service check box
(Skill 4) Customizing RIS Server Properties (3) • Properties you can modify • Specify the clients to be serviced • Select the RIS server to service the pre-staged clients (this is useful for load balancing) • Specify how names for new clients will be generated • Set the location where the client accounts
(Skill 4) Customizing RIS Server Properties (4) • Properties you can modify • Operating system • Platform • Language images for installation
(Skill 4) Figure 14-9 The Remote Install tab
(Skill 4) Figure 14-10 The New Clients tab on the <server_name>-Remote-Installation-Services Properties dialog box
(Skill 4) Figure 14-11 The Images tab
(Skill 4) Figure 14-12 The Image Properties dialog box
(Skill 4) Figure 14-13 The Computer Account Generation dialog box
(Skill 5) Customizing RIS Client Installation Options • You can customize the Client installation options when a RIS server is configured • Use the Choice Options Properties dialog box to view and modify the RIS installation options for a GPO
(Skill 5) Customizing RIS Client Installation Options (2) • Installation options • Automatic Setup • Custom Setup • Restart Setup • Tools
(Skill 5) Customizing RIS Client Installation Options (3) • Automatic Setup • The default installation option • Installation starts as soon as the user logs on • Users will not be prompted for any of the settings • Users can select the operating system images that include the applications they need to install
(Skill 5) Customizing RIS Client Installation Options (4) • Custom Setup • Users can override the computer name • Users can specify the location for the client account generated by the RIS server
(Skill 5) Customizing RIS Client Installation Options (5) • Restart Setup • Saves users time if there is an incomplete setup attempt • When setup starts again, users are not prompted for any values they already entered
(Skill 5) Customizing RIS Client Installation Options (6) • Tools • Allows users to use troubleshooting tools before the operating system has been installed • Typical troubleshooting tools • System BIOS flash updates • Memory virus scanners
(Skill 5) Figure 14-14 RIS Group Policy
(Skill 5) Figure 14-15 The Choice Options dialog box
(Skill 6) Creating a RIPrep Image • RIPrep images • Compressed form of the operating system and applications images • They are different from the default CD-based image • CD-based images enable you to install only the basic operating system without any applications • CD-based images provide settings defined by a standard unattended answer file
(Skill 6) Creating a RIPrep Image (2) • RIPrep images • Include various applications and desktop settings • Useful in situations in which different users require different set of applications • Files associated with each image are never duplicated • A RIS install requires more time as it is a full install
(Skill 6) Creating a RIPrep Image (3) • Creating a RIPrep image using the RIPrep tool • Install the operating system and all necessary applications and configure the required desktop settings on a computer • Copy the Administrator profile to the default user profile and allow all users to use it • Test the image • Create a RIPrep image of this computer and store the image on a RIS server
(Skill 6) Creating a RIPrep Image (4) • During image creation, the system performs several tasks • Verifies the version of Windows • Analyzes partitions • Copies partition information • Copies files to the server • Copies and updates Registry information • Shuts down the computer
(Skill 6) Creating a RIPrep Image (5) • Answer files • Are .sif files associated with both CD-based images and RIPrep images • Contain the answers to the various prompts that a user receives during a normal installation • Access to RIPrep images can be controlled by setting permissions for the associated .sif files • This ensures that a user selects the correct image
(Skill 6) Figure 14-16 The Remote Installation Preparation Wizard
(Skill 6) Figure 14-17 The Server Name screen