Download
1 / 102
1.05k likes | 1.17k Vues
Learn about Oracle ASM shared storage options, benefits, background processes, architecture, supported storage technologies, and storage consolidation. Understand ASM disk groups, mirroring, dynamic rebalancing, and benefits like simplified management and higher performance.

E N D
Objectives • After completing this lesson, you should be able to: • Identify options for shared storage • List the benefits of ASM • Describe the ASM background processes • Describe the ASM architecture
Shared Storage Technologies • Storage is a critical component of grid computing. • Fundamental sharing storage • New technology trends • Supported shared storage for Oracle grids: • Network Attached Storage • Storage Area Network • Supported file storage for Oracle grids: • Raw volumes • Cluster file system • ASM
Options for Shared Storage • Cluster File Systems • Simpler management • Use of OMF with RAC • Single Oracle software installation • Autoextend • Uniform accessibility to archive logs in case of physical node failure. • Raw devices: • Performance • Use when CFS is not available • Cannot be used for archivelog files
Oracle Cluster File System • Is a shared disk cluster file system for Linux and Windows • Improves management of data for RAC by eliminating the need to manage raw devices • Is an Open Source, free solution for Cluster File Systems • Can be downloaded from Oracle Technology Network: • http://oss.oracle.com/projects/ocfs/ (Linux) • http://www.oracle.com/technology/software/products/database/oracle10g/index.html (Windows)
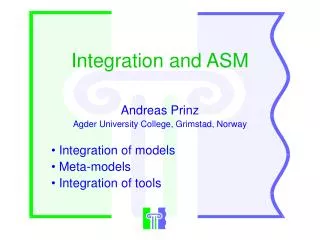
Application Database Filesystem ASM Volumemanager Operating system Automatic Storage Management • Is a portable and high-performancecluster file system • Manages Oracle database files • Spreads the data across disksto balance the load • Provides integrated mirroring across disks • Solves many storage management challenges • Works with Single instanceor RAC databases
ASM: Key Features and Benefits • Stripes files rather than logical volumes • Online disk reconfiguration and dynamic rebalancing • Adjustable rebalancing speed • Provides redundancy on a file basis • Supports only Oracle database files • Database cluster file system with performance of raw I/O usable on all storage platforms • Automatic database file management • No more hot spots: Eliminate manual I/O tuning . . . . . . . . . . . . . . . . . . . . . . . . . . . . . . . . . . . . . . . . . . . . . . . . . . . . . . . . . . . . . . . . . . . . . . . . . . . . . . . . . . . . . . . . . . . . . . . . . . . . . . . . . . . . . . . . . . . . . . . . . . . . . . . . . . . . . . . . . . . . . . . . . . . . . . . . . . . . . . . . . . . . . . . . . . . . . . . . . . . . . . . . . . . . . . . . . . . . . .
Nonclustered ASM Architecture DB instance SID=sales ASM instance SID=asm RBAL ASMB DBW0 ARB0 FG … RBAL GMON ASM disks ASM disks ASM disks ASM disks ASM disks ASM disks ASM disk group 2 ASM disk group 1
GMON GMON Clustered ASM Architecture Node1 Node2 Group Servicestom=+ASM1 bob=+ASM1harry=+ASM1 Group Services tom=+ASM2 bob=+ASM2harry=+ASM2 DB instance SID=sales1 DB instance SID=sales2 DBW0 ASMB DBW0 ASMB ASM instance SID=+ASM1 ASM instance SID=+ASM2 RBAL FG FG RBAL FG FG ASMB ASMB RBAL RBAL DB instance SID=test1 DB instance SID=test2 DBW0 DBW0 ARB0 ARB0 … … RBAL RBAL ARBA ARBA ASM disks ASM disks ASM disks ASM disks ASM disks ASM disks ASM disk group Tom ASM disk group Bob ASM disk group Harry
Database Storage Consolidation • Allows shared storage across several databases • RAC and single instance databases can use the same ASM instance. • Benefits: • Simplified and centralized management • Higher storage utilization • Higher performance GL Payroll and GL Payroll … … … 10 x 100 GB 10 x 50 GB 10 x 50 GB
ASM Storage: Concepts ASMdisk group Database ASM file Data file Tablespace Segment ASM disk Extent File system file orraw device Allocation unit(AU) Oracle datablock Physicalblock
ASM Disk Groups • Are a pool of disks managed as a logical unit • ASM partitions total disk space into uniform sized units • Spreads each file evenly across all disks • Uses coarse- or fine-grain striping on the basis of the file type • Administers disk groups, not files ASMinstance Disk group
Failure Group Controller 1 Controller 2 Controller 3 6 5 4 3 2 1 7 13 1 7 13 1 7 13 1 7 13 1 7 13 1 7 13 1 7 13 1 7 13 1 7 13 Failure group 1 Failure group 2 Failure group 3 Disk group A
Disk Group Mirroring • Mirror at AU level • Mix primary and mirror AUs on each disk • External redundancy:Defers to hardwaremirroring • Normal redundancy: • Two-way mirroring • At least two failuregroups • High redundancy: • Three-way mirroring • At least three failure groups
Disk Group Dynamic Rebalancing • Automatic online rebalance wheneverstorage configurationchanges • Only move data proportional to storage added • No need for manual I/O tuning • Online migration tonew storage • Configurable loadon system using ASM_POWER_LIMIT
Summary • In this lesson, you should have learned to: • Identify options for shared storage • List the benefits of ASM • Describe the ASM background processes • Describe the ASM architecture
Objectives • After completing this lesson, you should be able to: • Choose appropriate ASM disks • Describe the purpose of ASMLIB • Install ASMLIB
ASM Disks • ASM disks may use one of the following: • Local Raw Devices • Network Attached Storage • Storage Area Networks
ASM on Local Raw Devices • To use ASM on Local Raw Devices, you need to: • Create disk partitions on local disks • Map the raw devices to the file names • Set permissions properly
Configuring Disks • Oracle recommends that you create a single whole-disk partition on each disk that you want to use. • To ensure that the kernel is aware of the partition changes, run the partprobe command after partitioning all disks. # /sbin/fdisk /dev/sdc # /sbin/fdisk /dev/sdd # /sbin/partprobe
Disks and Partitions • Disks are often partitioned before use. • Disks and partitions are named. The name assigned: • Depends on the kernel discovery order • Can be set by Udev rules • Partitions vary in access time depending on physical location. Inside partition Cylinder 0 Outside partition
Managing Partitions • Partition administration involves several operations: • Create • Resize • Copy • Remove • Various tools can be used: • parted • fdisk • lvm • To ensure that the kernel is aware of the partition changes, run the partprobe command after partitioning disks.
Managing Partitions Using fdisk • You can use the basic fdisk commands to: • Create new partitions with n • Remove partitions with d • Quit without writing q • Write the partition table and quit w
Managing Partitions Using parted • You can use the basic parted commands to: • Create a new partition table with mklabel • Create new partitions with mkpart • Create new partitions and file system with mkpartfs • Remove partitions with rm • Resize partitions with resize • Move partitions with move • Quit with quit
Raw Devices on Linux • Raw devices: • Are deprecated in 2.6 kernel • Are replaced with the O_DIRECT flag access to block devices • Are character devices • Require modification to Udev rules and permissions
What Is Udev? • Linux Kernel 2.6 includes Udev. • The Udev subsystem: • Creates devices at reboot time for connected hardware • Creates devices for hardware that produce a hot plug event • Runs in user space • Loads kernel modules as needed • Is user configurable
Configuring Udev • The Udev subsystem reads configuration files to: • Load kernel modules (modprobe.conf) • Set device names (rules) • Set device access permissions (permissions) • Will be covered later in the section on SAN
ASM on NAS • To use ASM on NAS, you must: • Use a certified NAS storage device • Use zero padded files in the NFS mounted directory • Map raw devices to the file names • Ensure permissions are set properly
ASM on NAS • Create an exported directory for the disk group files on the NAS device: • As root, create mount point on the local system. • Add the entry in /etc/fstab. • Mount the NFS file system on the local system. • Create a directory for the files on the NFS file system using the disk group name as the directory name: • # mkdir -p /mnt/oracleasm # mount /mnt/oracleasm # mkdir /mnt/oracleasm/nfsdg
ASM on NAS • Create as many zero padded files as needed in the directory. • # dd if=/dev/zero of=/mnt/oracleasm/nfsdg/disk1 bs=1024k count=1000 • # dd if=/dev/zero of=/mnt/oracleasm/nfsdg/disk2 bs=1024k count=1000 • # dd if=/dev/zero of=/mnt/oracleasm/nfsdg/disk3 bs=1024k count=1000 • # dd if=/dev/zero of=/mnt/oracleasm/nfsdg/disk4 bs=1024k count=1000
ASM on NAS • Change the owner of the directory and files just created: • Change the permissions of the directory and files just created: • Set the ASM Discovery string to an expression matching the file names of the zero padded files. • # chown -R oracle:dba /mnt/oracleasm # chmod -R 660 /mnt/oracleasm # asm_diskstring = /mnt/oracleasm/nfsdg/disk*
ASM on SAN • To use ASM on SAN devices, you: • Must set up devices on SAN • Need to use UDEV to maintain device name
Initializing SAN Storage for iSCSI • To initialize the storage, disable or enable iSCSI Target from the management interface • Or, execute service iscsi-target restart as root: • View the contents of the /etc/ietd.conf file. • Edit the initiators.deny and initiators.allow files. [root@ed-dnfiler06b ~]# service iscsi-target restart [root@ed-dnfiler06b ~]# cat /etc/ietd.conf Target iqn.2006-01.com.oracle.us:cg1.ocr Lun 0 Path=/dev/cg3/ocr,Type=fileio ... [root@ed-dnfiler06b ~]# cat /etc/initiators.deny iqn.2006-01.com.oracle.us:cg3.ocr ALL iqn.2006-01.com.oracle.us:cg3.vote ALL ...
Accessing the Shared Storage • Make sure that the iscsi-initiator-tools RPM is loaded: • Edit the /etc/iscsi.conf file to add the discovery entry. • Make sure that the iscsi service is started at system boot: • Start the iscsi service. [root@ed-otraclin10a ~]# rpm -qa|grep iscsi [root@ed-otraclin11b ~]# vi /etc/iscsi.conf DiscoveryAddress=ed-dnfiler06b.us.oracle.com [root@ed-otraclin10a ~]# chkconfig –add iscsi [root@ed-otraclin10a ~]# chkconfig iscsi on [root@ed-otraclin11b ~]# service iscsi start
Accessing the Shared Storage • Check to see that the volumes are accessible with iscsi-ls and dmesg. [root@ed-otraclin10a ~]# iscsi-ls ************************************************************* SFNet iSCSI Driver Version ...4:0.1.11-3(02-May-2006) ************************************************************* TARGET NAME : iqn.2006-01.com.oracle.us:cg1.ocr TARGET ALIAS : HOST ID : 24 BUS ID : 0 TARGET ID : 0 TARGET ADDRESS : 10.156.49.151:3260,1 SESSION STATUS : ESTABLISHED AT Thu Nov 23 10:07:20 EST 2006 SESSION ID : ISID 00023d000001 TSIH 600 *************************************************************
Partitioning the iSCSI Disk • Use the fdisk utility to create iSCSI slices within the iSCSI volumes. • These device names are not persistent across reboots.
Udev Basics • Udev simplifies device management for cold and hot plug devices. • Udev uses the hot plug events sent by the kernel, whenever a device is added or removed from the system. • Details about newly added devices are exported to /sys. • Udevmanages device entries in /dev by monitoring /sys. • Udev is a standard package in Red Hat 4.0. • The primary benefit that Udev provides forOracle RAC environments is persistent: • Disk device naming • Device ownership and permissions
Udev Configuration • Udev behavior is controlled by /etc/udev/udev.conf. Important parameters include: • udev_root sets the location where Udev creates device nodes. (/dev is the default.) • default_mode controls the permissions of the device nodes. • default_owner sets the user ID of the files. • default_group sets the group ID of the files. • udev_rules sets the directory for the Udev rules files. (/etc/udev/udev.rules is the default.) • udev_permissions sets the directory for permissions. (/etc/udev/udev.permissions is the default.)
Udev Rules Parameters • Common parameters for NAME, SYMLINK, and PROGRAM: • If %n is the kernel number, sda2 would be 2 • %k is the kernel name for the device, for example, sda. • %M is the kernel major number for the device. • %m is the kernel minor number for the device. • %b is the bus ID for the device. • %p is the path for the device. • %c is the string returned by the external program defined by PROGRAM. • %s{filename} is the content of a sysfs (/sys) attribute.
Multipathing and Device Mapper • Multipathing tools aggregate a device-independent path into a single logical path • Multipathing is an important aspect of high-availability configurations. • RHEL4 incorporates a tool, called Device Mapper (DM), to manage multipathed devices. • The DM is dependent on the following packages: • Device-mapper • udev • device-mapper-multipath • The /etc/init.d/multipathd start command initializes the Device Mapper.
Configuring Multipath multipaths { multipath { wwid 14f70656e66696c000000000001000000d54 alias ocr path_grouping_policy multibus path_checker readsector0 path_selector "round-robin 0" failback manual no_path_retry 5 } ... }
Device Mapper Devices • DM devices are created as /dev/dm-n. • DM maps only whole drives. • If a drive has multiple partitions, the device mapping of each partition is handled bykpartx. • If the device is partitioned, the partitions will appear as: • /dev/mapper/mpathNpN • /dev/mapper/<alias>pN • /dev/mapper/<WWID>pN • OCR and Voting disks should use /dev/dm-Nor/dev/mapper/<alias>pN path formats. # cat /etc/udev/rules.d/40-multipath.rules KERNEL="dm-[0-9]*", PROGRAM="/sbin/mpath_get_name %M %m", \ RESULT="?*", NAME="%k", SYMLINK="mpath/%c" KERNEL="dm-[0-9]*", PROGRAM="/sbin/kpartx_get_name %M %m", \ RESULT="?*", NAME="%k", SYMLINK="mpath/%c"
ASMLibs • An ASMLib is a storage management interface between the Oracle kernel and disk storage. • You can load multiple ASMLibs. • Purpose-built drivers can provide: • Device discovery • More efficient I/O interface • Increased performance and reliability • Oracle freely delivers an ASMLib on Linux. • Several participating storage vendors such as HP and others are joining this initiative.
Oracle Linux ASMLib Installation: Overview 1. Install the ASMLib packages on each node: • Install fromhttp://otn.oracle.com/tech/linux/asmlibor set up Oracle channel for yum or up2date. • Install oracleasm-support, oracleasmlib, and kernel-related packages. 2. Configure ASMLib on each node: • Load ASM driver and mount ASM driver file system. • Use the oracleasm script with configure option. 3. Make disks available to ASMLib by marking disks using oracleasm createdisk on one node. 4. Make sure that disks are visible on other nodes using oracleasm scandisks. 5. Use appropriate discovery strings for this ASMLib.
Oracle Linux ASMLib Installation • Install the packages as the root user: • Run oracleasm with the configure option: • Provide oracleUID as the driver owner. • Provide dbaGID as the group of the driver. • Load the driver at system startup. # rpm –Uvh oracleasm* Preparing… ##################### [100%] 1: oracleasm-support ##################### [ 33%] 2: oracleasm-2.6.9-22.EL ##################### [ 67%] 3: oracleasmlib ##################### [100%] # /etc/init.d/oracleasm configure # /etc/init.d/oracleasm enable
ASM Library Disk Creation • Identify the device name for the disks that you want to use with the fdisk –l command. • Create a single whole-disk partition on the disk device with fdisk. • Enter a command similar to the following to mark the shared disk as an ASM disk: • To make the disk available on the other nodes, enter the following as root on each node: • Set the ASM_DISKSTRING parameter. /etc/init.d/oracleasm createdisk disk1 /dev/sdbn # /etc/init.d/oracleasm scandisks
Summary • In this lesson, you should have learned to: • Choose appropriate ASM disks • Describe the purpose of ASMLIB • Install ASMLIB
Objectives • After completing this lesson, you should be able to: • Install ASM • Create additional ASM instances • List the configuration parameters for ASM