Download
1 / 47
490 likes | 639 Vues
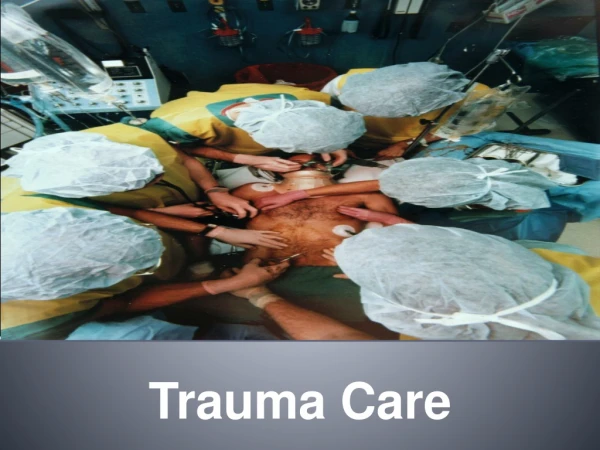
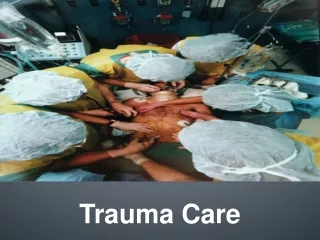
The First 15 Minutes of Trauma Care. Jake Breeding MD FACS June 24, 2011. Nothing to disclose. ATLS Approach to Trauma. Brief patient history Primary Survey Secondary Survey Adjuncts to care Tubes and lines X-rays Definitive Care. The Cajun Man. First 15 minutes of Trauma Care.

E N D
The First 15 Minutes of Trauma Care Jake Breeding MD FACS June 24, 2011
ATLS Approach to Trauma • Brief patient history • Primary Survey • Secondary Survey • Adjuncts to care • Tubes and lines • X-rays • Definitive Care
First 15 minutes of Trauma Care • Anticipation • Preparation • Evaluation • Recognition • Intervention • Disposition
The Golden Hour • Trauma patient deaths recognized as having three peaks: • Immediate (at the scene) • First 2 hours • Where we can make a difference! • Delayed (days to weeks) • The first 15 minutes of trauma care is important!
Anticipation • In a rural area, trauma is somewhat infrequent • Fewer opportunities to develop skills and experience • Military drills: “Always ready to go to war.” • Mental exercises • “What if?.........” • Continually reassess yourself, your team, and your facility: what are you ready for?
Preparation • Ready your team • Who will help me? • Ready your supplies • What do I need? • Ready yourself • Education • Know your resources • Know your limitations
Preparation • Ready your team • Nurse (ICU, ER, Floor), X-ray tech (at a minimum) • OR staff, RT/Anesthesia, Lab, Scribe • TNCC (Trauma Nurse Core Course) • RTTDC (Rural Trauma Team Development Course) • Everyone has a defined role • Important to discuss roles and rehearse • You are the “team leader” • Evaluation and Interventions performed simultaneously by team members
Preparation • Ready your supplies • Standard Precautions (Protect Yourself!) • Warm blankets • Warm IV fluids • Blood / Blood products • Oxygen • Airway management • Critical procedures supplies/equipment
Preparation • Prepare your livesaving equipment • Airway cart / Intubation supplies • 14 gauge Angiocath • #11 blade • Chest tube insertion tray • Central line kit
Preparation • Ready yourself • ATLS (Advanced Trauma Life Support) • RTTDC (Rural Trauma Team Development Course) • Procedures • Intubation • Central line placement • Chest tube placement • Cricothyrotomy
Preparation • Know your resources • OR • ICU • Rehab • Ambulance / Helicopter • Blood bank • Subspecialty support / availability
Preparation • Know your limitations • Blood bank • ICU / Hospital beds • Ventilators (# and availability) • Transportation resources (Air vs. Ground) • Staff experience / comfort level • Your experience / comfort level
Preparation • “I don’t remember what to do with this…” • “I haven’t seen one of these in a while….” • “I haven’t EVER seen one of these……” • “This sucks, I want to go home……” • It is NEVER a sign of weakness to ask for help!
Recognition • Begins when the ambulance/ER doors open • Gather information • Patient • Family / Witnesses • EMS • Law enforcement • Telemetry data (OnStar) • Can gather a lot of information as the patient is brought into the room
Recognition • Mechanism • Blunt or penetrating • Blunt • Speed, restraint use, damage to vehicle, windshield starring, airbag deployment • Penetrating • Caliber, Distance, number of shots fired • Length
Evaluation (Primary Survey) • A – Airway and C-spine immobilization • B – Breathing • C – Circulation • D – Disability and Deformity • E – Environment
Evaluation (Airway) • What is a quick and easy way to assess a trauma patient in 10 seconds? • Identify yourself • Ask the patient his/her name • Ask the patient what happened • A: Patent airway • B: Sufficient air reserve to permit speech • C: Sufficient perfusion to permit cerebration • D: Clear sensorium
Evaluation (Airway) • Obtain a secure airway • Nasal airway • Oral airway • LMA • Combitube • Endotracheal tube • Cricothyrotomy • Assess placement of endotracheal tube: • Bulb, EtCO2, Fogging of tube, CO2 detector, bilateral breath sounds, chest rise
Evaluation (Breathing) • Assess and ensure adequate oxygenation and ventilation • Respiratory rate • Chest movement • Air Entry • Oxygen saturation • Pneumothorax • Hemothorax • Flail chest
Evaluation (Circulation) • Assess for organ perfusion • Level of consciousness • Skin color and temperature • Pulse rate and character • Identify external bleeding and apply direct pressure
Evaluation (Disability and Deformity) • Assess pupil response • Assess Glascow Coma Scale • Best eye opening response (4) • Best verbal response (5) • Best motor response (6) • Comatose patient will have a GCS of 3. • Patients with GCS < 8 should be intubated.
Evaluation (Environment) • Completely expose / undress the patient • Avoid missed injuries • Avoid hypothermia • Warm room, blankets, fluids, Bair Hugger, etc.
Evaluation • AMPLE history: • Allergies • Medication • Past Medical / Surgical History • Last Meal • Events of accident • Loss of consciousness • Where does it hurt?
Evaluation • X-Ray • FAST Exam • Foley Catheter • NG/OG tube • ABG
Evaluation (X-ray) • Chest x-ray • Pneumothorax • Hemothorax • Assess position of endotracheal tube • Pelvis x-ray • Pelvic fractures • Pelvic ring disruption
Evaluation (FAST Exam) • Rapid bedside ultrasound test to evaluate for free fluid in the abdomen • Pericardial space • Morrison’s pouch (RUQ) • Splenorenal recess (LUQ) • Pouch of Douglass (pelvis)
Intervention • Lifesaving procedures that can be performed at the bedside in the trauma bay: • Endotracheal intubation • Central venous access • Needle thoracostomy • Tube thoracostomy • Cricothyrotomy • External pelvic fixation
Intervention: Endotracheal Intubation • Maintain C-spine precautions • Make sure equipment is functioning and ready • Have suction available • Have a backup plan • Verify tube placement • CO2 colorimeter/detector • Tube fogs with respiration • Bilateral chest rise • Bilateral breath sounds
Intervention: Central Venous Access • Have central line kit available • 7 fr. 20cm central line (double or triple lumen) • 8.5 fr. Introducer • 12 fr resuscitation line • Internal Jugular • Subclavian • Femoral
Intervention Central Venous Access • Try to avoid major injury between line site and heart (femoral approach) • Use ultrasound if available • Maintain C-spine precautions • Place line on side of chest tube (if possible) • Suture line securely in place
Intervention: Needle Thoracostomy • Emergently treat tension pneumothorax • Clinical diagnosis • Decreased breath sounds on one side • Hypotension (decreased preload) • Tracheal deviation (late) • 14 gauge Angiocath needle • 2ndintercostal space, midclavicular line • Leave Angiocath in place
Intervention: Tube Thoracostomy • Treat pneumothorax/hemothorax • Follows placement of needle thoracostomy • Use large caliber chest tube (36 or 40 FR) • 5thintercostal space in mid to anterior axillary line. • Be generous with local anesthesia • Penetrate just superior to edge of rib • Palpate opening with finger • Direct chest tube posteriorly and superiorly
Intervention: Tube Thoracostomy • Verify placement of tube • Fogging of tube • Blood return • Suture tube securely in place • Vasoline and gauze dressing • Tape tube securely to patient • Chest X-ray to verify resolution of problem
Intervention: Cricothyrotomy • Emergent surgical airway • #11 scalpel, ET tube (6 or 7) • Palpate trachea and cricothyroid membrane with non-dominant hand. • Vertical/horizontal incision • Incise cricothyroid membrane with scalpel • Dilate opening with handle of scalpel • Insert ET tube
Intervention (Pelvic Fixation) • “Open book” pelvic fractures • Increased volume of true pelvis • More room for bleeding • Decrease volume of pelvis • Commercial device • Bedsheet
Disposition • “Get therightpatient to the right facility in the right amount of time.” • Identify patient’s that need to be transferred to higher level of care EARLY. • Time critical injuries • Improved outcomes • Frees up local resources
Disposition • Call trauma center, ask to speak with trauma surgeon on call • Give patient details, events of accident, work-up performed, and injuries identified • Discuss transportation • ASK QUESTIONS!
Disposition (Air) PROS • Fast (mph) • Can go anywhere • Highly trained flight team (nurse, paramedic) CONS • Limited in poor visibility, wind, precipitation • Limited room for patient interventions • Risk to flight crew and patient • Cost
Disposition (Ground) PROS • Readily available • Familiar team to provider and patient • Fast (mph) CONS • Weather • Traffic • Loss of local resource
Improving the Process • Discuss the event with your team • What went right • What went wrong • What can we do better next time • Opportunity to debrief • Stressful situation • Bad outcomes • Lend support
Summary • Anticipation • Preparation • Evaluation • Recognition • Intervention • Disposition