Download

1 / 25
250 likes | 371 Vues
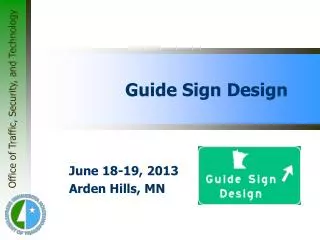
Guide Sign Design. June 18-19, 2013 Arden Hills, MN. General Design Process. First, use the guidelines for Font Sizes (Section 3.3.2 on page 3-5) to determine correct letter size and overlay size, based on speed, number of lanes, and roadway type (freeway or non-freeway )

E N D
Guide Sign Design June 18-19, 2013 Arden Hills, MN
General Design Process • First, use the guidelines for Font Sizes (Section 3.3.2 on page 3-5) to determine correct letter size and overlay size, based on speed, number of lanes, and roadway type (freeway or non-freeway) • The matching arrow size can be found in Section 3.8 on page 3-16 • Vertical spacing between lines: ½ to ¾ of letter height • This requirement may not be feasible with all overheads due to restrictions caused by existing mounting structures
General Design Process • Vertical spacing between text and inside of border: ½ to ¾ of letter height • Horizontal spacing between objects (fractions, overlays, arrows): ¾ to full letter height • Horizontal spacing between text and inside of border: ½ to ¾ of letter height
General Design Process • The appropriate arrow will be larger than the matching font height, and spacing around it will be less than the vertical spacing between lines (½ to ¾ letter height) • Due to the shapes of arrows, compressing space around them doesn't make them appear crowded
General Design Process • Vertical spacing around fractions can be compressed somewhat because fractions are much taller than the rest of the legend on the same line • Whenever possible, allow no more than three destinations or street names on a guide sign
General Design Process • Calculating the vertical size of the sign panel Use the following formulas and equivalents to determine the specific dimension: A = Letter height B = Vertical spacing from wording to wording, or from wording to inside border (½ A to ¾ A) C = Arrow/fraction height D = Horizontal spacing from inside border to legend (½ to ¾ A) E = Vertical spacing from arrow to wording, or from arrow to inside border (less than B)
General Design Process • Calculating the Vertical size of the Sign Panel • Add the heights of all objects in the sign, including border thicknesses • The border thickness may have to be estimated if the length of the panel’s shortest side – height or width – is not known (typical borders widths are summarized in Exhibit 3‑2) • Add the thickness of horizontal lines, which will be the same as the value given for border thickness • On signs with Font size combinations on the same line, use the largest size when determining component spacing • Add the heights of the spaces between legend lines as well as the spaces between legend lines and border
General Design Process • Add the two totals from Steps 1 and 2, rounding to the nearest number divisible by 6 (6” increments) • This figure is the panel height • Bear in mind that an adjustment may have to be made in border and horizontal line thickness to achieve the right size • Because of the rounding of the panel height in Step 3, spacing likely will need to be adjusted • To do this, find the difference between the rounded panel height and the actual total from Step 3 • Then distribute this difference between the spaces on the panel, ensuring to keep ‘B’ measurements equivalent, ‘D’ measurements equivalent, and ‘E’ measurements equivalent • Exceptions to this rule may be necessary in some cases to account for words containing low-hanging letters, such as g, j, p, q, and y, or in other situations
General Design Process • Calculating the Horizontal size of the Sign Panel • Horizontal spacing is fairly automatic in most cases • Primarily, it involves maintaining proper spacing from borders to legend and from legend to vertical lines • The example problems illustrate this in more detail • In the few complicated instances instructions are given as to how horizontal spacing can be done • Spacings from legends to borders and vertical lines should be between ½ and ¾ letter height in most cases
General Design Process • Review Panel Structure for Proper Supports • Once the panel has been sized using vertical and horizontal spacing guidelines refer to section 3.12.1 on page 3-25 to ensure U-Posts will be used versus I-beams
Example #1Supplemental Guide Sign • Problem Statement • Using the given conditions listed above and the sign components illustrated below, develop the guide sign using SignCAD paying particular attention to component location, justification, and spacing. • Purpose of Example • Color selection • Font, font size, and arrow selection • Vertical spacing • Horizontal spacing
Example #1Supplemental Guide Sign • Given Conditions • Posted speed limit = 35 mph • Number of basic lanes = 4 lanes • Non-Freeway • Sign Components • Proper Name Font A: 6” – 4.5” • Arrow Head: 13 (13-14 Arrow)
Example #1Supplemental Guide Sign • Sketch Panel & Create in SignCAD • Create Sign Components • Text • Font: E Modified • Size: 6-4.5 • Arrow • Angle: 0 degrees • Head: 13 • Create Panel • Drop Objects in Panel • Alignment – none required
Example #1Supplemental Guide Sign Determine Vertical Dimension of Panel
Example #1Supplemental Guide Sign • Final Sign Panel
Example #1Supplemental Guide Sign • Post Structure • Use 2U-2A post structure