Download
1 / 20
200 likes | 326 Vues
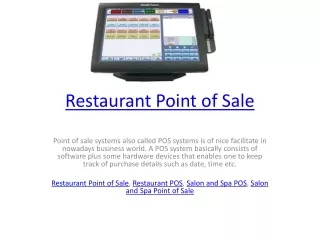
OrderPro Point of Sale (POS) Training National Convention 2007. Debi Miller, Sr. Supervisor Covington, OH. OrderPro POS. Provides offline customer ordering support Supports offline inventory management Prints customer receipts that are customizable

E N D
OrderPro Point of Sale(POS) Training National Convention 2007 Debi Miller, Sr. Supervisor Covington, OH
OrderPro POS • Provides offline customer ordering support • Supports offline inventory management • Prints customer receipts that are customizable • Supports automatic upload into the Pending Orders section of OrderPro • Interfaces with bar code scanners (modified cue cat scanner)
Getting Started • POS is a separate application and can be purchased separately or can be obtained as part of the Deluxe subscription • POS requires the Microsoft .NET Framework already be installed • Detailed instructions on how to download the product can be found in the Download Center in OrderPro • After installation, POS can be run from the Windows Start menu
Launching POS Click here to launch POS and the following application will appear.
Getting Started with POS The first time you use this tool, access your settings through the Tools menu. Select the Settings menu option. This will launch the following screen. This is the POS main screen. Here you can set your tax rate and pick your shipping method with cash and carry being an option! Fill in your consultant information and click the OK button. Note that you have to close the application and restart it to continue.
Customizing POS Customize your receipts for specific events and your end result will look like this next screen.
Printer that does work with OP POS Nancy Ann Wartman has used this printer for receipts at booth events.
Adding Customers Once a contact is entered, go to Step 2 by clicking on this tab. This will bring you to the following screen. The Existing Customers section will be updated with the new contact. and then clicking the Save option in the File menu. New customers can be added by filling in their information here…
Adding Books Click on the first letter of the title of the book… and then select the book here… and click the Add Title button. Double-clicking the title will also automatically add it to the list. The books will get added here. The quantities can be adjusted by highlighting the book here… You also have the option to set a specific percentage discount. and editing the quantity.
Quick Entry - Adding Books Once the order is completed, go to Step 3 by clicking on this tab. This will bring you to the following screen. Enter the ISBN and quantity and click the Add Title button. The book will be added to the Selected Tiles section. You can enter multiple books this way. Titles can also be added using the Quick Entry Mode option. Using this option will bring up the following screen.
Payment Details This screen is where you enter the payment information. You can edit the shipping method and taxes if necessary. Fill out the payment information and click the OK button. Payments can be added by clicking on the Add Payment button. This launches the following screen.
Printing Receipts By choosing receipt summary under the reports menu, you can print individual customer receipts.
Payment Summary By choosing payment summary under the reports menu, you can view and print a summary of all payments received.
Uploading to OrderPro Receipts can be uploaded to OrderPro by clicking on the Receipt Management option in the Tools menu. This will load the following screen. or select specific receipts to upload by clicking here… You can upload all the receipts as one order… You can remove the receipts after you upload them by clicking this option… and then selecting the receipts here. Click the OK button. Once you have selected your options and receipts, click the Upload button. The upload status will appear here and the following confirmation will appear. and have the contacts added to the contact manager.
Update Titles You can update your inventory database using the Inventory Management option in the Tools menu. This will launch the following screen. The Downloads tab is used to keep your titles up-to-date. Make sure this option is checked and… The upload status will appear here and the following confirmation will appear. Click the OK button. then click the OK button.
Inventory Sets The Inventory Sets tab can be used to create inventory sets that can be uploaded to OrderPro. You can manage your inventory using the Inventory Management option in the Tools menu. This will launch the following screen. Select an existing inventory set… click on the Add Title button. Type the ISBN and… or create a new set… Click the OK button. Status information is displayed here and the following confirmation is displayed. The items will be added here. and click on the Transfer button. Once you are done adding items, click the Upload Inventory Set button. This will load the following screen. You can delete an item by selecting it and clicking the Delete Row(s) button. You can also clear the inventory set by clicking here.
Need more help? We have the best IT department in the direct selling industry. They are constantly working to make our job easier. But, if you need their help, they promptly get back to you. Techsupport@myubah.com Debi@UsborneOhio.com