Download
1 / 36
360 likes | 506 Vues
Tk20 Guide. Fall 2012. This Tk20 Guide is meant to walk you through the Tk20 components you will use throughout your program. You can always find additional information at: http:// www.westga.edu/coe/index_550.php You can also e-mail questions to: Tk20@westga.edu. First Step.

E N D
Tk20 Guide Fall 2012
This Tk20 Guide is meant to walk you through the Tk20 components you will use throughout your program. You can always find additional information at: http://www.westga.edu/coe/index_550.php You can also e-mail questions to: Tk20@westga.edu
First Step • Your first step is to register for Tk20. If you want to use university financial aid $ you can make the purchase at the University Bookstore – it costs more through the bookstore. • You can also purchase Tk20 on-line at: http://westga.tk20.com/campustoolshighered/start.do • Additional information can always be found at: http://westga.tk20.com/campustoolshighered/start.do
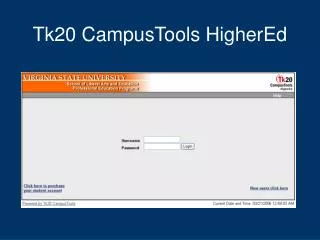
After you have an Account • After you have your account set up you will always access your account through the MyUWG log in page. Click on Log On Enter your username - first part of your e-mail address such as dputney1 and then enter your password
After you log in to myUWG click on the External Resources tab Then click on COE Tk20
These are the four tabs you will use throughout the program NEVER click on the Artifact Wizard Always click on the Save button when you have completed any task. Do NOT click on the Submit for Review button until you are told to do that in the Practicum course.
Four Portfolio Tabs • Throughout the program you will repeatedly use the four portfolio tabs you see at the top of the screen: • Policies and Procedures Handbook • Impact on Learning • Professional Practice • Roles/Exit Presentation The following slides will walk you through each of those tabs.
Professional Practice The third tab is the Professional Practice section. This is whereyou will post all of your volunteer Experience information. • Activities Checklist entries – each course • Volunteer Reflection form – each course • AASL Competency surveys – early and late in program • Dispositions surveys – early and late in program • School Data forms – each course and each level
The Professional Practice tab is where you will post all of your volunteer Experience information The Dispositions and AASL Competency items can also be completed during your first and last semesters in the program
Click here to access the Activities Checklist the first time you need to record and activity. Later screens will demonstrate how to add subsequent entries.
Radio button should be selected Click “Continue”
Type in title same as item you are working on such as “SLM Activities Checklist 1” for this first entry. Then Click on “Add Row”
Now you see this row Click on pull down tab
Select Activity Type name of district and school Click on pull down tab
Select amount of time spent on the specific activity Click on “Save” every time you enter an activity and time
When you are ready to enter information for another Activity Checklist item, you will need to click on the Artifacts tab at the top of the screen. You will notice that “Activity 1” shows up next to SLM Activities checklist” .
Click on Activities 1 or whatever you named your first entry. When you click on the Artifacts tab at the top of the screen you will then see a list of artifacts that you have already completed.
Click on the pull down tab Select the activity you want to record Enter the School/District and Number of Hours Click the Save button when you are finished
Click here to access Reflection Form Then make sure the radio button is clicked Then click on “Continue”
Enter title SLM Volunteer Reflection This is where you will enter notes each semester regarding your Volunteer Experience – like a journal – date entries. In your last semester you will type a summary paragraph. Click “Save” each time you enter notes
Here you can see the full list of items in the Professional Practice tab The next item to click on is the MEDT 6463 AASL Competency Survey
Make sure radio button is clicked Click on “Continue”
Type in title MEDT 6464 AASL Competency Survey Simply click on radio buttons to complete a self-rating
There are several School Data Forms in the list. Click on one, make sure the radio button is clicked and then click “Continue
Type in title of data form such as 6461 Administration School Data Form Click on live link to access Department of Education data