Download

1 / 24
240 likes | 334 Vues
Photography I: Unit I. Perceive and Respond to Aspects of Photography . EQ: What do you think makes a photograph effective/ “work”?. Photographic Eye (text) Ch.3 Vocabulary Kodak Glossary Homework. EQ: In what ways do we use light? In the world around us? In our Artwork?. Define ‘Light’

E N D
Photography I: Unit I Perceive and Respond to Aspects of Photography
EQ: What do you think makes a photograph effective/ “work”? • Photographic Eye (text) Ch.3 • Vocabulary • Kodak Glossary • Homework
EQ: In what ways do we use light? In the world around us? In our Artwork? • Define ‘Light’ • Photography (text): effects of lights/physical characteristics • TPS: using texts find examples of the following: • Use light as an aesthetic tool • Demonstrates light to: • Isolate subject matter • Create mood p.117 • Direct eye of the viewer • Facilities/Equipment available to Photo Student during course
Parts of the Camera • Camera Diagram: Pair Groups (2-4 Students) • Photography (text) Ch. 4 • Define the following: • Cameras/ p.87-94: Simple, Reflex, Rangefinder, Digital • Shutter Types/ p.95-96 • Accessories/ p.97 • Define/discuss each part and function of camera • SW sketch diagram of camera in notes • Collect cameras
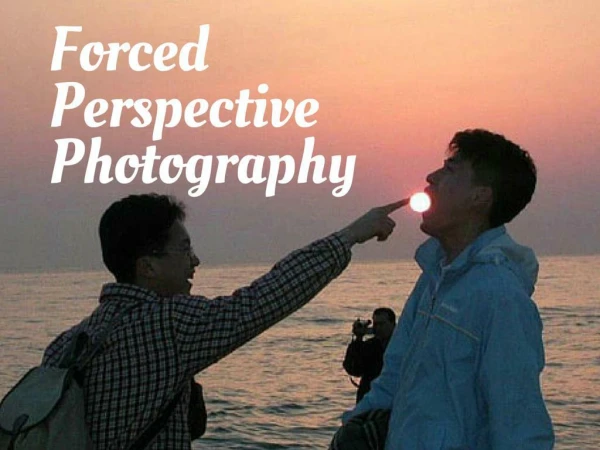
Six Guidelines for Better Photographing Composition • Simplicity • Use of line • Geometric placement • Balance • Avoidance of mergers • Framing techniques • Guidelines for Photographic Composition
Shutter Speed vs. Aperture • Shutter speed and apertureare important in controlling the amount of light entering the camera. • Aperture is the small opening allowing light on to the film while shutter speedis the length of time that sensor is exposed to light. • Aperture and shutter speeds are inversely proportional to each other and you need a balance between the two to achieve desirable results. • Shutter vs. Aperture Diagram
Quiz Day ! Good Luck!
EQ: How does a photographer utilize a bulk loader to create economical film portions for personal use? What is a bulk loader? What is a cassette? how to use a bulk film loader and empty cassettes to create rolls of film for personal use
Technical Guidelines Subject matter Portraits Landscapes/Cityscapes Still-Life Exposure Settings With 'passive' photography (no artificial lighting used) such as weather and landscape photography, there are three variables that determine how much light reaches the film to yield a properly exposed photo. These are the lens aperture, shutter speed, and film or sensor sensitivity. Depth of Field f/ratio determines is the depth of field, or depth of focus. At smaller apertures (higher f/ratios) the lens acts more like a pinhole, and both objects relatively close and far away from the lens will appear sharp. At larger apertures, the depth of focus decreases, and everything except objects within a narrow range of distance will not be sharp.
Subject Matter: Portrait A work of art that represents a specific person, a group of people, or an animal. Portraits usually show what a person looks like as well as revealing something about the subject's personality
Subject Matter: Landscapes/Cityscapes work of art which depicts scenery such as mountains, valleys, trees, rivers and forests. There is invariably some sky in the scene.
Subject Matter: Still-Life A picture of inanimate objects. Common still life subjects include vessels, food, flowers, books, clothing.
Exposure Settings: Lens Aperture Lens Aperture: The lens aperture controls how much light per unit time reaches the film/sensor. A camera lens consists of several groups of glass lenses, each group containing one or more elements. There is a group at the front of the lens, where the light comes in, and a group at the back, which mounts to the camera. The aperture measures the diameter of this part of the lens, where light travels parallel, and the lens' aperture is typically indicated as a so-called f/ratio. For example, a 28mm lens with a maximal aperture of f/2.8 has an aperture of 10mm (28mm focal length divided by 2.8). The bigger the aperture, the lower the f/ratio number, and the more light the lens will 'catch'. typical lens may have adjustable apertures f/2.8, f/4, f/5.6, f/8, f/11, f/16, f/22.
Exposure Settings: Shutter Speed Shutter Speed: The shutter speed determines how long a certain amount of light will reach the film/sensor. With daytime photography, shutter speeds are usually very fast, of the order of 1/1000 second (1 millisecond). Shutter speeds on older cameras differ approximately by factors of two, starting maybe from 1 second down to 1/1000 second or faster: 1, 1/2, 1/4, 1/8, 1/15, 1/30, 1/60, 1/125, 1/250, 1/500 and 1/1000 second. The 1/ part is usually omitted, with the understanding that the number corresponds to the fraction of a second.
Exposure Setting: Film Sensitivity Film Sensitivity: The film sensitivity determines how quickly a film or sensor will respond to a certain amount of light to become properly exposed. With film, the most common sensitivities are 100 and 200 ISO (also called ASA). The lower the ISO number, the less sensitive a film is. Most slide and print films have sensitivities ranging from 50 to 3200 ISO in factors of 2: 50, 100, 200, 400, 800, 1600 and 3200 ISO. All these factors correspond to one stop difference, so an exposure of 1/500 second at f/8 on 100 ISO film should yield the same amount of exposure as an exposure of 1/500 second at f/11 on 200 ISO film, or 1/250 second at f/8 on 50 ISO film. But 'slower' films have finer resolution than 'faster' films, thus low ISO films are desired unless the amount of available light is very limited.
Depth of Field Depth of field refers to the range of distance that appears acceptably sharp. It varies depending on camera type, aperture and focusing distance, although print size and viewing distance can also influence our perception of depth of field.
Controlling Depth of Field Although print size and viewing distance influence how large the circle of confusion appears to our eyes, aperture and focal distance are the two main factors that determine how big the circle of confusion will be on your camera's sensor. Larger apertures (smaller F-stop number) and closer focusing distances produce a shallower depth of field. The following test maintains the same focus distance, but changes the aperture setting:
Depth of Field and Aperture Visualization The key concept is this: when an object is in focus, light rays originating from that point converge at a point on the camera's sensor. If the light rays hit the sensor at slightly different locations (arriving at a disc instead of a point), then this object will be rendered as out of focus — and increasingly so depending on how far apart the light rays are.
EQ: How is 35mm B&W roll processed after exposure to produce usable images (negatives)? Understanding of the critical attributes of the chemicals used to process 35mm B&W roll film Developer Stop bath Fixer Photo flo (negatives)
Developer: D76 Film developer reveals the latent images on your film's negatives. The chemical acts on the film's light-sensitive silver halides and reduces them over time. The further the silvers get reduced, the lighter the negative will appear after processing and the darker the final image. When processing film, you must make sure the film developer is at the right temperature. Consult the packaging or container of the particular film you are developing for temperature guidelines as well as information about how much time film should be left in the developer. Agitate the tank while developing to ensure that the chemicals reach all parts of the negatives evenly. Film developer is not the same as print developer, so make sure to use the correct chemical.
Stop Bath Stop bath is a yellow, acidic chemical that quickly neutralizes the film developer and stops the developing process. This chemical is essential for avoiding over-development of negatives. Depending on the film and processing procedures you are using, the time you'll need to leave the negatives in the stop bath will vary, but it will usually be about 15 to 30 seconds. Stop bath can stain clothes and cause irritation to skin, so wear gloves during processing. Dilute 1 part concentrate with 63 parts water.
Fixer The fixer removes any remaining light-sensitive silvers from the film to "fix" the image so that you can safely view and work with the negatives in the light. The fixer step in film processing typically requires the most time. Dried fixer can stain negatives, so wash negatives with specialized bleach fix before continuing to the final water wash.
Photo Flo Decreases water-surface tension Minimizes water marks and streaks on film Promotes faster, more uniform drying