Download

1 / 34
340 likes | 345 Vues
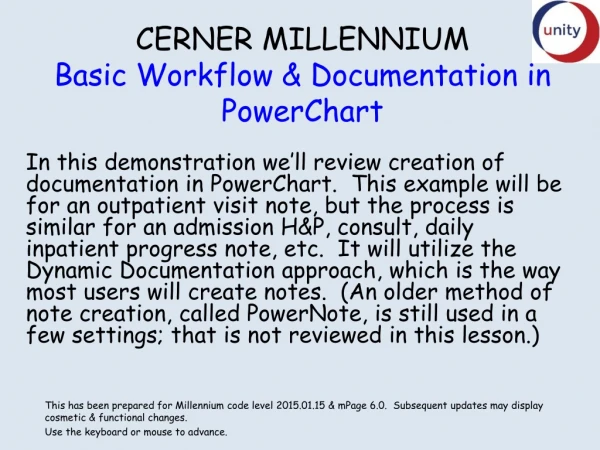
eKiDs PowerChart Basics. For Inpatient Physicians. How to Use this Tutorial. Welcome to the PowerChart Basics Tutorial. This tutorial will give you general knowledge of how to use PowerChart. Security & Password Considerations.

E N D
eKiDs PowerChart Basics For Inpatient Physicians
How to Use this Tutorial Welcome to the PowerChart Basics Tutorial This tutorial will give you general knowledge of how to use PowerChart.
Security & Password Considerations • The FIRST TIME you login, enter your username and password.You will then be prompted to change your password. • Never write your password down. • Choose a password you can memorize. • If you forget your password, call the IS help desk at 668-7075 to have your password reset. • Login immediately after it has been reset and change your password. • Never share your password with anyone!
If you have access to Virtual Desktop, you will be able to login to PowerChart simply by clicking the PowerChart icon. The PowerChart login screen will appear, without the need to login to Citrix. Accessing PowerChart via Virtual Desktop
As necessary, you may also need to access PowerChart via Citrix. To access eKiDs PowerChart via Citrix, you must first log in to the Citrix Web Interface. • You can access the Citrix Web Interface in three ways: • Select the Citrix Web Access icon on your Desktop. • On KDnet, under Popular Links, select Citrix Web Access. • Type “ekids” into your web browser. Accessing Citrix
After you have logged into Citrix, all applications for which you have access will display. Select PowerChart and log in using your username and password. Accessing PowerChart
A Security Failure error will occur if make a mistake while typing in your User Name and Password or if you are not yet authorized to access PowerChart. If you try to login three times in a row and are unsuccessful, you will be given an error message but may immediately attempt to sign back on. Common Login Errors
To begin, let’s discuss some terms that you should become familiar with: • Electronic Medical Record • Eclypsis • PowerChart • Downtime • Security Lesson 1: Introduction to PowerChart
An Electronic Medical Record [EMR] is a computerized version of a patient’s physical chart. Data such as orders, results, radiology images, and notes can be stored in an EMR. Lesson 1: Introduction to PowerChart
Eclypsisis CHKD’s Patient Management system. Demographic information related to the patient’s admission, discharge and transfer in maintained in this system. Lesson 1: Introduction to PowerChart
When a patient is registered, the EMR is created. • As orders are placed for the patient, or as the need arises to look up patient information, we can now access PowerChart. • PowerChartprovides capability such as the ability to view patient information, results, and enter orders. • PowerChart is a flexible tool because it interacts with other applications, such as SurgiNet, FirstNet, Eclipsys, and Epic. Inpatient and outpatient data can be viewed within Powerchart. Lesson 1: Introduction to PowerChart
Eclipsys is CHKD’s Inpatient Management system and is used to maintain admission, discharge, and transfer transactions. This includes Radiology, Laboratory, etc. Epic is CHKDHS’s Physician Practice Management system and is used for physician office and some outpatient hospital registrations, appointments, and billing transactions. A patient must be previously registered or admitted via Eclipsys or Epic in order to generate an Electronic Medical Record inPowerChart. Lesson 1: Introduction to PowerChart Patients for whom no Eclipsys or Epic records have been created will not be available from within PowerChart.
Some benefits of using PowerChart include: • Real time clinical information • Easy access to patient’s chart • Quickly accessible historical results • Customizable views Lesson 1: Introduction to PowerChart
Security in PowerChart Your username and password make up your electronic signature. As you access records in our systems, you are identified by your username and password. Security ensures that patient information remains confidential by tracking your interactions with patient records. Lesson 1: Introduction to PowerChart
Occasionally, downtime will occur with our applications. Downtime is any period of system unavailability. Scheduled downtime occurs for routine system maintenance. Unscheduled downtime occurs for cases when unplanned changes need to occur. When downtime occurs, consult with your practice manager or education coordinator for correct downtime procedures. Lesson 1: Introduction to PowerChart
The PowerChart Organizer opens to your home view which is the Message Center. Message Center enables you to perform tasks such as, requesting and signing electronic medication requests, approving and cosigning of orders, management of electronic messages and working with proxy authentication. Lesson 2: Message Center
Lesson 2: Message Center 3 4 1 2 5
The Inbox Summary is displayed on the left side of the window and allows navigation through the Message Center. The Message Center has folders which are expanded/collapsed by clicking the +/- next to the folder. The numbers to the right of the folder name in parentheses indicates the number of unopen/unread items and total number of items in each folder respectively. Lesson 2: Message Center
There are commands are available on the Message Center Toolbar. Toolbars will vary depending on what selection you have made under the Inbox tab. Some buttons are “grayed out” meaning that they may not be available for use at this time. Lesson 2: Message Center
From the Orders to Approve window, you can view orders that have been routed to you for signature. The order will open and display in the Orders to Approve Viewing Window. The information displayed on the right pane of Message Center will change when an item is selected from the Inbox section. Lesson 2: Message Center
There are three ways to open an order: • Double click directly on the subject line. • Click once to highlight and right click to open. • Select the subject line highlight and click the open icon. Lesson 2: Message Center Once one of the above options to open an order has been executed, it will open in a separate tab titled ‘Cosign Orders: (patient’s name)’.
Lesson 2: Message Center From the Orders to Approve window, you can view orders that have been routed to you for signature. The order will open and display in the Orders to Approve Viewing Window. The information displayed on the right pane of Message Center will change when an item is selected from the Inbox section.
Lesson 2: Message Center In the action pain the system defaults to approve. • Here you can choose: • Approve the Order • Refuse the order and enter a reason it is being refused • Enter additional comments if needed • Click the appropriate response for your order. • Next – moves you to the next order in the list without • making changes to the current order • OK – acknowledges the current order • OK & Next – acknowledges the current order and • moves you to the next order in the listing.
Lesson 2: Message Center The Key Notifications Toolbar alerts you when specific notifications are received in your Inbox in Message Center. This can display an indicator when Results, Messages, and Orders are received in your Inbox. New results are indicated in bold and the number adjacent to the result type indicates the number of new notifications in that category. Clicking the notification name opens the corresponding Inbox folder allowing you to view the details of the notification.
Lesson 2: Message Center The Refresh button is used to refresh any data that is being displayed. It also displays the time that the information was last refreshed. It is imperative that you Refresh the data after submitting changes.
Lesson 2: Message Center A pool is a shared mailbox that can be accessed by any user that is a member of the pool. A NICU pool has been set up to allow NICU providers to share responsibility for managing orders that need to be reviewed and cosigned and also orders that are eligible for renewal. You can co-sign and work with orders in the pool in the same manner as other orders sent to your inbox. NICU providers will see all orders for NICU patients that need co-signatures.
Lesson 3: Accessing the Patient’s Chart • To begin searching for a patient: • Under the Patient Menu, select ‘Search’. • Using the pull down arrow you can search by name or Medical Record number here. • On the eKiDs PowerChart Toolbar, select the Patient Search Icon which takes you to the Patient Search Menu.
Lesson 3: Accessing the Patient’s Chart When the Patient Search window appears, begin the search for your patient. The MRN is the fastest and most direct method of searching for a patient. However, you can also search for a patient by entering information in the Name, FIN, SSN, Birth Date, Age and / or Gender Fields.
Lesson 3: Accessing the Patient’s Chart After you conduct a patient search, all matching patients will display at the top of the screen. The selected patient’s encounters will display at the bottom of the screen. Double-click the appropriate encounter to open the chart. Ensure that the appropriate encounter is selected.
Lesson 3: Accessing the Patient’s Chart You can also search for a patient using the Recent button within the Organizer. The Recent button will display the names of the last nine charts that you accessed.
Lesson 3: Accessing the Patient’s Chart After you have selected the chart to open, you will be prompted to establish a relationship with the patient if you do not have one. Choose the correct option and click OK.
Lesson 3: Accessing the Patient’s Chart If the patient record that you are accessing has been marked as deceased, you will receive the message below before accessing the chart. To continue to the patient’s chart, click OK on the message. You will also be able to view the information from the Patient Information tab within the patient’s chart.
There are 3options you can use to log out / exit! • Click on “Task Menu” and choose the Exit option. • Click on Exit icon. • Click the “X” in the upper right corner of the screen Lesson 3: Accessing the Patient’s Chart Once you have finished performing functions in the system for the day, it is imperative that you log out. Logging out prevent others from using your electronic signature, and you must also sign off the system once you have completed the use of the system for the day.
This concludes PowerChart Basics Tutorial