Download
1 / 37
370 likes | 476 Vues
3. Word 2007 Basics. Learning Outcomes. Learn basic Word 2007 commands. Create, save, and print documents. Apply text, paragraph, and page formats. Review documents and apply communication skills. Build keyboarding skills. Word Screen. 26. Ribbon. New Document Screen. Insertion Point.

E N D
3 Word 2007 Basics Learning Outcomes • Learn basic Word 2007 commands. • Create, save, and print documents. • Apply text, paragraph, and page formats. • Review documents and apply communication skills. • Build keyboarding skills.
Word Screen 26 Ribbon New Document Screen Insertion Point Status bar
Ribbon Basics 26 • Tabs are located at the top of the Ribbon. • Groups contain related items and are positioned at the bottom of the Ribbon. • Commands are the buttons, boxes for keying information, and menus that provide a choice of options. Tab Group Command
Font Commands 26 Font Size Grow the Font Shrink the Font Font Clear Formatting Bold Font Color Highlight Italic Superscript Underline Change Case Subscript Strikethrough
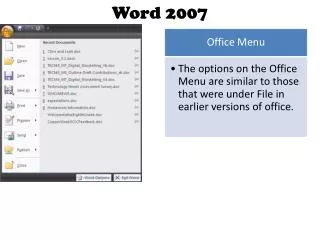
Office Button 26 Office Button Create a new document Open an existing document Save a document Print a document
Save & Save As 26 To save an existing document: • Click the Office Button. • Click Save. Save button Save As button
Save & Save As (continued) 26 To save a new document: Save As dialog box Save in box • Click the Office Button and click Save As. • Select the file location in the Save in box. If necessary, click New Folder to create and name a new folder. • Key the name of the file in the File name box; click Save. New Folder File name box Save
Close Document 26 To Close a Document and Leave Word Open: To Close a Document and Exit Word: Close option on Office Button • Click the Office Button and click Close at the bottom of the menu. • Click the Close button at the top right of the screen. Close button
New Document 26 To create a new Word document: • Click the Office Button and click New to display the New Document dialog box. • Click the Blank Document button; then click the Create button. New button Blank Document button
Open An Existing Document 26 Recent Documents list • Click the Office Button and double-click the filename in the Recent Documents list. Or • Click the Office Button and click the Open button. • Click on the appropriate folder, and double-click on the filename. Open button Select the file location Double-click on the filename
Print 26 To print one copy of a document to a default printer: • On the Office Button menu, click the arrow next to Print. • Select Quick Print. Displays Print dialog box with print options Prints one copy to default printer Displays how document will look when printed Print option on Office Button
Print Preview 26 To preview a document: • On the Office Button menu, click the arrow next to Print. • Click Print Preview to display how the document will look. Print Preview toolbar View one or two pages at one time Zoom Print from this toolbar Close Print Preview
Exit Word 26 • On the Office Button menu, click Exit Word at the lower right side of the menu. Or • Click the Close button at the top right of the screen. Exit Word button Close button
Paragraph Formats 27 • Alignment commands – specify how text lines up. • Line Spacing – determines the amount of space between lines of text. • Shading – applies color as a background for text. • Border – applies and removes inside and outside borders. Border Alignment commands Line Spacing Shading
Paragraph Formats (continued) 27 • Bullets & Numbering – formats lists of information. • Decrease & Increase Indent – moves all lines of a paragraph to the right or left. • Show/Hide – displays paragraph markings. Decrease & Increase Indent Bullets & Numbering Show/Hide
Alignment 27 • Align Text Left—all lines begin at left margin. • Center—all lines are centered. • Align Text Right—all lines are aligned at the right margin. • Justify—all lines are aligned at both the left and right margins. Center Justify Align Text Left Align Text Right
Bullets & Numbering 27 To apply Bullets and Numbering: • Key the list. • Select the list and click either the Bullets or Numbering command. Bullets command Numbering command
Bullets & Numbering (continued) 27 To select a different format: • Click the down arrow on either the Bullets or the Numbering command to display the library of styles. • Select the desired style. Numbering Library Bullet Library
Line Spacing 27 To change line spacing: • Position the insertion point in the paragraph whose spacing you wish to change. • Click the Line Spacing command and select the desired spacing. Line Spacing button Spacing options
Remove Space After Paragraph 27 • Position the insertion point at the end of the paragraph were space should be removed. • Click the Line Spacing command; then click Remove Space After Paragraph. Line Spacing command Remove Space After Paragraph
Cut, Copy, Paste 27 • To cut text - select the text and click the Cut command (removes text from its current location and places it on the Clipboard). • To copy text - select the text to be copied and click the Copy command. • To paste text - position the insertion point and click the Paste command. Cut command Copy command Paste command
Format Painter 27 To copy a paragraph format to a single paragraph: • Click in the paragraph that has the desired format. • Click the Format Painter. • Click in the paragraph to copy the desired format. Format Painter button
Format Painter (continued) 27 To copy a paragraph format to multiple paragraphs: • Double-click the Format Painter to keep it turned on. • Click in the paragraphs to copy the desired format. • Click Format Painter to turn it off.
Quick Access Toolbar 27 • Save - preserves the current version of a document. A new document displays the Save As dialog box. • Undo - reverses the most recent action you have taken. The down arrow displays a list of the commands that you can undo. • Redo - reverses the last Undo; it can be used several times to redo the past several actions. Save Undo Redo
Mini Toolbar 27 To use the Mini toolbar: • Select the text you wish to format. • Point the mouse at the Mini toolbar when it appears. • Click the command(s) that you want to apply. The Mini toolbar provides a shortcut to frequently used formatting commands.
Margins 28 To change margins: Margins command Gallery of margin options • In the Page Setup Group on the Page Layout tab, click the down arrow on the Margins command to display the gallery of margin options. • Click the desired margins option.
Orientation 28 To change page orientation: Orientation command • Click the down arrow on the Orientation command. • Select desired orientation. • Portrait – (default) positions text so top edge of paper is 8.5” wide. • Landscape – positions text so top edge of paper is 11” wide. Portrait Landscape
Date & Time 28 To insert the date and/or time: Date & Time command • Position the insertion point. • In the Text group on the Insert menu, click the Date & Time command to display the Date and Time dialog box. • Select the desired date or time format; click OK. Date and Time dialog box Date and time formats
Ruler & Indent 28 To indent text using the Ruler: • Drag the Indent Markers on each side of the Ruler. Tab alignment marker Line of writing Indent markers
Ruler & Indent (continued) 28 To indent text using the Indent command: • Click the Indent command. • Click the up arrows on both the left and right side to increase them. Indent command
Tabs 28 • Left Tab - aligns text at the left. • Center Tab - aligns text evenly on both sides of the tab stop. • Right Tab - aligns text at the right. • Decimal Tab - aligns numbers at the decimal point. • Bar Tab - aligns text to the right of a vertical bar. Left Tab Alignment button Center Tab Right Tab
Tabs (continued) 28 • To set a tab: Click the Alignment button to select the tab type; click the Horizontal Ruler where you want the tab. • To delete or clear a tab: Click the tab marker on the ruler, and drag it straight down. • To move a tab: Click the tab marker on the Ruler, and drag it to the new location.
Scroll Bar & Views 29 • Use the scroll bar to move through a document. • Use the Slider to zoom in and out on a document. • Use Views to display a document in different formats. Scroll bar View buttons Slider
Views 29 • Print Layout—displays how the document will look when printed. • Full Screen Reading—uses the full screen to display the document. • Web Layout—displays the document as it will appear on the Web. Print Layout Full Screen Reading Web Layout
Views (continued) 29 • Outline —displays the document in outline format. • Draft—displays the document without graphics and formatting. Draft Outline
Spelling & Grammar 29 • Correct errors as you key: • Red - spelling or keying errors • Green - grammar errors • Blue - contextual errors • Click Spelling & Grammar to check the entire document at once. Errors appear as squiggly lines Spelling & Grammar button Spelling & Grammar dialog box
Spelling & Grammar (continued) 29 • Verify Grammar and Spelling status on the status bar: • Still checking • Contains errors • Error free