Download

1 / 16
160 likes | 292 Vues
Applet Recording. Testing Java Applet. Java Applets are making WebSites more and more sophisticated. Highly graphical techniques bring more interactivity and visual effects to your WebSite. How can you make sure that your WebSite lives up to its expectations?.

E N D
Testing Java Applet Java Applets are making WebSites more and more sophisticated. Highly graphical techniques bring more interactivity and visual effects to your WebSite. How can you make sure that your WebSite lives up to its expectations?
What Is Different About Testing My Applet? A Java Applet creates objects outside the scope of normal HTML. eValid has the ability to record and playback successfully the interactive options of an applet and validate the pixel count of the applet to make sure it appears on the screen as it is supposed to.
eValid Advanced Recording Techniques Using the Advanced Recording features of eValid, one can create tests that interact and validate Java Applets. Advanced Recording options are powerful tools that can help test and validate even the most sophisticated WebSites.
Testing From The BrowserStep 1 of 9 From the eValid browser navigate to the WebSite you want to test, by typing the URL in the address bar.
Applets: Start TestingStep 2 of 9 Before initiating the record engine of eValid, you need to program it. This happens by simply clicking on Settings from the tool bar, and select: Settings > Record/Play Advanced Preferences
Applets: Advanced PreferencesStep 3 of 9 In the Miscellaneous Recording menu, select from the many Applet Recording optionsthat will satisfy your testing needs.
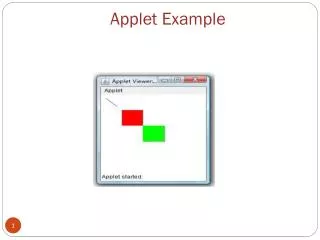
Applets: Record Applet InteractionStep 4 of 9 By simply clicking on Start Recording from the pull-down menu, you start interacting with your applet.
Applets: Validate OutputStep 5 of 9 (option 1) Next, validate the output from the applet. If the text is selectable, as in the screenshot to the left, you can use Record > Validate > Selected > Text.
Applets: Validate OutputStep 5 of 9 (option 2) Or you can use Record > Validate > & Synchronize > Screen Rectangle.
Applets: Insert WaitsStep 6 of 9 You may also wish to edit the script file and add Wait 1000 commands between each AppletMouseClick to ensure that eValid is completely synchronized with the applet.
Notes: Recording Tips and Solutions Sometimes, depending how an Applet or ActiveX control is instantiated, an application creates another layer between itself and the browser.
Notes: Recording Tips and Solutions To properly record the applet, it may be necessary to enable use of the Absolute Events options.
Notes: Absolute EventsStep 7 of 9 From the Toolbar, click on Settings > Record/Play Advanced Preferences > Absolute Events and choose the Absolute Clicks option among other Absolute recording options in the menu.
Access To ReportsStep 8 of 9 This report shows that you successfully validated the Selected Textand the Screen Rectangle.
Access To ReportsStep 9 of 9 Click View + Icon in the Event Log to view the same reports in a variety of formats: in graphical format, as a Spreadsheet, a HTML Table or in Test Editor. Immediate results are just a click away.