Download
1 / 29
290 likes | 432 Vues
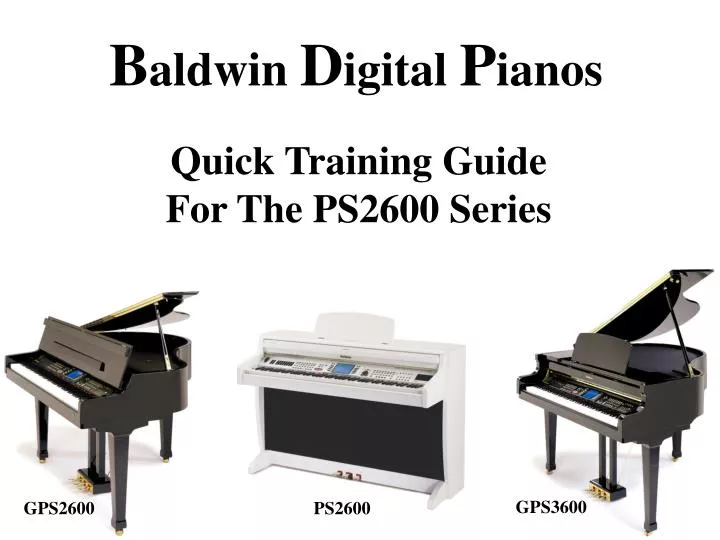
B aldwin D igital P ianos. Quick Training Guide For The PS2600 Series. GPS3600. GPS2600. PS2600. Table Of Contents. -page 1-. Hard Drive. 675 Floppy Disks. Aftertouch. Lyric & Music Display. PITCH BEND. &. Unique features of the PS2600 series. Easy To Use.

E N D
Baldwin Digital Pianos Quick Training Guide For The PS2600 Series GPS3600 GPS2600 PS2600
-page 1- Hard Drive 675 Floppy Disks Aftertouch Lyric & Music Display PITCH BEND & Unique features of the PS2600 series Easy To Use Internal Hard Drive w/220 Songs Vocal Harmonizer Unlimited Number of Sounds & Styles Large LCD w/ lyric, chord, and music display for karaoke 32 Track Recorder Full General MIDI Compatibility Pitch Bend Wheel / Aftertouch
-page 2- This is called the SOUND VIEW page The Display will look like this Sounds: Press Grand Piano Button The GRAND PIANO button places a Grand Piano sound across the keyboard and sets the pedals and effects to their default settings. When you begin each demo, press this button so you will always have the same starting point. NOTE: The right pedal is damper, the middle pedal is sostenuto and the left pedal turns the Vocal Harmonizer off and on.
-page 3- There are 16 SOUND GROUPS to choose from. Each SOUND GROUP has 16 Banks with 8 Sounds in each Bank. The Internal Hard Drive contains an addition 464 Sounds that can be loaded Selecting Sounds: Press Piano Sound Group The Display Will Look Like This The PS2600 has 1064 sound locations located within the 16 Sound Groups/Banks. Not all of these locations have sounds stored in them from the factory. This allows you to load additional sounds of your choice in the remaining locations which is one way the instrument can be customized for each of your customer’s.
-page 4- REMEMBER: Each of the 16 SOUND GROUPS has 16 Banks with 8 Sounds in each Bank. Press the Percussion Sound Group Then Press the Page ‘+’ Button The Display will now show the 8 sounds within Bank 2 of the Percussion Sound Group Selecting Different Sound Banks:
-page 5- Press the ENTER Button to return to the Sound View Screen The Display will look like this After Selecting Sounds: NOTE: The sounds that appear may be different than those shown, depending on the last sound you selected
-page 6- First, press the GRAND PIANO button to go to the default SOUND VIEW screen GRAND PIANO To Layer the StereoStrg sound with the Grand Piano sound, press the ‘E’ Soft Button. This will select Upper 2 Once you have selected Upper 2, press the ‘E’ Soft Button again to activate that keyboard zone Notice that when you activate a zone, the icon changes to a icon. Layering 2 Sounds: Notice that the display shows that the instrument is in Full Keyboard Mode. Upper 1 and Upper 2 can be activated while in Full Keyboard Mode.
-page 7- To Create a split keyboard, press the ‘F3’ Soft Button. This will activate Upper/Lower Mode allowing the keyboard to split. Now press the ‘C’ Soft Button twice to select and activate the Lower 1 sound. Creating A Split Keyboard:
-page 8- On the prior page, you created a Split Keyboard. It is also possible to Layer the Lower keyboard Zone To change the Split Point, press the ‘F7’ Soft Button. Play the note where you would like the keyboard split, and then press ENTER Adding A Lower Layer: Press the ‘A’ Soft Button twice to select and activate the Lower 2 sound.
-page 9- • Global Presets are one of the most powerful aspects of the PS2600 Series • instruments. A Global Preset remembers: • The Keyboard Mode (Full Keyboard or Split/Layered), • What sound(s) are active on the keyboard • Octave settings • Pedal settings • Effects routing • The Style and Variation that is selected • Individual Sound Edit Parameters (Filter, Touch, Tuning, etc.) There are 64 Global Presets available arranged in 8 groups. Each group has 8 Global Presets to choose from. Global Presets:
-page 10- To select Global Preset Group 1, press the first Global Preset button. The display will look like this Selecting Global Presets:
-page 11- Below are the 8 Global Preset Groups and the 8 individual Presets within each of those Groups Global Preset Groups:
-page 12- You will notice that the 8th Preset Group is called Drawbars. The Presets in this Group use a special Keyboard Mode called Multi. The Multi Keyboard Mode, in conjunction with the 8 Volume Sliders on the left side of the panel, allows the PS2600 Series to duplicate the Drawbars of a Tone Wheel Organ. 8 Volume Sliders These 6 Sliders control the right hand side of the keyboard (Upper Manual) These 2 Sliders control the left hand side of the keyboard (Lower Manual) The Drawbars Group:
-page 13- Press the GRAND PIANO Button GRAND PIANO This takes you back to the default Sound View page Now, select Upp/Low Keyboard Mode with the ‘F3’ Soft Button. Next, select and activate the remaining three Keyboard Zones (UPPER2, LOWER1 and LOWER2) using ‘E’, ‘C’ and ‘A’ Soft Buttons Creating Global Presets:
-page 14- Next, press the SFX SOUND GROUP, and go to BANK 4. Then select RideIt In this exercise, select LOWER 2 Press ENTER, and the display will look like this Now, adjust the volumes of each part Remember, you can change the sound(s) in the 4 Keyboard Zones by selecting that zone and then press the SOUND GROUP of your choice, select a new sound followed by the ENTER Button Editing Global Presets:
-page 15- The Display will look like this Once you have edited the GLOBAL PRESET to your liking, press the STORE PRESET Button located directly below the Drawbars Global Preset Group. Using the Cursor Keys and Rotary Dial, select the Group and Preset Number. To name the Preset, press the ‘F7/F8’ Soft Button and use the keyboard to spell out the new name. Then Press ENTER. Press ENTER a second time, and your new Preset is now stored. Saving Global Presets:
-page 16- These are called Soft Buttons. They are called that because the PS2600 software determines what function they serve depending on the mode the instrument is in at any given time. These are Cursor Keys. Use these to select various parameters within the center of the display. The Rotary Dial raises or lowers the value of parameters in the display ENTER and ESCAPE How Do I Get Around On This Thing?
-page 17- • Anything that is at the edge of the display, use the soft buttons. • Anything in the center of the display, use the cursor keys. • To raise or lower a value, use the rotary dial. The Soft Buttons select functions that are at the very left and/or right of the display Cursor Keys Cursor Keys move the shaded cursor inside the display (in this example, the cursor will move up and down) Rotary Dial The Rotary Dial will change the value of the selected parameter (in this example, the Transpose value will be increased or decreased) Navigating around the PS2600 is easy, once you know how to read the screen. The Rules Are:
-page 18- The Floppy Disk is useful for transporting files to and from a computer or another digital piano, and for playing purchased SMF’s (Standard MIDI Files). The internal Hard Disk is useful for storing massive amounts of data (Songs, Presets, Sounds, etc.) for fast and easy retrieval. The Hard Disk will hold about 675 Floppy Disks worth of data. NOTE: Use the ‘F1 and F2’ Soft Buttons to select Floppy Disk or Hard Disk Disk Operations: The PS2600 has a two types of disk storage: Floppy Disk and internal Hard Disk.
-page 19- Press the DISK Button Then use the Cursor Keys to select Single Song Loading A Song From Hard Disk:
-page 20- Press the ENTER Button and use the Down Cursor Key to select the folder named “S_HITS_1.BLK” NOTE: The SONG files are toward the end of the list. The first group of files that start with “SN_” are SOUND files. The second group “ST_” are STYLE files Press ENTER again and use the Down Cursor Key to select the SONG named “CALIF_DREA”. This is California Dreamin’ by the Mama’s and the Papa’s. Loading A Song From Hard Disk:
-page 21- Press the ENTER Button and the display will look like this Press ENTER again to confirm the load Notice that “CALIF_DREA” now appears in the RAM column NOTE: You can load up to 16 SONGS by using the Cursor Keys to select other open locations Loading A Song From Hard Disk:
-page 22- Press PLAY to hear the SONG Press SONG to view song menu (& make a selection with a corresponding button) Press SCORE to view lyrics and/or music Playing Songs w/ Karaoke:
-page 23- After pressing the SCORE button, you can change what is displayed on the screen (and external TV, if connected) The Display will look like this 2. Press the ‘F3’ Soft Button to view Music, Chords and Lyrics Switching Between Lyrics/Music View: To Change what is displayed on the screen 1. Press the ‘F8’ Soft Button 3. Press ENTER to return to the previous display
-page 24- 1. Press the EDIT Button 2. Use the Cursor Keys to highlight General, then press ENTER 3. Use the Cursor Keys to highlight Mic./Line In and Press ENTER While talking into the microphone, adjust the Line 1 Input Level Knob (located on the back of the instrument) until the VU Meter moves into the darkened area. NOTE: Do not set the level so high as to allow the Peak indicator to be displayed. This will cause unwanted distortion. Adjusting the Microphone Level
-page 25- The Vocal Harmonizer: Live from the Keyboard 1. Plug microphone into “Mic Line Input #1 in the back of the instrument and adjust the gain pot (the inner of the two).2. Press the “Grand Piano” button 3. To hear your voice “live,” bring up the Mic/Line slider. To hear the sound of your pitch-corrected voice only (assigned only to the notes you play on the keyboard), adjust the slider all the way down. 4. Lessen or mute the piano / keyboard sound (if desired) by minimizing the Upper 1 Slider. 5. When you sing or even talk into the microphone, the sound of your voice will be assigned to the exact pitch of the key or keys you are pressing on the keyboard.Note: You can turn off the Harmonizer by pressing the left pedal once. To turn back on press the pedal again, and be sure to play a chord before singing.
-page 26- 2.(For best effect, press variation 4& use the “Intro” & “Ending” buttons.) 3. At any point, you may press “STYLE PRESET” button for more right hand melody presets, appropriate to the current style. Using The Arranger: 1. Select a Style, Press “SINGLE TOUCH PLAY” and Play!
-page 27- Each Style has up to 8 Style Presets. Style Presets are similar to Global Presets. Style Presets store the Keyboard Mode (Full, Upp/Low or Multi), what sounds are assigned to keyboard and what sounds are assigned to the various accompaniment tracks. This allows quick access to a total of 8 sounds during a performance, drawing from the 1064 sounds onboard using the Soft Buttons around the display. Style Presets: You can create your own Style Presets by using the same technique used in creating and storing Global Presets