Download
1 / 16
160 likes | 350 Vues
CS 110 SPRING 2011 MS Office: PowerPoint. Transition Creating presentation in outline view. Printing Outline. Microsoft ® Office PowerPoint ® 2007 Training. The Power point 2007 Training link. Add animations and transitions. Outline mode.

E N D
CS 110 SPRING 2011 MS Office: PowerPoint. Transition Creating presentation in outline view. Printing Outline sgazziano@johncabot.edu
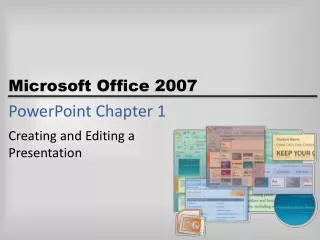
Microsoft® Office PowerPoint®2007 Training The Power point 2007 Training link
Add animations and transitions Create your first presentation
Outline mode • You may add slides one after the other to create your presentation by only using the slide options from PowerPoint's Normal mode. But there is a disadvantage to this technique. You have no global outline, or view, of your presentation. • The Outline mode settles this problem and adds other advantages: • Allows to better structure your ideas. • To move them around your presentation when necessary. • Helps you to quickly develop your presentation. Create your first presentation
Outline mode • A presentation is rarely a place where you want to place long sentences, unless it's a quote from an important person. • The text of your presentation should consist of keywords to make people understand the point that you want to make. • A better term to describe the text that should be in your presentation would be a " punchline ". For example, to explain the reasons of the growth of sales, you could write " Increase of sales ". • It's up to you after, during your presentation, to supply the explanations to the punchlines that you used. Create your first presentation
Outline mode • The contents of text of a slide can be cut in two parts: the main title, that explains the subject of the slide, and points to be covered on the subject. • The view in Outline mode shows each of the lines of your slides. It doesn't show the added text that is in the free text boxes • The lines that are the closest to the left side of the screen, or the first level if you prefer, are for the main title of the slide. The text that is on the second level to the sixth level is the text of the slide. The lines that are on the third level are the sub-categories of the text of the slide and so on. This is an added text box Create your first presentation
Outline mode: exercise • Enter outline mode • Write the title of your new slide • Press ENTER • At the moment, the last line is considered to be the main title for a new slide instead of being the text of the second slide (Exercise). • Place the cursor on the line where it's written “Enter outline mode".Press the button or the TAB key. • ... Better follow the teacher now .... Create your first presentation
Outline mode • HEREis a good link to learn the outline mode • Try selecting a text in outline mode and right click on it: • Practice “promote/demote” and “move up / move down” Create your first presentation
Adding sounds • The MS page with all help to add sounds Create your first presentation
Adding sounds Create your first presentation
Adding sounds Create your first presentation
Adding sounds Create your first presentation
Adding sounds Create your first presentation
Inserting, playing, and modifying movies • Sometimes the best way to ensure that your audience understands your message is to show a video or animation, collectively referred to in PowerPoint as movies. For example, if your company has developed a short advertising video, it makes more sense to include the video in a presentation about marketing plans than to try and describe it with bullet points or even still pictures. You can insert the following types of movies in slides: • Video clips. • Animated clips. Create your first presentation
Inserting, playing, and modifying movies • Video clips. • You can insert a digital video file in one of two ways: • If a slide’s layout includes a content placeholder, you can click the Insert Movie button in the placeholder. • You can also click the Movie button in the Media Clips group on the Insert tab. • Either way, the Insert Movie dialog box opens so that you can select the file. Before PowerPoint inserts the file, you specify whether the video should play automatically when the slide containing it appears or whether you will start the video manually. Create your first presentation
Inserting, playing, and modifying movies • Animated clips. • PowerPoint comes with several animated graphics. • You insert these animated objects by clicking the Movie arrow in the Media Clips group on the Insert tab, and then clicking Movie From Clip Organizer to display the Clip Art task pane, where you can select the clip you want. • If you are connected to the Internet, clicking the Clip Art On Office Online link in the task pane takes you to the Office Online Clip Art and Media Web site, from which you can download hundreds of clip art images, photos, sounds, and animated clips. Create your first presentation