Download
1 / 12
200 likes | 554 Vues
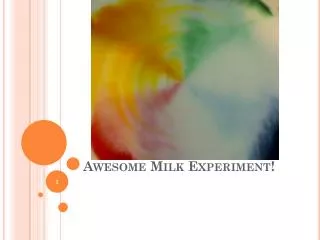
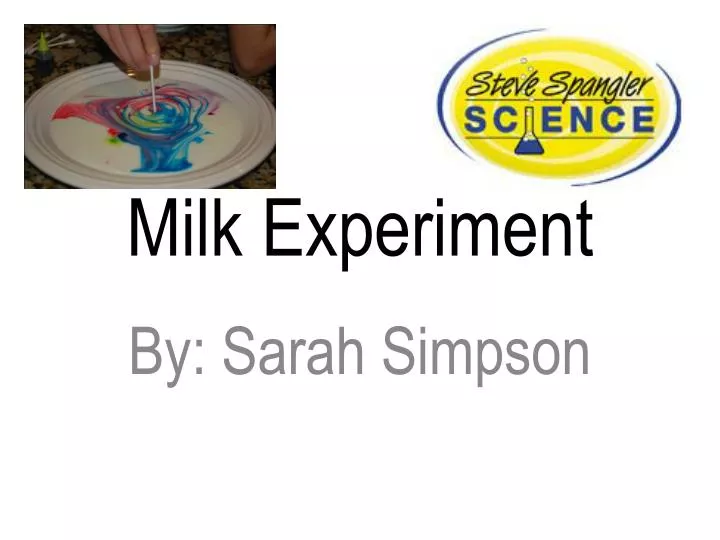
Milk Experiment. By: Sarah Simpson. Worksheet for learning center…. Milk Experiment-Learning Center

E N D
Milk Experiment By: Sarah Simpson
Worksheet for learning center… • Milk Experiment-Learning Center • What is your first prediction, what do you think will happen when we place a plain cotton swab into the milk? _______________________________________________________________________________________________________________________________________. • What is your second prediction, what do you think will happen when we place a cotton swab with dish soap on it into the milk? ___________________________________________________________________________________________________________________________________________________________________________________________. • Draw a picture of what you saw… You can use crayons if you’d like… Were any of your predictions correct? Circle an answer • My first prediction was correct---Yes or No • My second prediction was correct---Yes or No
Materials • Worksheet • Glass Pie Plate/Dinner plate • 2% milk • Food coloring (red, yellow, blue & green) • Dawn Dish soap • Cotton Swabs • Crayons • Clear Plastic Cups
Steps: • 1. Pour enough milk in the dinner plate to completely cover the bottom of the plate & allow the milk to settle • 2. Add one drop of each of the four colors of food coloring red, yellow, blue, and green to the milk. • 3. Keep the drops close together in the center of the plate of milk
Steps continued… • 4. Find a clean cotton swab, make your first prediction on your worksheet • 5. After making your prediction, place the plain cotton swab into the milk and observe. • 6. Next, take the other end of the cotton swab, and dip it into the cup of dish soap. • 7. Make your second prediction on your worksheet • 8. Place the dish soap end of the cotton swab into the milk & observe
Steps Continued… • 9. Pull the dish soap covered cotton swab out of the milk • 10. Draw what you have observed on your worksheet • 11. Circle if any of your predictions were correct on your worksheet.
Why does this happen? • There is fat in milk, and what happens is the soap molecules are trying to hook onto the fat that is in milk; causing the molecules of fat in the milk to bend, roll, and twist in all different directions as the soap molecules race around to join up with the fat molecules in the soap.
What Have you learned from the video? • What happens when you use 1% milk, whole milk, half and half and buttermilk?
Extension • We could extend this learning center by doing the color changing milk experiment with Elmer’s glue. • You place Elmer’s glue onto a plastic plate, place your drops of food coloring into the glue near the center. • Put a drop of soap into the center of the glue, and observe. • Let the glue dry overnight, and peel it off of the plate. • You now have made your own stained glass.
Sources • http://www.stevespanglerscience.com/experiment/milk-color-explosion • http://www.youtube.com/watch?v=pTe2pqlQWTo