Download
1 / 78
780 likes | 910 Vues
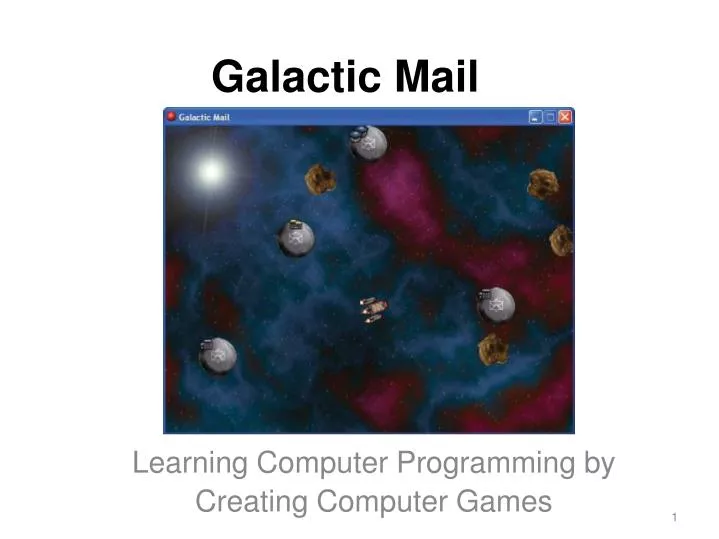
Galactic Mail . Learning Computer Programming by Creating Computer Games. “Crackdown” Xbox360 Game. 1. Learning Programming With Game Maker. You will use: events and actions to change sprites and objects.

E N D
Galactic Mail Learning Computer Programming by Creating Computer Games “Crackdown” Xbox360 Game 1
Learning Programming With Game Maker • You will use: • events and actions to change sprites and objects. • Depth property of objects to control the order that instances appear on screen. • This chapter also introduced the use of variables, even though we didn’t call them variables. • For example, the word direction is a variable indicating the current direction of an instance. • the variables x and y that indicate the position of an instance. • There are many variables in Game Maker, and they are very useful. Other variables will be used in the chapters to follow. 77
Learning Programming With Game Maker Galactic Mail Game Design • You play an intergalactic mail carrier who must deliver mail to a number of inhabited moons. • The pilot must safely steer a course from moon to moon while avoiding dangerous asteroids. • The mail carrier is paid for each delivery , but pay is deducted for time spent on moons. • This adds pressure to the difficult task of piloting the rickety, old rocket, which doesn’t steer very well in space. • When the rocket is on a moon, the arrow keys rotate it to set the launch direction • The spacebar launches the rocket, and the vacated moon is removed from the screen to show that its mail has been delivered. • In flight, the rocket will keep moving in the direction it is pointing, with only a limited control over steering using the arrow keys. 2
Learning Programming With Game Maker • When objects move outside the playing area, they reappear on the other side to give the impression of a continuous world. • A player gains points for delivering mail, but points are deducted while waiting on a moon. • This encourages players to move quickly from moon to moon. • There are different levels, with more asteroids to avoid. • The game is over if the rocket hits an asteroid, and a high-score table will be displayed. • The final game looks like the earlier slide 3
Learning Programming With Game Maker • The various elements needed to create the game are • moons, asteroids, explosions and rockets. • We’ll actually use two different moon objects (for a normal moon and an occupied moon) and two different rocket objects (for a “landed rocket” and a “flying rocket”). • All the resources for this game are in the Go to the shared folder to copy the material. 4
Learning Programming With Game Maker Sprites and Sounds • Sprites provide images for each element of the game. • In this chapter, we’ll use some extra abilities of sprites • First set Game Maker into AdvancedMode Setting Game Maker into Advanced Mode: 1. You must save any game you are working on before switching modes. 2. Click the File menu and look for Advanced Mode. If there is a checkmark in front of it, then you are in Advanced mode. Otherwise, click Advanced Mode to select it, and the main window should now look like Figure 3-2. • We’ll leave Game Maker in Advanced mode for the remainder of the book, even though some options are only used in later chapters. • Now we’re going to start a new, empty game. 5
Learning Programming With Game Maker Figure 3-2. In Game Maker Advanced mode, there are additional resources on the left and a new menu. 6
Learning Programming With Game Maker • First we’ll create the sprites needed • This time we’ll add a couple of additional steps. • Each sprite in Game Maker has its own origin, which controls the exact position that it appears on the screen. • By default, the origin of a sprite is set at the top-left corner of the image. • This means that when you move objects around in the game, it’s as if you were holding them by their top-left corner. • But, because the rockets in Galactic Mail need to sit in the center of the moons, it will be better if the origin of all sprites are centered. 7
Learning Programming With Game Maker Creating new sprite resources for the game: 1. From the Resources menu, choose Create Sprite. The Sprite Properties form with additional Advanced mode options will appear, like the one shown in Figure 3-3. 2. Click in the Name field and name the sprite sprite_moon. 3. Click the Load Sprite button. Select Moon.gif from the CD’s Resources/Chapter03 folder Figure 3-3. The Sprite Properties form shows the advanced options. 8
Learning Programming With Game Maker 4. Controls to set the origin are in the middle of the form’s second column Click the Center button to move the origin to the sprite’s center Crosshairs will be in the middle of the sprite’s image indicating the origin’s position. You can also change the origin by clicking on the sprite image with the mouse or by typing in X and Y values directly. 5. Enable the Smoothedges option by clicking on the box next to it. This makes sprite edges look less jagged during the game by making them slightly transparent. (reduces “jaggies”) 6. Click OK to close the form. 9
Learning Programming With Game Maker 7. Now create asteroid and explosion sprites in the same way using Asteroid.gif and Explosion.gif (remember to center their origins). 8. We’ll need two sprites for the rocket: one for when it has landed on a moon and one for when it is flying through space. Create one sprite called sprite_landed using Landed.gif and another called sprite_flying using Flying.gif. Center the origins of both sprites • Before closing the Sprite Properties form for this last sprite, click the Edit Sprite button. A form will appear like the one shown in Figure 3-4. 10
Learning Programming With Game Maker Figure 3-4. The Sprite Editor shows all the images of the rocket. 11
Learning Programming With Game Maker • By scrolling down the images contained in this sprite, you’ll see that it is an animation of the rocket turning a full circle. • There are 72 different images at slightly different orientations, animating a complete turn of 360 degrees. • We use the images to pick the correct rotation position for the rocket in the game. • We can use the Sprite Editor to change the sprite in many ways, but for now simply close it by clicking the button with the green checkmark in the top left of the window. • The game now has five different sprites. moon, asteroid, explosion and 2rocket ships • Next we’ll add sound effects and background music for the game 12
Learning Programming With Game Maker Creating new sound resources for the game: 1. Select Create Sound from the Resources menu. Note that the Sound Properties form now has additional Advanced mode options, but we don’t need them now (some are only in the registered version of Game Maker). 2. Call the sound sound_explosion and click Load Sound. Select the Explosion.wav file from Resources/Chapter03 on the CD. 3. Close the form by clicking OK. 4. Now create the sound_bonus and music_background sounds in the same way using the Bonus.wav and Music.mp3 files. Adding all these resources at the start will make it easier to drop them into the game as we are going along—so let’s get started on some action. 13
Learning Programming With Game Maker Moons and Asteroid Objects • Both moons and asteroids will fly around the screen in straight lines, jumping to the opposite side of the room when they go off the edge of the screen. In Game Maker this is called wrapping, and it is done using the Wrap Screen action. Creating the moon object: 1. From the Resources menu, choose Create Object. The Advanced mode Object Properties form has additional options and actions too (see Figure 3-5). 2. Call the object object_moon and give it the moon sprite 14
Learning Programming With Game Maker Figure 3-5. The Object Properties form for the moon object looks like this. 15
Learning Programming With Game Maker • When a moon is created, we want it to start moving in a completely random direction. Adding a create event to the moon object: 1. Click the Add Event button and choose the Create event. 2. Include the Move Free action in the Actions list for this event. 3. This action form requires a direction and a speed. Enter a Speed of 4 and type random(360) in the Direction property. This indicates a random direction between 0 and 360 degrees. The form should now look like Figure 3-6. 16
Learning Programming With Game Maker • To make sure that the moonreappears at the other side goes off the edge of the room, include a wrapaction for the moon object: 1. Click the Add Event button, choose the Other events, and select Outside Room from the pop-up menu. 2. Include the Wrap Screen action in the Actions list. 3. In the form that appears, indicate that wrapping occurs in both directions (top to bottom and left to right). Now the form should look like Figure 3-7. 4. The moon object is now ready to go, so you can close the Object Properties form by clicking OK. Figure 3-6. Use the random command in a Move Free action. Figure 3-7. The Wrap Screen action properties form 17
Learning Programming With Game Maker • The asteroid object can be created in exactly the same way as the moon. • However, we want to make the asteroids appear behind other objects when they cross paths with them on the screen. • Object instances are usually drawn in the order their creation, so you can’t be sure if one type of object will appear in front of another. • But, you can change this with an object’s depth value. • Instanceswith a smaller depth value are drawn on top of instances with a greater depth, and appear in front of them. • All objects have a default depth of 0, so to make sure the asteroids appear behindother objects , simply give them a depth greater than 0. 18
Learning Programming With Game Maker Creating the asteroid object: 1. Create a new object called object_asteroid and give it the asteroid sprite. 2. On the left-hand side there is a text field labeled Depth. Enter 10 in this field and change the depth of the object from 0 to 10. 3. Add the Create event and include the Move Free action in the Actions list. Type random(360) in the Direction property and enter a Speed of 4. 4. Add the Other, Outside Room event and include the Wrap Screen action in the Actions list (indicate wrapping in both directions). 19
Learning Programming With Game Maker 5. The Object Properties form now looks like Figure 3-8. Click OK to close the form. Figure 3-8. Set the depth for the asteroid object. 20
Learning Programming With Game Maker • Now would be a good time to check that everything has gone according to plan. • Before we can do that, we must create a room with some instances of moons and asteroids. Creating a room with moon and asteroid instances: 1. Select Create Background from the Resources menu. 2. Call the background background_main, and click the Load Background button. Select the Background.bmp image from the folder Resources/Chapter03 3. Click OK to close the Background Properties form. 4. Select Create Room from the Resources menu. If the whole room isn’t visible, enlarge the window. 21
Learning Programming With Game Maker 5. Select the settings tab and name the room room_first. Provide an appropriate caption for the room (“Galactic Mail”). 6. Select the backgrounds tab. Click the menu icon to the right of where it says <no background> and select the background from the pop-up menu. 7. Select the objects tab and place a number of asteroids and moons in the room. (Remember that you can choose the object to place by clicking where it says “Object to add with left mouse”). The Room Properties form should now look like Figure 3-9. 8. Close the Room Properties form by clicking the greencheckmark in the top-left corner. 22
Learning Programming With Game Maker Figure 3-9.Here’s our first room 23
Learning Programming With Game Maker Saving and running the game: 1. Choose Save fromthe File menu (or click the disk icon). Save the game where you can easily find it again (the desktop, thumbdrive, or your personal GWC storage area, for example). 2. Select Run normally fromthe Run menu. If all goes well, the game should then appear in a new window. • Before continuing, double-check that everything is working the way it’s supposed to. a. Are the moons and asteroids moving in different random directions? b. Do they reappear on the other side of the screen when they leave the room? c. Do the asteroids always pass behind the moons? If any of these are not working properly, check that you’ve followed the instructions correctly. 24
Learning Programming With Game Maker Flying Around • So far, so good, so we’ll introduce some gameplay by bringing the rocket into the game. • We’ll make two rocket objects, but let’s stop to consider why • Our rocket has two different ways of behaving: Sitting on top of a moving moon with full control over the ship’s direction, and Flying through space with only limited control • If we used two ways of controlling one object it would require a complicated set of events and actions, but if we separate these behaviors into two different objects, then it becomes easier. • As long as both objects look the same, the player won’t notice that the ship changed from being a “flying rocket” object to a “landed rocket” object at different points of the game. 25
Learning Programming With Game Maker • We also need 2 moon objects, since we want the landed rocket object to follow the path of one particular moon around (the one it’s on). • Making it into a separate object will allow us to single it out from the others. • Since the 2nd moon object will be almost the same as the normal moon, we can take a shortcut and make a copy of the existing moon object. 26
Learning Programming With Game Maker Creating the special moon object: 1. Right-click the moon object in the resource list, and select Duplicate from the pop-up menu. A copy of the moon object will be added to the resource list and its properties form is displayed. 2. Change the name to object_specialmoon. It’s important to use this exact name (including the underscore) since we’ll use it to identify this object later. 3. Set the Depth of this object to -5. This guarantees that instances of this moon arealways in front of the other moons since it is less than 0. 4. We’ll also make this moonstart the backgroundmusic at the beginning of the game. Add an Other, Game start event and include a Play Sound action in it (main1 tab). Select the background music sound and set Loop to true sothat the music plays continuously. 5. Click OK to close the properties form. 27
Learning Programming With Game Maker • Now open the first room and add a single instance of this new special moon to the level. • Run the game and the music should play. • (You won’t notice any other difference because the special moon should look and behave exactly like the other moons.) Now we can make our 2 rocket objects. • We’ll begin with the landed rocket, which needs to sit on the special moon object until the player decides to blast off. • We’ll use a Jump Position action to make it follow the special moon’s position as it moves around the screen. 28
Learning Programming With Game Maker Creating the landed rocket object: 1. Create a new object called object_landed and give it the landedrocket sprite. Set the Depth to -10 so that it appears in front of the moons and will look like it’s sitting on the special moon’s surface 2. Add a Step, End Step event to the new object. An End Step allows actions to be performed immediately before instances are drawn at their new position on the screen. Therefore, we can use this event to find out where the special moon has been moved to and place the rocket at the same location – just before both of them are drawn. ■Note – A Step is a short period of time in which everything on the screen moves a very small distance. Game Maker normally takes 30 steps every second, but you can change this by altering the Speed in the settings tab for each room. 29
Learning Programming With Game Maker 3. Include the Jump Position action in the Actions list for this event. This action allows us to move an object to the coordinates of any position on the screen. Type object_specialmoon.x into the X value andobject_specialmoon.yinto the Y value. • These indicate the x and y positions of the special moon. • Make sure that you type the names carefully, including underscores and dots in the correct positions. • The action should now look like Figure 3-10. Figure 3-10. We set the rocket to jump to the x and y positions of the special moon, so that it will follow this moon around. 30
Learning Programming With Game Maker 4. You might want to test the game now. Place one instance of the rocket at a random position in the room and run the game. The rocket should jump to the position of the special moon and stay on top of it as it moves around. • When you run the game, you will also notice that the rocket continually spins around without any user input. • This is because the rocket sprite contains an animation showing the rocket rotating through 360 degrees. • By default, Game Maker automatically cycles through a sprite’s subimages to create an animation. • But, we don’t want this for this game – we need Game Maker to select the appropriate subimage based on the directionthe rocket will be moving in. 31
Learning Programming With Game Maker • This requires a small amount of arithmetic. • There are 72 images representing a turn of 360 degrees, so each image shows the rocket rotated by 5 degrees more than the previous (because 360/72 = 5). • Game Maker stores the direction of all objects in degrees, so it can determine which rocket subimage to use by dividing the rocket object’s current direction by 5. • Then we can make the rocket face in the correct direction by using this rule (direction/5) to set the current subimage in a Change Sprite action 32
Learning Programming With Game Maker Adding a change sprite action in the landed object: • With the landedrocketObjectProperties form open, add a Change Sprite action (main1 tab) in the End Step event. - Choose the landed rocket sprite from the menu and type direction/5 into the Subimage property. - direction is a special term that Game Maker uses as the direction that this instance is currently facing • Finally, set Speed to 0 to stop the sprite from animating on its own and changing the subimage. • Figure 3-11 shows how this action should now look. 33
Learning Programming With Game Maker ■ Note This way of dealing with rotated images might seem rather clumsy, but many old arcade games were made in a similar way so that each rotated image could include realistic lighting effects. Nonetheless, the regis-tered version of Game Maker contains an add-itional action to rotate a sprite automatically without the need for sub-images. Figure 3-11. Set the correct subimage in the sprite 34
Learning Programming With Game Maker • We will also make use of the direction term for the object to add actions that allow the player to control the direction of the rocket using the arrow keys. Adding a keyboard event to the landed rocket object: 1. Add a Keyboard, <Left> event to the landed rocket object. 2. Add the Move Free action and typedirection+10 in the Direction property. This indicates that the current direction should be increased by 10 degrees. Set Speed to 0 because we don’t want the rocket to move independently of the special moon. • This action should now look like Figure 3-12. 35
Learning Programming With Game Maker 3. Add a similar Keyboard event for the <Right> key. Add a Move Free action and type direction-10 in the Direction property. • The last control that we will need for the landed rocket will allow the player to launch the rocket using the spacebar. • This control will change the landed rocket object into a flying rocket object, but since we haven’t created the flying rocket object yet, we can’t make an action yet either! Figure 3-12. Set the direction to equal itself plus 10 36
Learning Programming With Game Maker • So let’s make the flying rocket now and finish up later Creating the flying rocket object: • Create a new object called object_flying and select the flying rocket sprite. Set Depth to -10 to make sure that this object appears in front of moons. 2. Add an Other,Outside Room event and include a Wrap Screen action to wrap around the screen in both directions. • Add an End Step event. Add a Change Sprite action, choose the flying rocket sprite, type direction/5 in the Subimage property, and set the Speed to 0. 37
Learning Programming With Game Maker 4. Add a Keyboard, <Left> event and include a Move Free action. We don’t want the player to have too much control over the flying rocket, so type direction+2 in Direction and set Speed to 6. 5. Add a Keyboard, <Right> event with a Move Free action. Type direction-2 in Direction and set Speed to 6. • The basic gameplay is nearly complete now – just a few more events to add • First, the game should end when the rocket hits an asteroid. • Next, when the flying rocket reaches a moon, it must change to a landed rocket, and the moon must change to a special moon (so that the landed rocket can follow ). 38
Learning Programming With Game Maker • We change the objects by using the Change Instance action, whichreplaces an instance of one type of object with another. • Its as if we melted the jello from one instance and poured it into a new object mold. • Although the instance becomes a completely different kind of object, it keeps some of its original properties, such as its position on the screen and its direction. • It is critical that these values remain the same – else the launch direction of the landed rocket be reset as soon as it turned into a flying rocket! 39
Learning Programming With Game Maker • Adding collision events to the flying rocket object: 1. Add a Collision eventwith the asteroid object and include the Restart Game action(main2 tab) in the Actions list. Later, we’ll add an explosion to make this better. • Add a Collision event with the moon object and add the Change Instance action(main1 tab). Set the object to change into object_landed using the menu button, andleave the other options unchanged. 40
Learning Programming With Game Maker 3. Add a second Change Instance actionfor changing the moon intoa special moon object. • So that this action changes the moon object (and not the rocket), click the Applies to option to Other from Self. • Now the action will apply to the other object in the collision, which is the moon. • Set the object to change into object_specialmoon. • Figure 3-13 shows the settings. Figure 3-13. Change the other instance involved in the collision to a special moon. 41
Learning Programming With Game Maker • Now, we can go back to the landed rocket object. • We need an event that changes it into a flying rocket and deletes the special moon when the spacebar is pressed. Adding a key press event to the landed rocket object: 1. Reopen the Object Properties form for the landed rocket by double-clicking on it in the resource list. 2. Add a Key Press, <Space> event and include a Move Free action to set the rocket in motion. Type direction in the Direction property(this keeps the direction the same) and set Speed to 6. 3. Now add a Change Instance action and change the object into an object_flying. 42
Learning Programming With Game Maker 4. Finally, we want to delete the special moon because it no longer needs to be visited. • Include a Destroy action and change the Applies to option to Object. • Click the menu button next to this and select the object_specialmoon See Figure 3-14. Figure 3-14. Include a Destroy action for the special moon.. 43
Learning Programming With Game Maker ■Caution - Using the Object setting for Applies to performs an action on ALL instances of that type of object in the room. • Deleting all of the special moon instances is OK in this case (as there is only one), but you will need to think carefully about the effects this setting will have before using it in your own games. Figure 3-14. Include a Destroy action for the special moon.. 44
Learning Programming With Game Maker • That completes the secondversion of the game. • Make sure you save it and check that it all works as it should so far. Don’t keep going unless this part works as planned • You should be able to rotate the rocket on a moon, launch it with the spacebar, and steer through the asteroids to land on another moon. • Moons should disappear as you visit them, and the game should restart if you hit an asteroid. • If something isn’t working, then check the instructions again. • Or compare your version with the version on the CD (Games/Chapter03/galactic2.gm6). 45
Learning Programming With Game Maker • SCORING, LEVELS, AND FINISHING TOUCHES Winning and Losing • In this section we’ll put a bit more effort into what happens when the player wins or loses the game. • We’ll start by making asteroids explode on contact An Explosion • To make this work, we add a new explosion object and create an instance of it when the rocket hits an asteroid. • This will play the explosion sound when it is created and endthe game with a high-score table after the explosion animation has finished. 46
Learning Programming With Game Maker Adding an explosion object to the game: • Create a new object named object_explosion, and select the explosion sprite. Give it a Depth of -10 to make it appear in front of other instances. 2. Add a Create eventand add a Play Sound action (main1 tab) for the explosion sound. • Add an Other, Animation End event. This eventoccurs when a sprite reaches the finalsubimage in its animation. 47
Learning Programming With Game Maker 4. Add the Show Highscore action (score tab) in the Actions list for this event. Tomake the high-score list look more interesting, set Background to the same as the background for the game, set Other Color to yellow, and choose a different font (e.g., Arial, bold). The Show Highscore action window will now look like Figure 3-15. Figure 3-15. You can spice up the high-score table 48
Learning Programming With Game Maker 5. Also add a Restart Game actionto start the game again after the high-score table is closed (main2 tab). 6. Click OK toclosetheobject. • Next we change the behavior of the flying rocket when it hits an asteroid. 49