Download
1 / 12
120 likes | 398 Vues
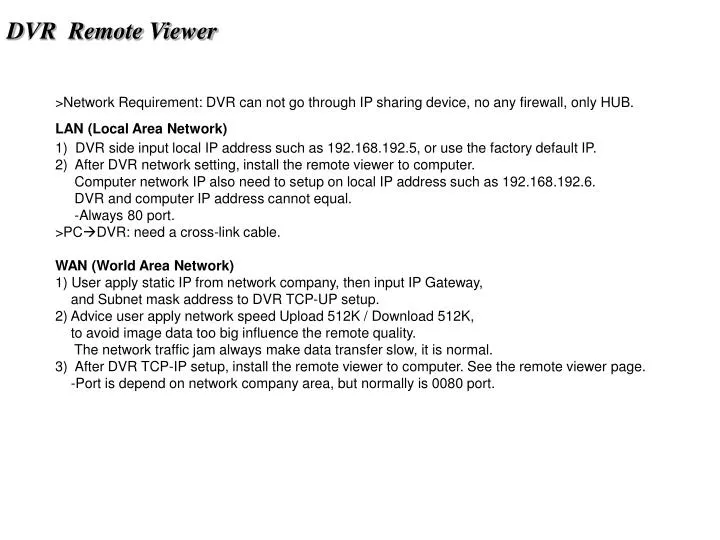
DVR Remote Viewer. >Network Requirement: DVR can not go through IP sharing device, no any firewall, only HUB. LAN (Local Area Network) 1) DVR side input local IP address such as 192.168.192.5, or use the factory default IP.

E N D
DVR Remote Viewer >Network Requirement: DVR can not go through IP sharing device, no any firewall, only HUB. LAN (Local Area Network) 1) DVR side input local IP address such as 192.168.192.5, or use the factory default IP. 2) After DVR network setting, install the remote viewer to computer. Computer network IP also need to setup on local IP address such as 192.168.192.6. DVR and computer IP address cannot equal. -Always 80 port. >PCDVR: need a cross-link cable. WAN (World Area Network) 1) User apply static IP from network company, then input IP Gateway, and Subnet mask address to DVR TCP-UP setup. 2) Advice user apply network speed Upload 512K / Download 512K, to avoid image data too big influence the remote quality. The network traffic jam always make data transfer slow, it is normal. 3) After DVR TCP-IP setup, install the remote viewer to computer. See the remote viewer page. -Port is depend on network company area, but normally is 0080 port.
LAN (Local Area Network) 1) DVR side input local IP address such as 192.168.192.5, or use the factory default IP. 2) After DVR network setting, install the remote viewer to computer. Computer network IP also need to setup on local IP address such as 192.168.192.6. DVR and computer IP address cannot equal. -Always 0080 port. >PCDVR: need a cross-link cable. Network Cable System 1 : DVR connect to PC Orange/White,Orange,Green/White,Blue,Blue/White,Green,Coffee/White, Coffee Orange/White,Orange,Green/White,Blue,Blue/White,Green,Coffee/White, Coffee Network cable(Cross-Link) Cross-Link network cable Orange/White,Orange,Green/White,Blue,Blue/White,Green,Coffee/White, Coffee Green/White,Green,Orange/White,Blue,Blue/White,Orange,Coffee/White, Coffee
System 2 : DVR and PC connect to HUB. Network Cable Orange/White,Orange,Green/White,Blue,Blue/White,Green,Coffee/White, Coffee Network Cable HUB Orange/White,Orange,Green/White,Blue,Blue/White,Green,Coffee/White, Coffee Network Cable
PC and DVR connecting, both must be on same network level. DVR, press MENU to Advanced setup pageTCP-IP setup Use DVR TCP-IP factory default or company network IP level. ADVANCED SETUP PAGE 1. ALARM SETUP 2. MOTION SETUP 3. RECORD SETUP 4. TCP-IP SETUP 5. PASSWORD SETUP 6. HDD FORMAT 7. HDD AUTO DETECT 8. FACTORY DEFAULT TCP-IP SETUP PAGE 1. IP ADDRESS 000.000.000.000 2. GATEWAY 000.000.000.000 3. SUBNET MASK 000.000.000.000 4. MAC ADDRESS 000.000.000.000 > TCP-IP SETUP CONNECTION SPEED: LAN / 512K / 64K Press direction buttons up/down/left/right to TCP-IP items position. -IP ADDRESS 192.168.192.250 0080 (Factory Default) -GATEWAY Press values change button to change values.192.168.192.001 (Factory Default) -SUBNET MASK 255.255.255.000 (Factory Default) -MAC ADDRESS XXXXXXXXXXXXX. Machine number, user can not change.
DVR and PC connect, needs to setup same network level..,Go to TCPIP setup..
Click Internet Protocol(TCP/IP) 192.168.192(same as DVR, but last one different.
DOS command : PING To make sure DVR is connecting to Network Request timed out. DVR is not connecting. DVRIP
Remote Viewer Click Setting.
IP Setting • Input DVR IP . • Input Port 80 • Input ID: ADMIN • Input Password: 44444 Save Option: Choose a folder to save image and duration time Duration time is not working on 16 CH DVR, only 4 CH DVR. Click OK back to main remote viewer Second one user, port is 81
When connecting, Fan is keeping running Start to playback Click connect
Full and split channel display Power on/off Start to playback 4 CH DVR has a REC button. 16 CH DVR not support. Choose date Year/month/day Choose time Hour/mins/secs SAVE: JPG picture saved to the folder user set. PRINT: picture print out EVENT: Event list and play 16 CH DVR can not save AVI. file