Download
1 / 102
1.04k likes | 1.2k Vues
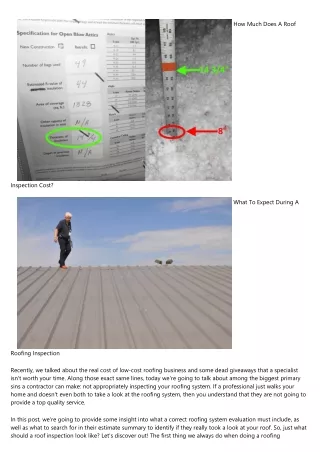
10 Steps to Performing a Roof Inspection. After successful completion of this training, you will be able to verify two things: the installation of the roof covering and underlayment complies with common building standards or the general recommendations of most shingle manufacturers; and

E N D
After successful completion of this training, you will be able to verify two things: the installation of the roof covering and underlayment complies with common building standards or the general recommendations of most shingle manufacturers; and the installation is such that water intrusion will be prevented.
Because more than three-quarters of all homes use asphalt roof shingles, we’ll be focused primarily on that type of roof.
This training refers to some recommended best practices and the International Residential Code. The code is silent on many aspects of roof covering. The manufacturer’s installation instructions (typically found on the packaging of the roof bundles) is the single best source for many of the requirements for the correct protection provided by the roof coverings.
10 Steps to Performing a Roof Inspection Check the roof covering
10 Steps to Performing a Roof Inspection Check the roof covering Check the fasteners
10 Steps to Performing a Roof Inspection Check the roof covering Check the fasteners Check the deck sheathing
10 Steps to Performing a Roof Inspection Check the roof covering Check the fasteners Check the deck sheathing Check the slope and underlayment
10 Steps to Performing a Roof Inspection Check the roof covering Check the fasteners Check the deck sheathing Check the slope and underlayment Check the ice barrier
10 Steps to Performing a Roof Inspection Check the roof covering Check the fasteners Check the deck sheathing Check the slope and underlayment Check the ice barrier Check the drip edge
10 Steps to Performing a Roof Inspection Check the roof covering Check the fasteners Check the deck sheathing Check the slope and underlayment Check the ice barrier Check the drip edge Check for an offset pattern
10 Steps to Performing a Roof Inspection Check the roof covering Check the fasteners Check the deck sheathing Check the slope and underlayment Check the ice barrier Check the drip edge Check for an offset pattern Check the roof valley flashing
10 Steps to Performing a Roof Inspection Check the roof covering Check the fasteners Check the deck sheathing Check the slope and underlayment Check the ice barrier Check the drip edge Check for an offset pattern Check the roof valley flashing Check the nail penetration into the deck sheathing
10 Steps to Performing a Roof Inspection Check the roof covering Check the fasteners Check the deck sheathing Check the slope and underlayment Check the ice barrier Check the drip edge Check for an offset pattern Check the roof valley flashing Check the nail penetration into the deck sheathing Check the flashing areas.
Before we proceed step-by-step, let’s first go over a few basic concepts: shedding water, reinforcement, shapes, top lap, end lap, slope or pitch, self-sealing strips, open valley, and closed valley.
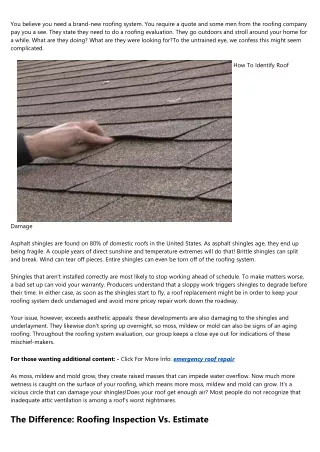
Asphalt shingles are designed to be layered. The layering is designed to SHED water. An asphalt shingle roof is water-resistant – not waterproof. A shingle roof essentially relies on the slope of the roof to SHED the water.
Asphalt shingles are REINFORCED. They are referred to as either “organic-reinforced asphalt shingles” or “glass-fiber-reinforced asphalt shingles.” Most of the shingles you’ll see will be “glass-fiber-reinforced.” The organic ones you may see will probably be old – and they’ll be comparatively really thick.
There are three SHAPES (or types) of asphalt shingles: strip shingles, laminated strip shingles, or individual shingles.
STRIP shingles are generally longer in width than height. Common dimensions are 12 by 36 inches. Shingles called “3-tab” and “laminated” are all categorized as strip shingles. Strip shingles are “self-adhering” – they have adhesive seal strips on them that bond the shingles to the other lapped shingle courses.
LAMINATED STRIP shingles are called “architectural” or “dimensional” shingles. These shingles have additional laminated material to give the shingle a random thickness and a dimensional, architectural appearance. They are also self-adhering.
INDIVIDUAL shingles are smaller than strip shingles. You need more of them to cover the same area. They are typically shaped – including diamond, octagon, scalloped, and fish scale patterns. Some are interlocking. Individual shingles are mostly no longer available.
The term TOP LAP is the lap of the underlayment that runs parallel to the eaves.
The term TOP LAP is the lap of the underlayment that runs parallel to the eaves. The term END LAP is the lap of the underlayment at the end of the roll.
The term SLOPE or PITCH of a roof can be written out as vertical units over horizontal units. The roof’s slope or pitch is described as a ratio of rise to run, or the proportion of vertical height to horizontal length.
A conventional roof can have a slope or pitch of 4:12, which means that when 12 units are measured horizontally, the roof surface rises vertically 4 units.
SELF-SEALING STRIPS refers to the adhesive on a shingle that is placed so that the lapped shingle will adhere to it. The adhesive helps in resisting uplift caused by strong winds. An OPEN VALLEY is one in which the roof covering abuts the valley lining (or flashing), and the lining is exposed (metal flashing is typically used in the valley). A CLOSED VALLEY is one in which the roof covering covers the valley lining (or flashing) and the lining is not exposed.
STEP #1 Determine if the roof covering is designed to provide a weather barrier. The purpose of the roof covering is to protect the structure underneath from water intrusion and water damage. The design of the roof system must take into account the underlayment requirements, the type of roof geometry, the weather conditions based upon location, and the type of roof covering materials.
STEP #1 The International Residential Code states: R903.1 General. Roof decks shall be covered with approved roof coverings secured to the building or structure… Roof assemblies shall be designed and installed in accordance with this code and the approved manufacturer’s installation instructions such that the roof assembly shall serve to protect the building or structure.
STEP #1 If you look to code to provide information about what to inspect at the roof system, you won’t find much detail. When the code says something like “in accordance with the manufacturer’s installation instructions” – that should not be taken lightly. There are many manufacturers of asphalt shingles, and most (if not all of them) have websites with technical installation guidelines available for free downloading.
STEP #1 Building codes don’t address the many details required for a complete and proper installation of the many available roofing products. With only a few exceptions, a second layer of roof covering (or a new roof covering) should NOT be installed without first removing the existing roof covering.
STEP #1 Determine if the roof covering is designed to provide a weather barrier.
STEP #2 Check the fasteners. There is good fastening and bad fastening. During a typical home inspection, checking the fasteners from the roof surface will be almost impossible. However, there are a few things that every inspector should know:
STEP #2 Fasteners for asphalt shingles should be nails – corrosion resistant - galvanized steel, stainless steel, aluminum or copper. The nails MUST be corrosion resistant to keep them from rusting away and leaving holes for water to seep through or wind to blow off shingles because of the lack of attachment.
STEP #2 They should have a minimum nominal shank diameter of 12-gauge (0.015”) with a minimum head diameter of 3/8-inch.
STEP #2 Fasteners should not appear in the 5-inch area of exposure of the shingle. Typical exposure for standard-size strip shingles is 5 inches (125 mm). With the nail head in the field of the exposure area of the shingle, I report it as a “potential water entry point” and recommend “correction and further evaluation.” Nails should never be visibly exposed or weathered.
STEP #3 Determine if the roof is solidly sheathed. This is a little difficult, and can get technical and exhaustive. But for us home inspectors, what we really need to know are two things: the application of the asphalt shingles requires a solid surface, and if the roof is not solidly sheathed, the asphalt shingles will not provide the proper, correct protection from the weather.
STEP #3 The roof covering is only as strong as the substrate to which it is attached. Asphalt shingles are typically applied onto two types of decking materials: wood panels (which can be plywood or oriented strand board or OSB), and wood planks or wood boards.
STEP #3 In each situation (no matter what) the roof needs a nailable substrate that provides adequate support. Now there’s proper thickness, design loads (including wind uplift), span of supporting framing members that are important, but we’re not going to get into those details.
STEP #3 Nearly all sheathing problems are due to improper installation. So, here are six quick inspection tips for checking the roof deck sheathing.
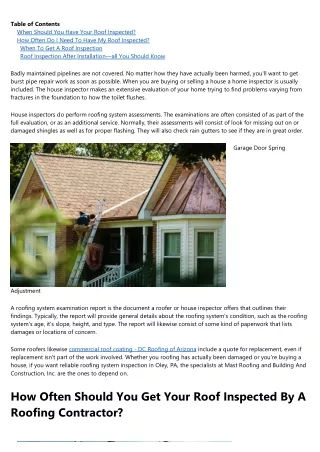
STEP #3 1. Walk the roof surface. Now, you’re not required to walk upon any roof surface according to the InterNACHI Standards of Practice. Personally, I see the benefit of walking on the roof to check the apparent structural integrity of the roof deck sheathing. I have often found major structural defects caused by a latent roof leak by simply walking upon that area and finding it to be soft under my feet.
STEP #3 2. Sheathing should be fastened with a minimum of 8d common nails spaced at most 6 inches on center at supported panel ends and edges. At intermediate support areas, the fasteners should be at 12 inches on center.
STEP #3 3. There should be a 1/8-inch space at the panel ends and edges. A 16d common nail could be used as a gauge.
STEP #3 4. The long dimension should be perpendicular to the supports. Each piece should be continuous over at least two spans. The panel should be at least 24-inches wide.
STEP #3 5. Panel spacer-type edge clips could be installed and recommended by some manufacturers.