Download
1 / 77
770 likes | 883 Vues
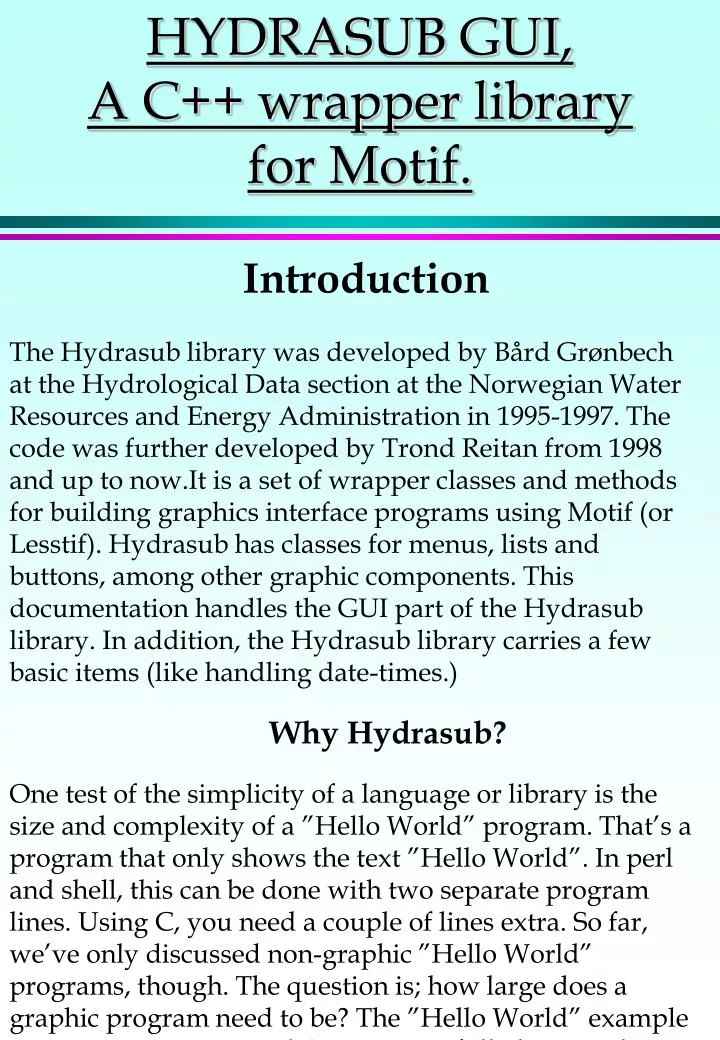
HYDRASUB GUI, A C++ wrapper library for Motif. Introduction

E N D
HYDRASUB GUI,A C++ wrapper library for Motif. Introduction The Hydrasub library was developed by Bård Grønbech at the Hydrological Data section at the Norwegian Water Resources and Energy Administration in 1995-1997. The code was further developed by Trond Reitan from 1998 and up to now.It is a set of wrapper classes and methods for building graphics interface programs using Motif (or Lesstif). Hydrasub has classes for menus, lists and buttons, among other graphic components. This documentation handles the GUI part of the Hydrasub library. In addition, the Hydrasub library carries a few basic items (like handling date-times.) Why Hydrasub? One test of the simplicity of a language or library is the size and complexity of a ”Hello World” program. That’s a program that only shows the text ”Hello World”. In perl and shell, this can be done with two separate program lines. Using C, you need a couple of lines extra. So far, we’ve only discussed non-graphic ”Hello World” programs, though. The question is; how large does a graphic program need to be? The ”Hello World” example program I saw in Visual C++, was awfully large and complex. (Much of the code was automatically inserted,
Hydrasub introduction and was not object oriented at all.) The C interface for X/Motif was a bit simpler, but the programmer still needed to fill a large page of relatively obscure code to get the ”work” done. Java is much better. You need only about ten to fifteen lines, in order to make the ”Hello World” program. Though it’s not intuitive that the program has to look the way it does, the code is relatively readable. The main quibble people have with Java is that it’s slow, has poor string routines and seems to eat more system resources than is needed for the job. Using Hydrasub The great thing about Hydrasub is that it has an interface that looks quite a bit like the way one Java accesses the graphic components (Java 1.0). There aren’t as many different graphic components in this library, but I found most that have needed. As in Java, on first makes container widgets and then builds the other widgets into these ones, by specifying that the containers should be the ’parent’ widgets. As in Java (1.0), one subscribes to user events by (re-)defining how certain methods belonging to a widget should work. These methods are virtual (though they are implemented in the original classes), and have names such as ’pushed’ or ’OneHit’. All virtual methods in this library are ways in which a programmer can access user events belonging to a given class.
The widget class 1 The widget class The widget class is a C++ wrapper for ’Widget’, the Motif structure for general graphic components (’widgets’). All classes (except ’mainwin’) in Hydrasub are subclasses of the widget class. Thus it has no appearance in itself, but defines a set of methods that are common to all it’s subclasses. Here are the most important of these methods; int IsMapped(void) - Returns 1 if the widget is ’mapped’, that is, made visible. void Map(void) - If the widget isn’t visible, this command will make it so. Note; most widgets are made visible when they’re built. The main exception is the ’shell’ class, that represent sub-windows. void Unmap(void) - Removes the widget from the screen. void Width(Dimension width) - Sets the width of the widget. void Height(Dimension height) - Sets the height.. Dimension Width(void) - Returns the width of the widget. Dimension Height(void) - Returns the height.
More about the widget class void Background(char *color) - Sets the background colour of the widget by specifying the widget background colour as a string. (For legal names, see the programcolorview.) void Foreground(char *color) - Sets the foreground colour of the widget. void Beep(int sec) - Does just that... :) int screenwidth(void) - Returns the screen width in the window where the widget is found. int screenheight(void) - Returns the screen height. void Sensitive(void)/InSensitive(void) - Makes the widget sensitive/insensitive to user input. The widget is sensitive as default. Routines used in conjugation with the widget class void AddWorkCursor(widgetw) - Uses a ’clock’ mouse cursor over the given widget (usually a window). (Note; it is still possible to use widgets under the marker, unless you use the InSensitive method. This method only transforms the cursor.) void RmWorkCursor(widgetw) - Reinstalls the normal mouse cursor in the widget and it’s sub-widgets.
The class for the main window - ’mainwin’ 2 The mainwin class The mainwin class represents the main window of an application. It has a constructor that reflects this, by taking the program arguments as input strings. Typically, one object of this class is made in the main-loop of the program, after which the Run method of this class is called. (Often this is all that’s found in the main-loop.) Important methods: mainwin(char *title, int argc, char **argv) - The constructor of mainwin takes the argument count and the arguments from the main loop as input. Usually the contents of the main window is built in the constructor of the main window class, which has to be a subclass of this class. Run(void) - This method ”Runs” the program. What this means is that the program will set up and show all the components and wait for input from the user. void Iconify(void)/DeIconofy(void) - Iconifies (or deiconifies) the main window.
Example using mainwin: Here we’ll show a simple program that uses the mainwin class in order to make a ”Hello World” program. The class label will also be used, in order to make the text that’s to be shown in the main window. (The label class will be explained shortly.) Note that we’ll do it the hard way in this program, by defining a subclass of mainwin and it’s constructor. The constructor then builds it’s sub-widgets. For the purpose of this program, one could make a few shortcuts... motifhello.C: #include "motifhello.H" hello::hello(char *title,int argc,char **argv) : mainwin(title,argc,argv) { hellabel.build(*this,"Hello!"); // builds the label that says ’hello’ } main(int argc,char **argv) { hello h("hello-applic",argc,argv); // Calls the constructor which // sets up the window h.Run(); // Lets the application run }
Example using mainwin (2): motifhello.H: #include <mainwin.H> #include <label.H> class hello : public mainwin { label hellabel; // A label that presents the text in the window public hello(char *,int,char **); // the constructor }; The Result;
The labelwidget: 3 The label class We have already seen a program that uses a subclass of the widget class, namely the label class. This may be the simples of widgets, as it’s sole purpose is to show a text in a window or a ’container’ (more about containers later). The constructor of this class takes no input. However, if it’s to be shown, one needs to use the ’build’ method. The method name ’build’ is used in most of the subclasses of widget, in order to make a widget appear. Different widgets require different input in order to be made, so the input to the ’build’ method may vary from class to class. Normally the parent widget is the first argument in the method. Important methods; void build(Widgetparent, char *title) - Puts the widget inside the parent widget ’parent’ and puts the text ’title’ inside it. void labelString(char *fmt, …) - Changes the text that the widget displays. Takes the same kind of input as the printf routine. Appearance:
The ’row’ widget, anexample of a ’container’ 4 The row class If you need to have more that one widget (usually you do) inside a window, you have to put them inside a ’container’. A container is a widget where you can put several widgets inside it. The container which is (most) used in the Hydrasub library is called ’row’. The row class is virtual and has two subclasses, vrow and hrow. In a vrow widget the sub-widgets are placed vertically down from the top of the widget. In hrow the widgets are places from left to right. Example showing buttons in a hrow: Example showing buttons in a vrow;
More about the ’row’ class As all other widgets, row has a build method that builds the widget. This method and other methods belonging to the class is shown here; void build(Widgetparent) - Builds the container (either as a hrow or as a vrow), where other components can be built inside it. (For instance, a hrow can be placed inside a vrow, or vice versa.) void alignBeginning(void) - This is the default setting of the row widget. The sub-widgets are placed from the upper left-hand corner. void alignCenter(void) -.Starts by putting widgets in the centre of the container. void alignEnd(void) -.Starts by putting widgets in the lower right-hand corner. void spacing(int pixels) - Puts some ’air’ in between widgets placed inside this container. PS:For an example of program code using the row class, se shelluse.C/H and pushbuse.C/H.
Sub-windows, the ’shell’ and ’shelldialog’ classes 5 The shell and shelldialog classes The ’shell’ and ’shelldialog’ classes can be used to make sub-windows of the main window. When making these objects, one usually puts a container inside it and then place the components of the window inside this container. The ’shell’ class has several methods attached to it, among those a ’build’ method. One calls this method by specifying the window where this sub-window will be placed over (normally the main window, mainwin::toplevel). After having made the window, one usually calls the Map method from the widget class, in order to make the window visible. One can also make the window at the start of the program and make it appear by using the Map window whenever the situation calls for this.
More about the ’shell’ and ’shelldialog’ classes In conjugation with sub-window, two button classes has been made, namely closeshelldialog and closeshell. Objects of these classes are connected to a shelldialog or shell window, and when pushed the windows will be unmapped. Methods in shell/shelldialog: void build(Widgetparent, char *title) - Makes a window placed above the parent window and containing the title ’title’. void Iconify(void) - Iconifies the window void DeIconify(void) -De-Iconifies the window. Special for shell: void Noborder(void) - No border around the window.
Making and using sub-windows (shell and shelldialog): Here is a program that shows how to use the shell and closeshell classes. shelluse.C; #include "shelluse.H" shelluse::shelluse(char *title,int argc,char **argv) : mainwin(title,argc, argv) { hellabel.build(*this,”Nothing here..."); // contents of the main window helloshell.build(mainwin::toplevel,"Hello-shell"); // builds the shell shellrow.build(helloshell); // Makes a container shellabel.build(shellrow,"Hello!"); // label, as in 1st ex // pushbutton for closing the shell closeb.build(shellrow,&helloshell,”Close the window"); closeb.Background("red"); // set the background colour closeb.Foreground("white"); // set the foreground colour helloshell.Map(); // show the shell window } main(int argc,char **argv) { shelluse h("hello-applic",argc,argv); // run the constructor h.Run(); // run the ’application’ }
Making and using sub-windows (shell and shelldialog) -2 #include <mainwin.H> #include <label.H> #include <shell.H> #include <row.H> class shelluse : public mainwin { label hellabel; // the label in the main window shell helloshell; // the subwindow vrow shellrow; // container closeshell closeb; // pushbutton for closing // the sub-window label shellabel; // the label of the subwindow public: shelluse(char *,int,char **); // the constructor of // the main window }; shelluse.H; The Result; If one pushes the ’close the window’ button, the window is closed.
closeshell and closeshelldialog 6 The closeshell and closeshelldialog classes The closeshell and closeshelldialog are pushbuttons that closes a sub-window, either of the type shell or the type shelldialog. They are made by calling their ’build’ methods, where one specifies where the button is to be placed, a pointer to the window which is to be unmapped when the button is pushed and the button text. Methods: void build(Widgetparent, shell *pointer, char *title) - Makes a pushbutton with the title ’title’ and the parentwidget ’parent’. The window pointed to by ’pointer’ will be closed when the button is pushed. Se ”shelluse” for an example of how the class is used...
Dialog-windows: The dialog class is a generic class for handling small ”dialog” window. These are used for giving the user small messages in a popup window. The window has a message and a ’close window’ button. By calling the ”ok_or_cancel” method, one can make two buttons appear. These small windows are built (using the ’build’ method) almost like the shell windows, but are not meant to contain any other widgets. They do not require separate mapping, like the shell windows do. 7 Important methods;: void build(Widgetparent, char *title, char *message) - Makes and maps the dialog window with the title ’title’ and the message ’message’. int ok_or_cancel(char *okstr,char *cancelstr) - Activates the second button in the window and waits for the user to push one of them. Returns one if the user pushed the confirming button and zero if the user pushed the denying button.(labelled ’cancelstr’. Appearance The dialog class has a number of sub-classes, that are labelled according to their intended use; MessageDialog, ErrorDialog, InformationDialog, QuestionDialog, WarningDialog and WorkingDialog
Text fields - ’textf’ 8 Text fields are used for fetching user input in the form of a text (string). They are usually editable but need not be. They have a label in front of them and a specified length. The textf class has a few subclasses, representing number fields (onlydigit), DateTime (more about the DateTime class later) fields (onlydatetime) and password fields. The textf class use purely virtual. A real component belonging to textf must either be a vtextf (vertical text field, the label comes over the field itself) or htextf, horizontal text field. The onlydigit and onlydatetime classes have similar subclasses. Some of the methods; void build(Widgetparent, char *title) - Makes a text field in the component ’parent’ with the label ’title’. void build(Widgetparent, int len, char *title) - As above, but enables the programmer to specify the field length. void Editable(Boolean b) - Sets whether the field should be editable or not. void SetText(char *text) - Sets the contents of the field char *operator()() - Fetches the contents of the field.. Use: field.build(parent,”title”); char *contents=field(); void Clear (void) - Clears the field.
The appearance of the text field - textf Example of a horizontal text field htextf: textfuse.C: #include "textfuse.H" textfuse::textfuse(char *title,int argc,char **argv) : mainwin(title,argc,argv) { inputf.build(*this,10,”Write something here:"); } main(int argc,char **argv) { textfuse t("hello-applic",argc,argv); t.Run(); } textfuse.H: #include <mainwin.H> #include <textf.H> class textfuse : public mainwin { htextf inputf; public: textfuse(char *,int,char **); }; For a more interesting example, see pushbuse.C/H.
Larger text fields -the ’text’ class 9 It is also possible to have text fields that stretches over more than one line. To make such a widget, one can use the ’text’ class. The ’build’ method of this widget tells how large the field should be. Except for that, it is used much like the textf class. Methods: void build(Widgetparent, int col, int row, Boolean edit) - Makes a text field with ’col’ columns and ’row’ rows in the parent component ’parent’. One can set whether the field should be editable or not, by using the ’edit’ variable. (Default; edit=True). text &operator+=(char *) - This operator appends a given string to the text field. Example; text_object += ”This is an example”; void Prepend(char *str) - Puts the string ’str’ in front of the contents of the text field. void SetText(char *str) - Sets the contents of the field. char *GetText(void) - Fetches the contents of the field. void Clear(void) - Clears the field. Appearance: For use, see the example belonging to the ’filesel’ class.
Buttons -’pushb’ 10 Push-buttons are used for letting the user tell that an action is to take place. The ’pushb’ class has a ’build’ method that sets the label of the string. When the user pushes a button, the ’pushed’ method for that pushb object is called One can subscribe to button events by redefining the contents of the ’pushed’ method. This can be done by making a subclass of pushb where the ’pushed’ method is redefined. Usually, the a button object can’t do much on it’s own, and needs to tell the parent class (representing, for instance the window that uses the button) that the button has been pushed. This is often done by storing a pointer back to this larger class, when making the button. It is often smart to store the button type, too, so that one doesn’t need to define one subclass of pushb for each button one plans to use in the program. Important methods; void build(Widgetparent, char *text) - Makes a push button in the component ’parent’ and with the text ’text’ written on the button. virtual void pushed(void) - This method is call each time the button is pushed by the user.
Appearance of ’pushb’ objects This is the appearance of the ”pushbuse” program, that will be listed in the next pages. #include "pushbuse.H" // CREATE -Should build a push button and store the necessary info // on the button type and the parent object pointer. void pushbuse_pushb::Create(widget parent, char *name, pushbuse *ipt, BUTTON_TYPE type) { typ=type; // stores the button type (OK or EXIT) pt=ipt; // stores a pointer back to the main object build(parent,name); // builds the button } // PUSHED - Called when the button is pushed. Notifies the main object // sending along the button type. void pushbuse_pushb::pushed(void) { pt->buttonpushed(typ); // Tells the main object that the button has // been pushed } pushbuse.C:
A program example that uses the pushb class; // EXITQUEST - The ’quit’ button has been pushed... void pushbuse::exitquest(void) { // Make a dialog window that asks the user if he/she really wants to quit quest.build(mainwin::toplevel,”Question:", ”Do you really want to quit?"); // wait for an answer... if(quest.ok_or_cancel(”Yes","No")) exit(0); // A confirming answer means that we’ll quit } // SENDTEXT - The button labelled ’fetch text’ has been pushed. Send the // text from the text field to a message dialog window. void pushbuse::sendtext(void) { char str[200]; // We’ll store the message string here sprintf(str,”Inside the text field is the following text found:\n\"%s\"",inputf()); // 'input()' fetches the text from the text field ”input” // Build the dialog window; mess.build(mainwin::toplevel,"Message:",str); } // BUTTONPUSHED - A button has been pushed. Take action // according to the button type; void pushbuse::buttonpushed(BUTTON_TYPE type) { switch(type) // Take action according to the button type.... { case PUSHB_OK: // ’fetch text' has been pushed sendtext(); // starts the 'sendtext’ method break; case PUSHB_EXIT: // ’quit’ has been pushed exitquest(); // start ’the exitquest’ method break; } } pushbuse.C: Continued on the next page;
Program example for the pushb class, continued; pushbuse.C: // CONSTRUCTOR - Makes the main window pushbuse::pushbuse(char *title,int argc,char **argv) : mainwin(title,argc,argv) { v1.build(*this); // Make the main container inputf.build(v1,10,”Write something here:"); // Make the input text field h1.build(v1); // Make a horizontal container exitb.Create(h1,”Quit",this,PUSHB_EXIT); // Makes the ’quit’ button exitb.Background("red"); // Set the background colour red exitb.Foreground("white"); // ... and the foreground white okb.Create(h1,”Fetch text",this,PUSHB_OK); // Makes the ’fetch text’ button okb.Background("green"); // Green background okb.Foreground("black"); // Black foreground } // MAIN - the main loop main(int argc,char **argv) { pushbuse pu("pushb-applic",argc,argv); // makes the main window pu.Run(); // runs the application }
Program example for the pushb class, continued; #include <mainwin.H> #include <textf.H> #include <dialog.H> #include <pushb.H> #include <row.H> #include <stdlib.h> #include <unistd.h> class pushbuse; // tell that the main class exists enum BUTTON_TYPE {PUSHB_OK, PUSHB_EXIT}; // button types // PUSHBUSE_PUSHB - A subclass of 'pushb' that ’talks to’ the main object when // the button is pushed; class pushbuse_pushb : public pushb { private: BUTTON_TYPE typ; // Storage room for the button type pushbuse *pt; // Stores a pointer back to the main object public: // Method for making the button; void Create(widget parent, char *name, pushbuse *ipt, BUTTON_TYPE TYPE); // Method for catching button events; void pushed(void); }; class pushbuse : public mainwin { // 'pushbuse_pushb' Should be able to access restricted methods; friend class pushbuse_pushb; private: vrow v1; // the main container hrow h1; // horizontal container htextf inputf; // input text field pushbuse_pushb okb,exitb; // push buttons MessageDialog mess; // dialog window nr. 1 QuestionDialog quest; // dialog window nr. 2 void exitquest(void); // Called when the ’exit’ button is pushed void sendtext(void); // Called when the ’fetch text’ button is pushed protected: void buttonpushed(BUTTON_TYPE type); // Calls the right method when a button has been pushed public: // the constructor, makes the main window pushbuse(char *,int,char **); }; pushbuse.H
Menus - ’Menu’ Menus are usually used in the main window, where the user often is presented with a lot of choices and possible actions. The choices are grouped along a line at the top of the window. 11 Appearance: Each section in the menu has a number of choices, represented by text. In addition, one can put toggle-buttons and separators in the separate pushdown menus. Ordinary sections are grouped from left to right, but the ”help”-section is usually placed at the rightmost corner. Methods; void build(Widgetparent, …) - Builds the component. The ’parent’widget of the menu is usually the main container of the window, and the menu is the first item in this container. The arguments following ’parent’ is a number of strings that tells the ’build’ method what to insert into the menu. This collection of strings are terminated with a zero-pointer( see the example). If the string starts with ”STM:”, this tells the build method that a new group is to be inserted. If the string is ”SEP”, a separator is inserted. If it starts with ”T:”, a toggle-button is inserted and if the string starts with ”HLP:”, a help group is inserted. All other strings are considered normal items in a pushdown menu.
More about menus-methods and program example virtual void pushed(char *str) - A virtual method that is called when the user pushes a menu item. The method that calls pushed, sends along the string the user chose. Here comes a program example using the Menu class. It’s simply called ”menuse(,C/H). menuse.H; #include <mainwin.H> #include <dialog.H> #include <menu.H> #include <row.H> #include <label.H> #include <stdlib.h> #include <unistd.h> #include <string.h> class menuse; // Tells about the existence of the main class // implement a Menu class with a defined ’pushed’ method; class menuse_menu : public Menu { private: menuse *pt; // pointer back to the main object public: void Create(widget parent, menuse *ipt); // creates the menu void pushed(char *menustr); // notifies the main object about menu events };
Program example -menuse.H class menuse : public mainwin { // 'menuse_menu' should be able to access restricted methods... friend class menuse_menu; private: vrow v1; // the main container label lab1; menuse_menu menu; // the menu itself MessageDialog mess; // dialog window void setcolor(char *color); // sets the colour void sendtext(char *messtext); // takes care of the ’fetch text ’event protected: void menupushed(char *menustr); // called when the user uses the menu // Called by menuse_menu... public: // Constructor. Makes the main window menuse(char *,int,char **); }; We’ve now made a Menu subclass with a defined pushed method and a pointer back to the main window object. The menu can thus tell the main window, when then user pushes a menu item.
Program example -menuse.C #include "menuse.H" // CREATE - Should build the menu and store a pointer back to the main object void menuse_menu::Create(widget parent, menuse *ipt) { pt=ipt; // store the pointer back to the main object // build the menu; build(parent, "STM:File", // a new section in the menu, labelled ’File’ "\”Fetch file\"","\”Write to file\"", // normal menu elements "T:On/off", // element with a checkbox. "SEP", // separator ”Exit", // new, ordinary element "STM:Colours", // a new section in the menu "blue","green",”yellow", // elements under ’colour’ "HLP:Help", // Help-menu section, will be shown to the right ”About menuse", // elements in the help section... NULL); // terminate with NULL, in order to tell that // there’s no more items in the menu } // PUSHED - The menu has been used. Tell the main object void menuse_menu::pushed(char *str) { pt->menupushed(str); // tell which menu item that’s been pushed. }
Program example -menuse.C (2) // A menu item has been pushed. Find out which, and take action accordingly. void menuse::menupushed(char *str) { static Boolean onoff=False; // permanent storage of the on/off status // Compare the incoming string with strings we know are in the menu; if(!strcmp(str,"\”Fetch file\"")) // tell which menu item has been pushed sendtext("\”Fetch file\" has been chosen!"); else if(!strcmp(str,"\”Write to file\"")) // tell which menu item has been pushed sendtext("\”Write to file\" has been chosen!"); else if(!strcmp(str,”On/Off")) { // tell about the ”on/off” status onoff=!onoff; if(onoff) sendtext("\”On\" is chosen!"); else sendtext("\”Off\" is chosen!"); } else if(!strcmp(str,"blue")) setcolor("blue"); else if(!strcmp(str,"green")) setcolor("green"); else if(!strcmp(str,”yellow")) setcolor("yellow"); else if(!strcmp(str,”About menuse")) sendtext(”This is a program for showing how the Menu class works"); else // If nothing else has been chosen, we’ll assume that ”Exit” has been pushed exit(0); }
Program example -menuse.C (3) // SETCOLOR - Changes the colour of the main window void menuse::setcolor(char *color) { v1.Background(color); menu.Background(color); lab1.Background(color); } // SENDTEXT - Show a text in a dialog window. Used by menupushed to tell // which menu item has been chosen. void menuse::sendtext(char *textmess) { mess.build(mainwin::toplevel,"Message:",textmess); } // CONSTRUCTOR -Make the main window menuse::menuse(char *title,int argc,char **argv) : mainwin(title,argc,argv) { v1.build(*this); // make the main container menu.Create(v1,this); // make the menu // Build a label that represent the contents of a main window lab1.build(v1,"Menu test "); } // MAIN - function main(int argc,char **argv) { menuse mu("menu-applic",argc,argv); // make the main window mu.Run(); // run the application }
Appearance and program flow - ”menuse”; This is the appearance of the previously listed program example. The main window shows a Menu and a label. Shows a text message or Terminates the program Changes the colour of the main window
Single menu rows - ’SelOptMenu’ 12 Sometimes one wants the menus other places than at the top of a window. If one has several choices that are connected to other components in the vicinity, it’s nice to present those choices at that place. This menu is created using the SelOptMenu class, which makes the underlying widgets and handles user input.
More about ’SelOptMenu’ Methods in SelOptMenu: void Create(Widgetparent, char *title) - builds this component in the parent widget’parent’, and gives it the title ’title’. The title is presented right before the menu itself.. void Insert(char **list, int ilen, int focus) - Puts in the elements given in the string array ’list’, which should have length ’ilen’. Can set the focus to the given element, if that is wanted. void SetFocus(int focus) - Sets the focus to the given element number, ’focus’. char *CurrStr(void) - Returns the focused element as a string. int GetNumber(void) - Returns the number of the element that has the focus right now. virtual void Pushed(char *item) - A virtual method that is called each time the user uses the menu. Sends the newly focused element along as a string.
Checkboxes-’toggle’ There is often a need to enable the user to take an ”all-or-nothing” type of choice. The widget way of doing this is by making a ’checkbox’ or ’toggle button’. This is implemented in Hydrasub by the toggle class. Here’s an example of how the widget looks like; 13 Outlook: or ’OFF’ ’ON’ Methods: void build(Widgetparent, char *text) - Builds a widget in the parent widget named ’parent’, with the label ’text’. virtual void pushed(Boolean on) - A virtual method that is started when the user pushes the toggle button. The method sends along the state of the checkbox (on=True or off=False). void ToggleButtonOn(void) - Switches on the checkbox. void ToggleButtonOff(void) - Switches off the checkbox Boolean operator()() - Returns the state of the checkbox. void SetLabel(char *str) - Changes the label of the checkbox.
Sets of toggle buttons - ’SelToggle’ A choice can often be between just a few options. One can use a menu for enabling the user to make such a choice, but a collection of checkboxes can illustrate the choice better. A set of checkboxes in a so-called ’radiobox’ will at maximum only have one box checked. This is implemented in the component called ’SelToggle’. 14 The example is fetched from the program ’toguse’. Outlook; Methods: void hbuild(Widgetparent, char **items, int len, int focus=0) - This method will build the widget, making a horizontal row of checkboxes with the given label(items)and the given number of checkboxes (len). The focus is given to the checkbox a position ’focus’. If this variable is set to zero, then no checkbox will initially be activated. void vbuild(Widgetparent, char **items, int len, int focus=0) - Works like the hbuild method, but places the checkboxes in a vertical column. int operator()() - Returns the position of the focused checkbox. void SetFocus(char *newfocus) - Activates the checkbox at the given position, giving the component a new focus. virtual void pushed(char *item) - This virtual method is called each time the user activates a checkbox. The label of the checkbox is sent along.
An example using ’SelOptMenu’, ’toggle’ and ’SelToggle’ We’ll now make a program that uses a toggle button, a set of toggle buttons and a menu. While the single toggle button is activated, the contents of the menu and the toggle button set should be mirrored. toguse.H: #include <mainwin.H> #include <menu.H> #include <row.H> #include <label.H> #include <toggle.H> #include <stdlib.h> #include <unistd.h> #include <string.h> class toguse; // tells that the main class exists // TOGUSE_MENU // This is a subclass of SelOptmenu (pushdown menu) // that subscribes to user input by implementing the // 'pushed' method. Notifies the main object when // that method is called. class toguse_menu : public SelOptmenu { private: toguse *pt; // A pointer back to the main object public: // Creates the menu, storing a pointer back to the main object void create(widget parent, char *title, char **items, int length, int focus, toguse *ipt); // Called when an item is chosen by the user. Notifies the parent void pushed(char *menustr); }; // TOGUSE_SELTOG // This is a subclass of the SelToggle class (toggle button rows). // The 'pushed' method is implemented in order to handle // button events (notifies the main object). class toguse_seltog : public SelToggle { private: toguse *pt; // A pointer back to the main object public: // Creates the toggle button row, string a pointer back to parent void Create(widget parent, char **items, int len, int focus, toguse *ipt); // Called when th user pushes a toggle button. Notifies parent void pushed(char *togstr); }; // TOGUSE // This is the main window class and handles the int- // eraction between the menu and the toggle buttons class toguse : public mainwin { // 'toguse_menu' and 'toguse_seltog' should be able // to access internal methods; friend class toguse_menu; friend class toguse_seltog; private: vrow v1; // the main container hrow h1; // container for the checkbox // component's label label lab1; // a label for explaining stuff toguse_menu menu; // menu component toguse_seltog seltog; // checkbox component toggle connectiontog; // single toggle button for // coupling/decoupling the menu and the checkbox // row char **choices; // Stores the strings holding the name of the choices int choicelen; // The number of choices protected: // Called when the user pushes a menu item void menupushed(char *menustr); // Called when the user pushes a toggle button // in the checkbox row; void togpushed(char *togstr); public: // Constructor // Makes the main window toguse(char *,int,char **); };
The program example ’toguse’ continues(2): // TOGUSE // This is the main window class and handles the interaction // between the menu and the toggle button row class toguse : public mainwin { // 'toguse_menu' and 'toguse_seltog' should be able to // access internal methods; friend class toguse_menu; friend class toguse_seltog; private: vrow v1; // the main container hrow h1; // container for the checkbox component's label label lab1; // a label for explaining stuff toguse_menu menu; // menu component toguse_seltog seltog; // checkbox (toggle) component toggle connectiontog; // single toggle button for // coupling/decoupling the menu and the checkbox row char **choices; // Stores the strings holding the name of the choices int choicelen; // The number of choices protected: // Called when the user pushes a menu item void menupushed(char *menustr); // Called when the user pushes a toggle button in the checkbox row; void togpushed(char *togstr); public: // Constructor // Makes the main window toguse(char *,int,char **); }; toguse.C:
The program example ’toguse’ continues(3): toguse.C: // CONSTRUCTOR // Makes the main window toguse::toguse(char *title,int argc,char **argv) : mainwin(title,argc,argv) { // Possible choices char *choicesbuff[]={"Choice number 1", "Choice number 2", "Choice number 3", "Choice number 4","Exit"}; choicelen=4; // the number of choices // Make a char** holding the list of choice strings choices=new char*[choicelen+1]; for(int i=0;i<choicelen+1;i++) { choices[i]=new char[100]; strcpy(choices[i],choicesbuff[i]); } v1.build(*this); // make the main container // Make the coupling/decoupling toggle button connectiontog.build(v1, "Couple the menu and the checkbox row:"); connectiontog.ToggleButtonOn(); // build the menu: menu.create(v1,"Choice, using a menu:", choices, choicelen+1, 1, this); // build the checkbox row; h1.build(v1); lab1.build(h1,"Choices, using the checkbox row:"); seltog.Create(h1, choices, choicelen, 1, this); } // MAIN main(int argc,char **argv) { toguse tu("toggle-applic",argc,argv); // build the main window tu.Run(); // run the application } // TOGUSE // This is the main window class and handles the int- // eraction between the menu and the toggle buttons class toguse : public mainwin { // 'toguse_menu' and 'toguse_seltog' should be able to // access internal methods; friend class toguse_menu; friend class toguse_seltog; private: vrow v1; // the main container hrow h1; // container for the checkbox // component's label label lab1; // a label for explaining stuff toguse_menu menu; // menu component toguse_seltog seltog; // checkbox (toggle) component toggle connectiontog; // single toggle button for // (de-)coupling the menu and the checkbox row char **choices; // Stores the strings holding // the name of the choices int choicelen; // The number of choices protected: // Called when the user pushes a menu item void menupushed(char *menustr); // Called when the user pushes a toggle button in // the checkbox row; void togpushed(char *togstr); public: // Constructor // Makes the main window toguse(char *,int,char **); };
The appearance and use of the ‘toguse’ program The result will be ha handsome little “application”. One can set the option menu and thus change the state of the checkbox array, or select a checkbox an change the state of the menu. If the topmost toggle button is switched off, the connection between the SelOptMenu component and the SelToggle component is broken.
Two-colored pictures -’pixelmap’ Two-colored pictures can easily be inserted as a widget in Motif. Using the Hydrasub library, one can import a so-called xbm-picture with the command build in the ’pixelmap’ class. The example uses the ’nve_hest’ and ’nve_small’ sub-class, that presents a picture of the NVE-horse. (The library was developed at the Norwegian organisation NVE). Pictures of the xbm kind can be loaded and saved using xv or another pictures presentation program. 15 Outlook: Methods in ’pixelmap’: void build(Widgetparent, char *filename) - Makes a black-and- white picture, loading the X11-bitmap file ’filename’. void build(Widgetparent, char *filename, char*fground_color, char *bground_color) - Makes a pictures with a specified background and foreground color. Methods in ’nve_hest’ and ’nve_small’: void build(Widget parent) - Makes the NVE-horse in normal and small format.
The program component, ’header’ and ’header_lite’: The component ’header’ and the smaller ’header_lite’ is made as a standard way of presenting a program. They’re small layout ‘tricks’ made in order to give a uniform “look and feel” at the top of a set of programs. The standard is showing the NVE-horse in the right-hand corner though the pixmap can be substituted. The ’header’ uses the pixelmap sub-class ’nve_hest’, in order to show the NVEW-horse. Similarly, ’header_lite’ uses the ’nve_small’ class. 16 Outlook; Method: void build(Widgetparent, char *title, int*spaces) - Builds a header component with the label ’title’ (in the example above; ”SerEdit 2.1”) and a small NVE-horse placed in the right-hand corner, with a label with ’spaces’ as the number of spaces in between the title and the pixmap.
The component for file selection - ’filesel’ 17 One often want’s to enable the user to choose a file to save to or load from. There’s a standard component for such a procedure in Motif, and the ’filesel’ class is a C++ interface for this component. Outlook: Methods: void build(Widget parent, char *dir=”.”) - Makes the component and starts the file-listing in the given directory, ’dir’. virtual void ok(char *filename) - This virtual method is called when the user pushes the ‘OK’ button. It sends along the filename that the user has chosen. virtual void cancel(void) - This virtual method is called when the user pushes the ‘cancel’ button.
An example that uses the ‘text’ and ‘filesel’ class - filetext We’ll now examine a small program that fetches a file, shows the contents of the file on the screen, enables the user to change the contents and save it to the same file. This is in fact a small text editor! // This is a push-button class that notifies the main object, // when it's pushed; class filetext_savebutton : public pushb { filetext *pt; // points back to the main window object; public: // creates the button, storing the main window pointer // and the button type; void Create(widget parent,char *text, filetext *ipt); // called when the user pushes the button; void pushed(void); }; // The main window class; class filetext : public mainwin { friend class filetext_savebutton; friend class filetext_filesel; private: hrow h1; // the main container vrow v1,v2; // containers shell fileshell; // separate window text filelist; // text field for file listings closeshell closeb; // close-button for the sep. window filetext_savebutton savebutton; // saving-button header_lite hd; // header graphics filetext_filesel fsel; // file selection component ErrorDialog err; // error dialog window char current_filename[200]; // should store the currently // chosen file name protected: // called when the user pushes the 'saving' button void savebuttonpushed(void); // called when the user pushes the 'ok' button in the file // selection component; void filechosen(char *filename); public: // constructor: filetext(char *,int,char **); }; filetext.H: // This program should allow the use to choose // a file using the file selection component in the // main window. Then the user pushes the 'OK' button, // a new window should appear, showing the contents // of the file in a text widget. The contents can be // changed in this widget and saved using the 'save' // button. (Thus the program can act as a primitive // text file editor.) If the user pushes the 'cancel' // button in the main window, the program is // terminated. //#include <mainwin.H> #include <header.H> #include <row.H> #include <filesel.H> #include <shell.H> #include <text.H> #include <dialog.H> #include <pushb.H> class filetext; // The class for the file selection component. // The methods for handling user events are defined here; class filetext_filesel : public filesel { private: // points back to the main window object; filetext *pt; public: // creates the component, storing a pointer back to // the main object void Create(widget parent,filetext *ipt); void ok(char *filename); // handles that the user pushes the 'ok' button void cancel(void); // handles that the user pushes the 'cancel' button };
An example that uses the ‘text’ and ‘filesel’ class - filetext (2) filetext.C: #include "filetext.H" #include <fstream.h> #include <iostream.h> #include <stdlib.h> #include <unistd.h> // CREATE - Makes a file selection component // Stores a pointer back to the main window object void filetext_filesel::Create(widget parent, filetext *ipt) { pt=ipt; build(parent); } // OK - The user has pushed the 'OK' button. // Tells the main window object about this... void filetext_filesel::ok(char *filename) { pt->filechosen(filename); } // CANCEL - The user has pushed the 'cancel' button. // Exits the application void filetext_filesel::cancel(void) { exit(0); } // CREATE - Creates a push-button and stores a // pointer back to the main // window object and the button type void filetext_savebutton::Create(widget parent, char *text, filetext *ipt) { pt=ipt; build(parent,text); Background("green"); Foreground("black"); } // PUSHED - tells the main window // object when the button is pushed void filetext_savebutton::pushed(void) { pt->savebuttonpushed(); } // Stores the contents of the text field // in the given file void filetext::savebuttonpushed(void) { ofstream out; // checks if a file has been selected.... if(!current_filename) { // if not, notify the user; err.build(mainwin::toplevel,"Error", "No file selected!!"); return; } // opens the file for writing; out.open(current_filename,ios::trunc); // writes to the file; out << filelist.GetText(); // closes the file; out.close(); }
An example that uses the ‘text’ and ‘filesel’ class - filetext (3) // FILECHOSEN - Sends the contents of a given // file to the graphic text field void filetext::filechosen(char *filename) { ifstream in; char line[1000]; // clear old contents of the text field t filelist.Clear(); //open the file for reading; in.open(filename,ios::in); // traverse the file; in.getline(line,999); do { // send a line to the text field component filelist += line; filelist += "\n"; in.getline(line,999); } while(!in.eof()); // fetch the next line in the file in.close(); // show the window with the text field; fileshell.Map(); // store the chosen file name strcpy(current_filename,filename); } filetext.C: // FILECHOSEN - Sends the contents of a // given file to the graphic text field void filetext::filechosen(char *filename) { ifstream in; char line[1000]; // clear old contents of the text field t filelist.Clear(); //open the file for reading; in.open(filename,ios::in); // traverse the file; in.getline(line,999); do { // send a line to the text field component filelist += line; filelist += "\n"; in.getline(line,999); } while(!in.eof()); // fetch the next line // in the file in.close(); // show the window with the text field; fileshell.Map(); // store the chosen file name strcpy(current_filename,filename); }
The outlook of the’filetext’ program: Header This is a filter that determines which files that are to be shown in the list to the right. List of file directories Quits the program The ’OK’ button of the file selection component. In this program, pushing this button will fetch the contents of the file and show it in a separate window. Saves the contents of the text widget to the chosen file. Closes the window without saving the contents.
Separations lines -’sep’, ’hsep’ and ’vsep’: 18 The ’sep’ class is a layout element that is used to put a separation line in a window. To be used, an object must belong two one of it’s two sub-classes,’hsep’ (horizontal separator) or ’vsep’ (vertical separator). One can use the standard type or choose from a set of defined separator types defined in separator.H. Example of the outlook of the sep class: Methods: void build(Widgetparent) - Builds a standard separator. void build(Widgetparent, SEPTYPE type) - Builds a separator of the given ’type’. (See separator.H.) The program listuse, is an example program that uses the sep class, see later in the text.
Marking a separate area in a window - ’frame’: 19 In order to improve the layout of a window, one might wish to mark a certain area of it. This can be done with the “frame” widget. One can think of ’frame’ as a container that only allows one sub-widget (but this can be another container.) An example showing the outlook of the frame widget. Methods: void build(Widgetparent) - makes a ’frame’ around whatever is placed inside this widget. For an example that uses this class, see listuse.C/H.
Text lists, the ’list’ class There’s often a need to present the user of a choice between a great but finite number of possibilities where each possibility is presented as a text. In order to enable the user to make such a choice, the ‘list’ widget was made. It looks a lot like the ‘text’ widget, but each line is selectable. This means that the user can choose a line of text and the program will ‘know’ which line and which text was chosen. This can be done immediately after the user has chosen a line or when the program finds it convenient to retrieve that information. 20 An example of the outlook of this widget; Methods: void build(Widgetparent, int rows, int hor_scroll_bar=0) - Builds a list with ’rows’ number of visible rows. One can use the toggle variable ’hor_scroll_bar’ for letting the widget use a horizontal scrollbar when that is convenient. The default is for this not to happen. virtual void OneHit(int pos, char *contents) - This virtual method is called whenever the user chooses a line in the widget. The chosen text string and text line is sent along. list operator+=(char *) - Inserts a new line into the widget.. void Insert(char *elementstr) - Also inserts a new element.
Text lists, the ’list’ class (2) void Inserts(char **elements, int len) - Inserts a string array of elements of length ’len’. void Delete(int pos) - Removes the element at the given position, ’pos’. void Clear(void) -Removes all elements in the list. void ClearSelected(void) - Removes the elements that the user has marked. void MarkAll(Boolean policy=False) - Marks all elements. void Mark(int pos) - Marks the element at position ’pos. void RemoveMark(int pos) - Removes the marking at the position ’pos’. int Selected(void) - Returns the position of the first marked element. int Selected(int **poslist) - Returns the number of selected elements and the position of each of them in the ‘poslist’ array. int ExistsInList(char *element) -Checks if the text string ’element’ exists in the list.